.png?width=140&height=37&name=BLAZE-Logo-Blue%20(2).png)
While a single dashboard with multiple locations is recommended, there are situations where multiple dashboards are the only option. For example, if you have multiple locations spanning across different regulatory regions. In this article, you will learn how to complete product transfers when your company operates with multiple dashboards.
Setting Up Multi-Dashboard Transfers
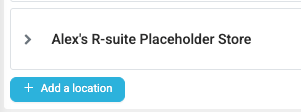
In order to enable transfers between dashboards, the user must create "placeholder" locations within each unique dashboards. Each dashboard will have "active locations" (locations that are selling products) and "Placeholder" locations used only to complete product transfers. You will transfer your products to the corresponding location using the "placeholder" in each dashboard.
To create a placeholder location:
- Navigate to Settings> Location
- HIt the blue " + Add a Location" button
- Create a name for your placeholder location e.g "Store name 1 Placeholder" or "Store name 1 Transfer Location"
Transferring Products Out of your Source Location
-
Log in to the dashboard from which you are transferring products out.
-
Navigate to Inventory > Transfers.
-
Click the blue "Add a transfer" button in the top right corner of your screen.

-
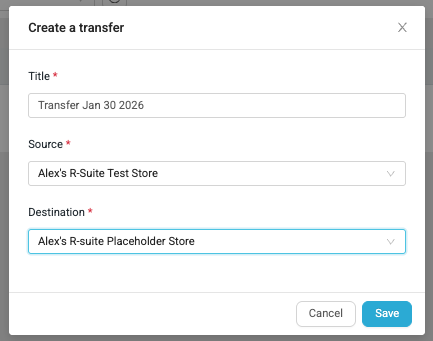
Make sure that the location you are transferring products from is selected as "source" and ensure that the placeholder location for where you are transferring products to is selected as "destination."
-
Add the products you would like to transfer. You can manually add products using the "add products" drop-down menu or by using the import feature in the top right of your screen. To use the import feature, you will need to import a .CSV file with the product SKU and quantity you are transferring.
-
Double-check your work to make sure you are transferring the correct amounts with the correct associated wholesale costs.
-
Once all fields are confirmed, change the "status" bar to "completed." This will transfer the inventory from your source location to the placeholder location.
-
Click the blue "Save" button in the top right corner of your screen. This will complete the transfer
-
Once the transfer is saved, a new button will populate in the top right-hand corner that allows you to export this transfer. Click that button and download the transfer file.

You have successfully transferred the products out of your source location. The next step is to transfer the products to the destination location.
Transferring Products Into Your Destination Location
-
Open the export file that you downloaded from the original product transfer. Remove all of the columns except for "SKU" and "quantity." Save the file in the .CSV format (the file will be in the .CSV format when you download it).
-
Log in to the dashboard of the destination location.
-
Go to Inventory > Transfers.
-
Click the blue "Add a transfer" button in the top right corner of your screen.
-
Make sure that you have selected the placeholder location you are transferring the products from as the "source" and ensure you select the destination location that you are transferring the products to as the "destination."
-
Add the products you would like to transfer. You can do this by using the exported .CSV file from the original transfer. Click the "Import" button in the top right corner of your screen and add the file

-
Double-check to ensure that the quantities and total dollar value match the same amounts as the original transfer. If they do not, double-check each line item for discrepancies before submitting.
-
Once everything is correct, change the status to "completed." This will move the inventory into your destination location.
-
Click the blue "Save" button in the top right corner of your screen. This will complete the transaction.
Note: You will want to make sure that you are documenting the transfer ID from the original transfer as well as the date that it took place to make the transfer more traceable. You can add this to the "notes" section.,
The inter-dashboard product transfer is now complete.