.png?width=140&height=37&name=BLAZE-Logo-Blue%20(2).png)
The inventory overview section displays all your inventory levels by product and location. This article will explain how to view, add, remove, and reset your inventory. It will also discuss stock settings for inventory levels.
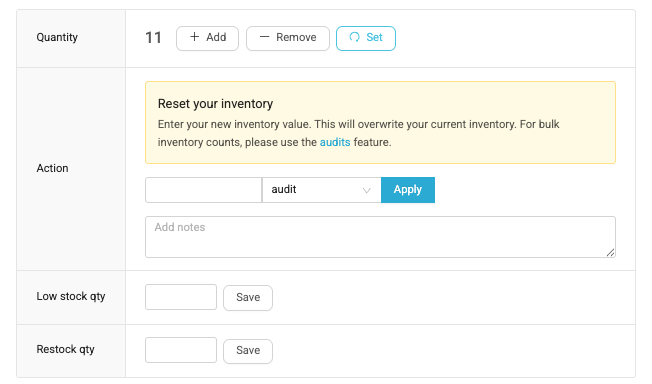
In the Inventory > Overview section you can click on the product's inventory quantity within the product row and it will expand more information. You will be able to view the product’s inventory logs and adjust the inventory levels.
The inventory change options include: add, remove, set, low stock, and restock quantity options; and an inventory log of all the inventory movements for this inventory item. 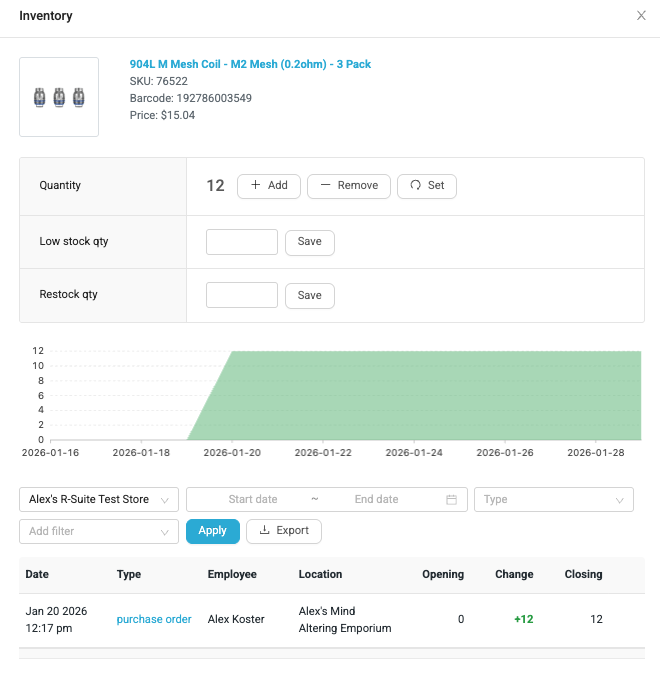
Altering inventory level options
Customers can make inventory changes that include the following: add, remove or reset.
-
Click on the product quantity (select a specific location if applicable)
-
Click on the “Add, Remove or Set” button and enter the product quantity change.
-
Select the correct reason for the change in quantity.
-
Click on "Apply" to complete the change.
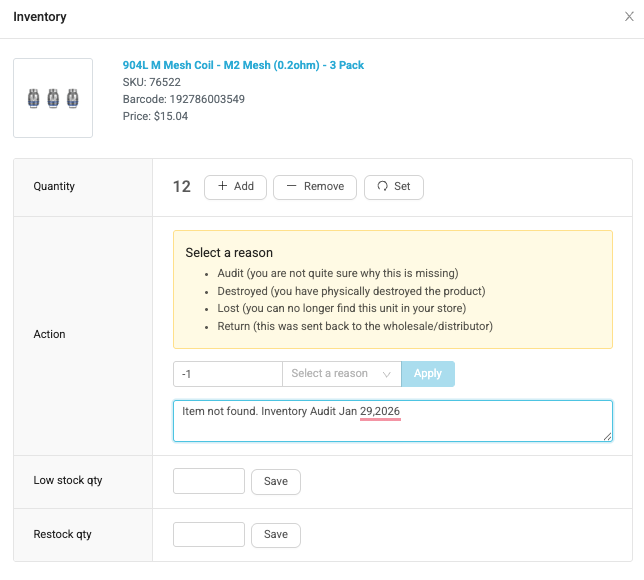
If you leave a note explaining the inventory changes, you will be able to see the inventory log reflected below capturing the change. When you hover over the little circle, the entered note will appear.
Adding inventory
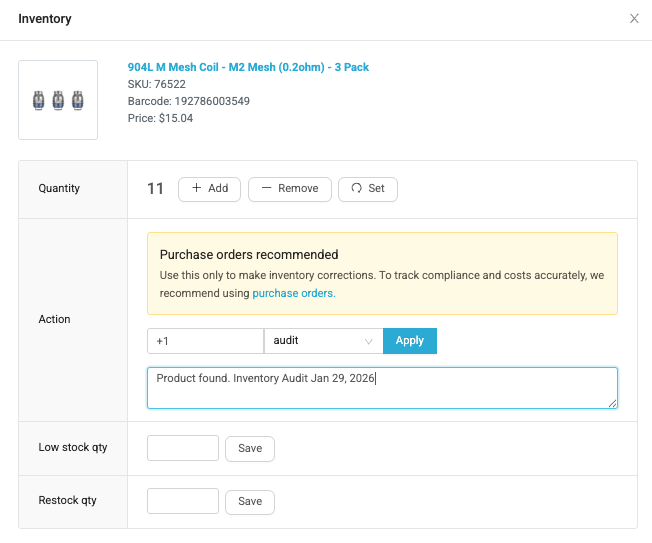
The only option to explain the addition will be “Audit”. BLAZE recommends using this feature when you already have inventory that has previously been purchased and is being transferred.
For example, when you need to transfer inventory from a different location or POS.
Important: All other inventory additions should be entered via the Purchase Order section in order to track compliance and costs accurately.
Removing inventory
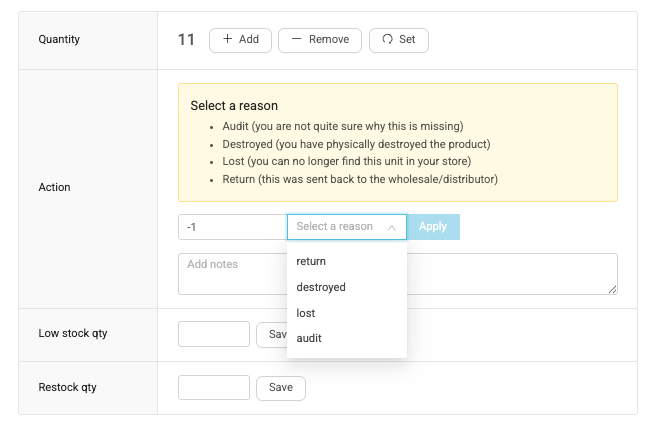
Select from a dropdown of options to explain the removal. Reasons include:
-
Audit (you are not quite sure why this is missing)
-
Destroyed (you have physically destroyed the product)
-
Lost (you can no longer find this unit in your store)
-
Return (this was sent back to the wholesale/distributor)
Resetting inventory
This will reset and overwrite your inventory levels for a product.
Stock settings
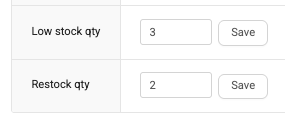
Customers can enter quantity thresholds to assist with low stock and restock levels.
-
Low Stock is the minimum stock level for this product.
-
Note: If low stock quantities are applied to products, customers will be able to set up "Low Stock Alerts" which will send the customer an SMS text message notifying them that the product's inventory levels have reached the low stock level.
-
Restock is the number of units you will want to reorder once you hit your low stock quantity to replenish your inventory.
Why is the inventory greyed out?
When the inventory options are greyed out and you will not be able to add remove, or set inventory levels. To get access, the “Can edit inventory” permission must be turned on which is found in the Employee Security Roles section. This permission can be set to specific locations.
For example, if you had the permission to edit inventory at location A but not for location B. You would still be able to edit inventory at location A.
Setting Up Low Stock Alerts
Ensure your shop never runs out of essential inventory items by configuring automated notifications.
Step 1: Set Product Thresholds
Before alerts can be sent, you must define what "Low Stock" means for each item.
-
Navigate to Inventory > Overview.
-
Select the product you wish to monitor.
-
In the Stock Settings or Low Stock field, enter the minimum quantity that should trigger an alert.
-
Click Save.
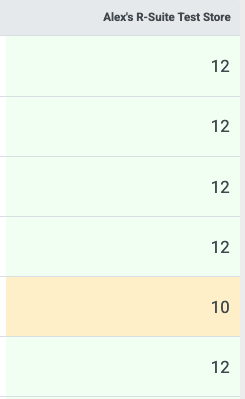
- When a product reaches it's low stock alert inventory level, it's block in the inventory column will appear as yellow as opposed to green
Step 2: Enable Notifications
Once thresholds are set, you must designate who receives the alert.
-
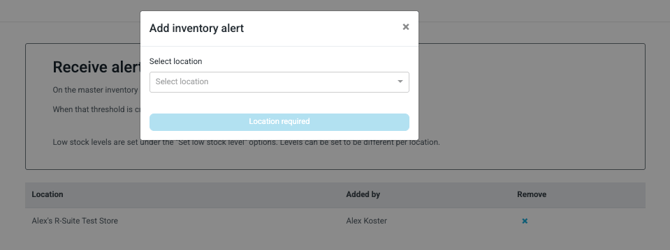
Navigate to Inventory > Low Stock Alerts
-
Hit the "+ Add Alert" Button in the top right corner
-
Select a location for which you'd like to receive low stock alerts
- When an inventory item falls to or below your defined threshold, BLAZE will automatically send an email to the assigned users.
Step 3: Monitor and Restock
-
Use the Restock value in your inventory overview to quickly identify how many units need to be added to your next Purchase Order to reach optimal levels.
