Use the Tymber Data Layer to configure custom tracking pixels in Google Tag Manager.
Ask Tymber to install the data layer in Google Tag Manager to get started using the data layer.
How to install Google Tag Manager Tymber data layer
Step one, download the Tymber data layer here. Once downloaded, proceed to your Google Tag Manager account to import the data layer.
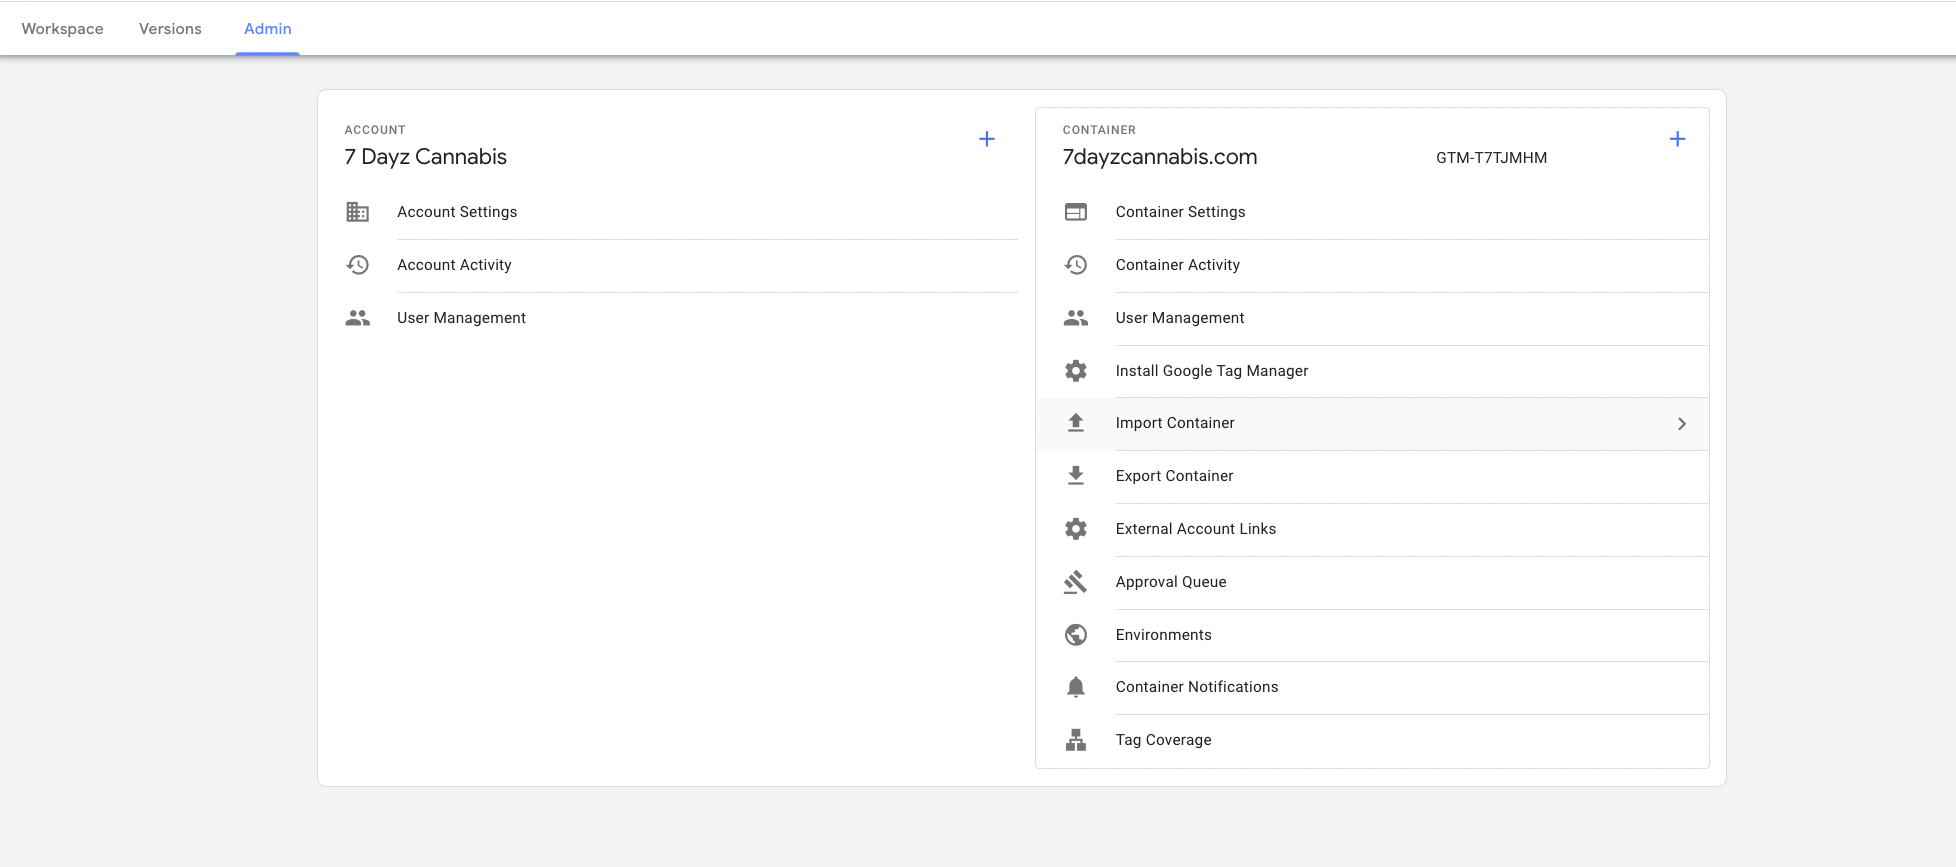
Select 'Import container'

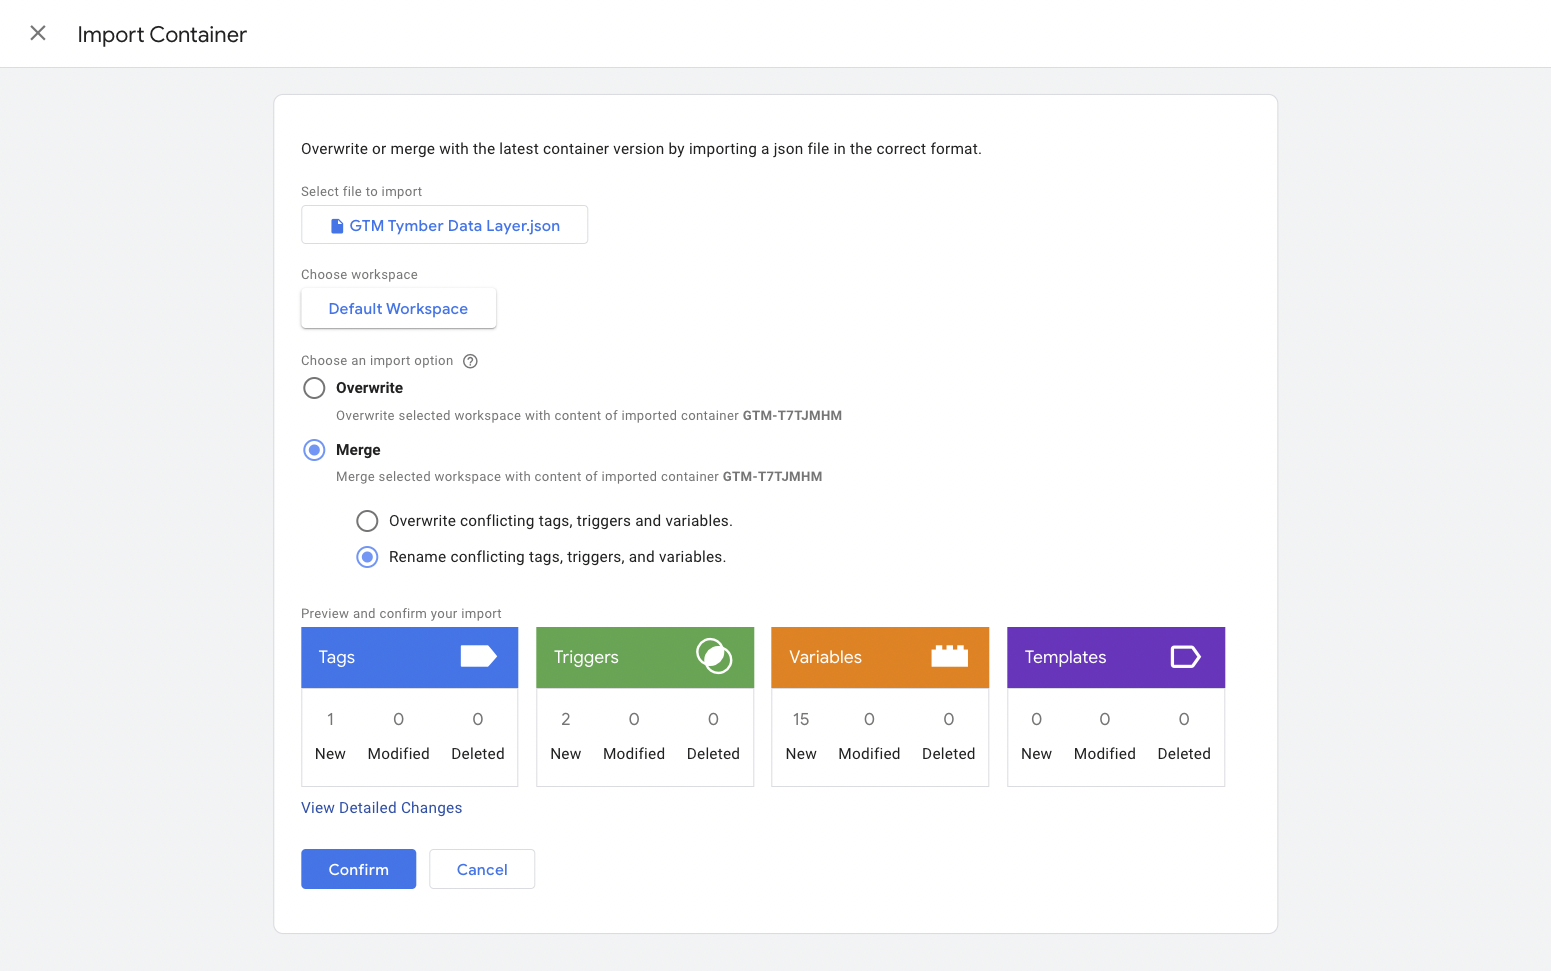
Upload the data layer file, then as a best practice it is recommended to select 'merge' and 'rename conflicting tags, triggers and variables' so that you don't overwrite anything that is pre-existing in your Google Tag Manager account. Lastly, click 'Confirm'.

Now, you have successfully installed the Tymber data layer for Google Tag Manager. You may begin using it.
How to use the Tymber data layer
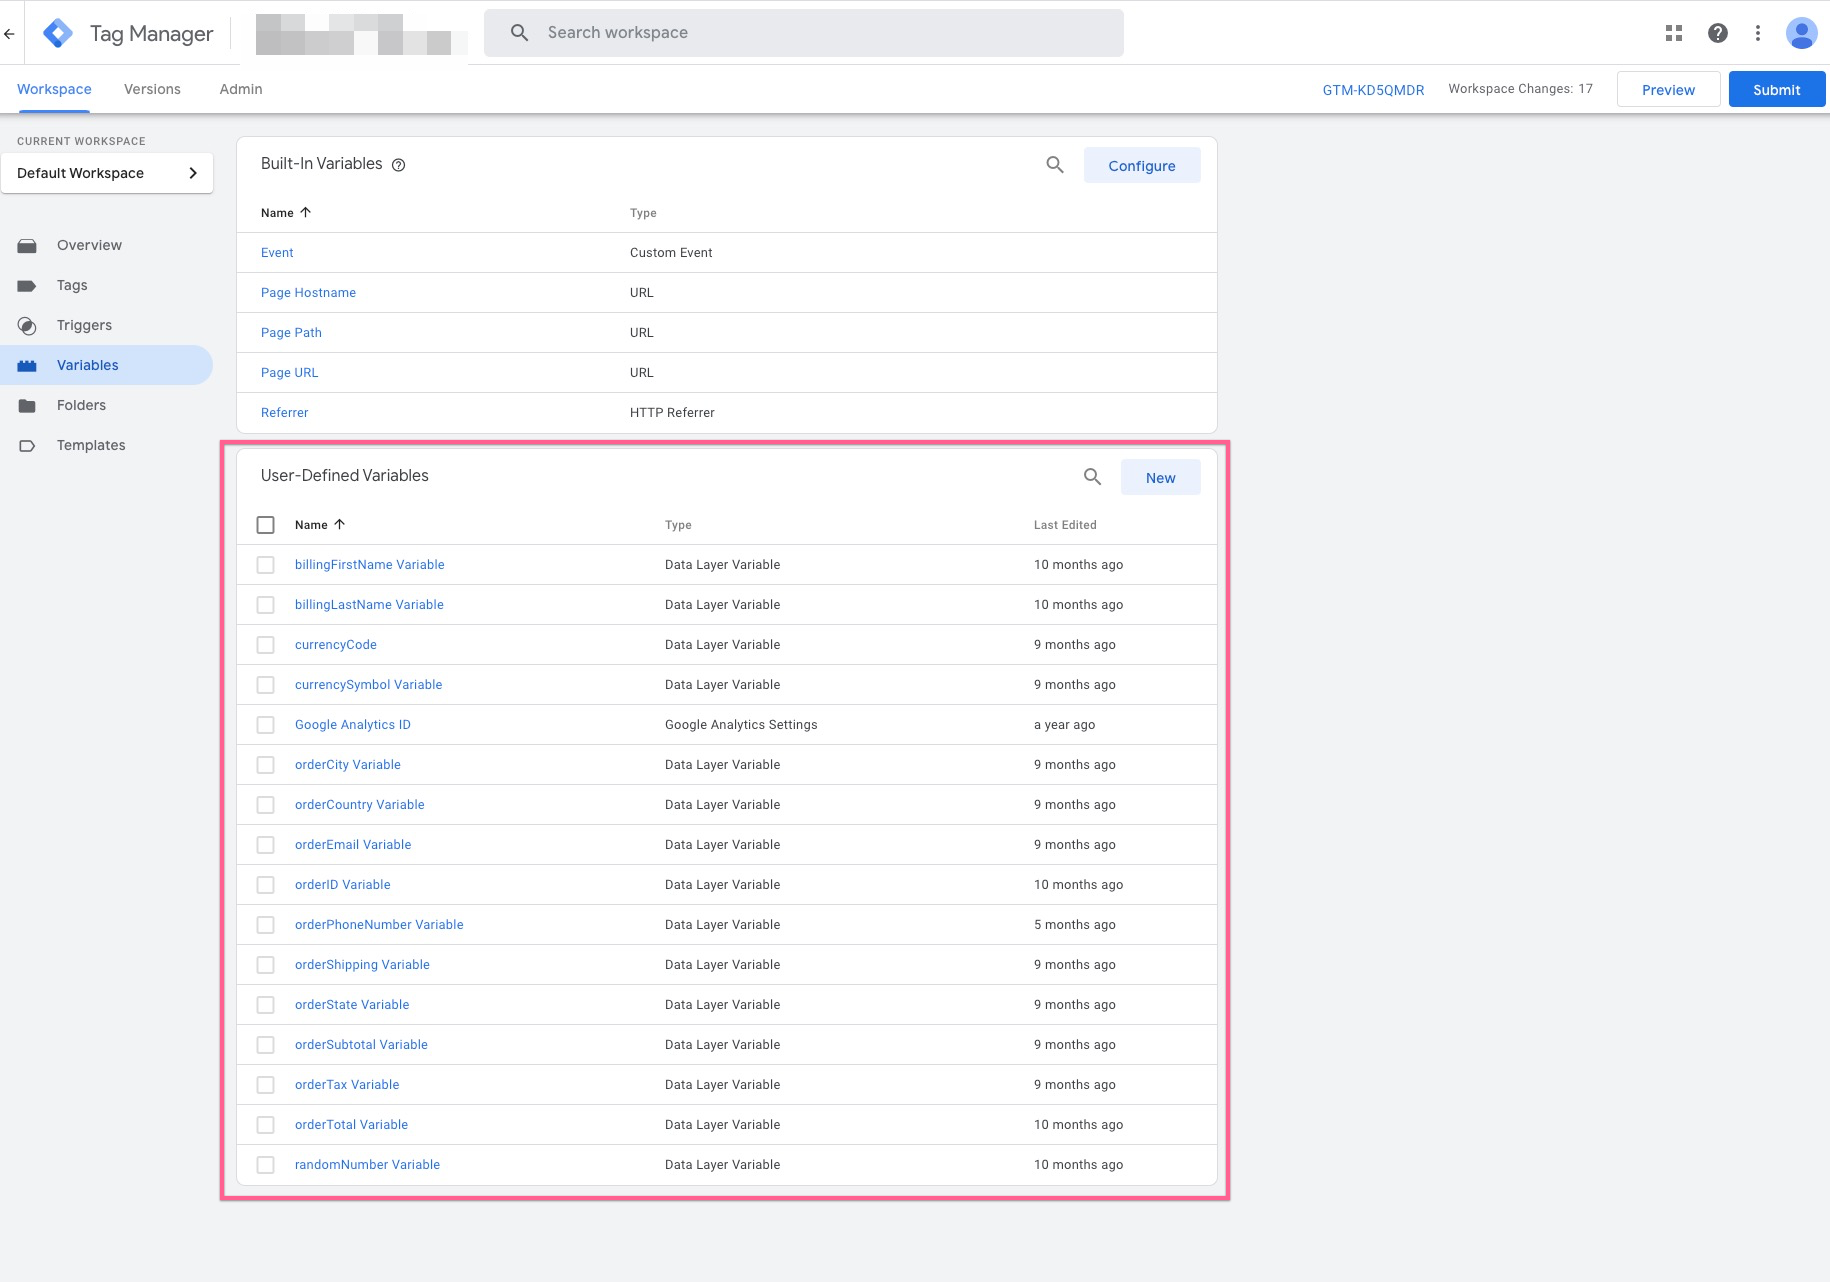
Once the data layer is installed, you will find the custom user-defined variables in your Google Tag Manager account.

You will also see two triggers available once the data layer is installed.

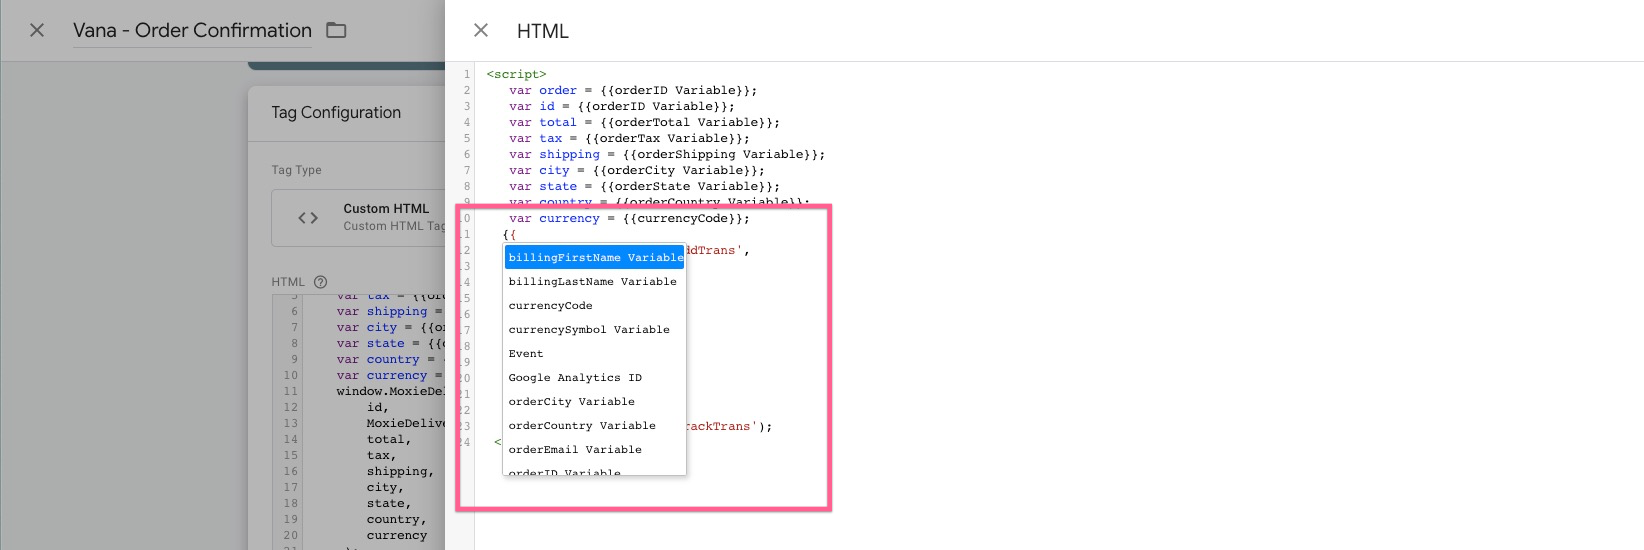
You can use the variables and triggers to configure custom tracking pixels by starting to type the curly brackets as shown in the screenshot below.


