WELCOME to BLAZE Sites!
Get familiar with the BLAZE Sites Editor and its 4 core components before you begin:
- Top Bar
- Side Panel (Layers)
- Design Panel
- Canvas
Learn about the core components in detail: BLAZE Sites | Editor Tour (4 Videos)
🚨DO NOT DELETE STORE LOCATOR WIDGET THIS WILL BREAK YOUR SITE. 🚨
📝 Update Business Information
-
Log in to your account.
-
On the Site Dashboard, find the site you want to edit.
-
Click the pencil icon ✏️ to open the BLAZE Sites Editor.
-
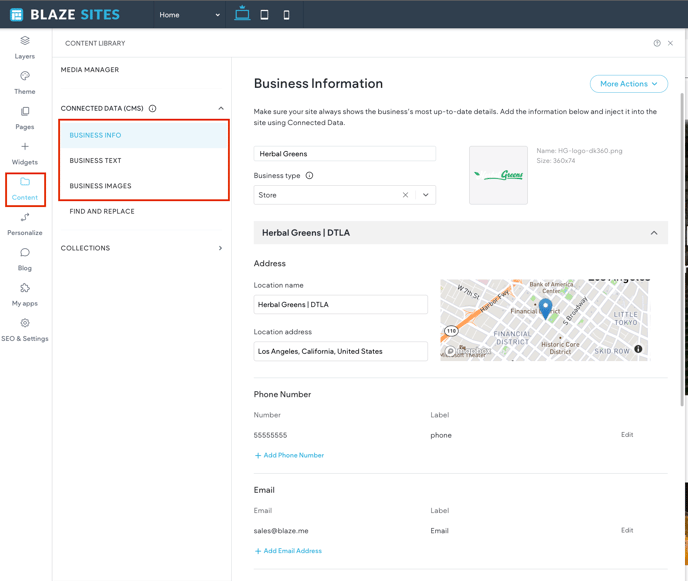
In the editor, go to the Content tab.
-
Under the Content tab, update the following sections:
-
Business Info (e.g., name, address, phone)
-
Business Text (e.g., tagline, about section)
-
Business Images (e.g., logo, header image)
-
🤖 PRO TIP: Use ✨AI to help generate engaging Business Text!
Enable Local Business Schema to improve your site’s visibility in rich search results.
Click here to learn more about the Content tab and your business information.
🔍 Set Up Page SEO
-
Go to your Site Dashboard.
-
Navigate to SEO > Page SEO.
-
For each page, you can manually enter your SEO meta title and description.
-
Or, save time by using AI! Just click "Generate Meta Tags" or tap the ✨ sparkle icon next to each field to automatically generate optimized content.


NOTE: If using AI generated content AI Content Assistant will popup. Please fill out all fields with relevant information for the best results. 
Click here to learn more about Page SEO
✏️ Edit Text and Images on Your Website Pages
-
Go to your Homepage, About Us, or other key pages.
-
Click directly on any textarea to update your content with your store’s unique info—like who you are, what you offer, and how to contact you.
-
To update images, click on any photo and select "Replace" to upload your own. Use real images of your team, storefront, or products to make the site feel authentic.
- To maximize SEO, add Alt Text to each image.
🚨 NOTE: Make sure the alt text accurately describes the image — incorrect alt text can harm your SEO instead of helping it.
📊 How to Add Google Analytics and Google Tag Manager IDs
-
In the left-side navigation, click on SEO & Settings.
-
Select Google Tools from the menu.
-
Enter your Google Analytics Tracking ID in the designated field.
-
Enter your Google Tag Manager Container ID in the corresponding field.
-
Save your changes and publish your site.
💡PRO TIP: Make sure your Google accounts are properly set up and you have the correct tracking IDs ready before adding them.
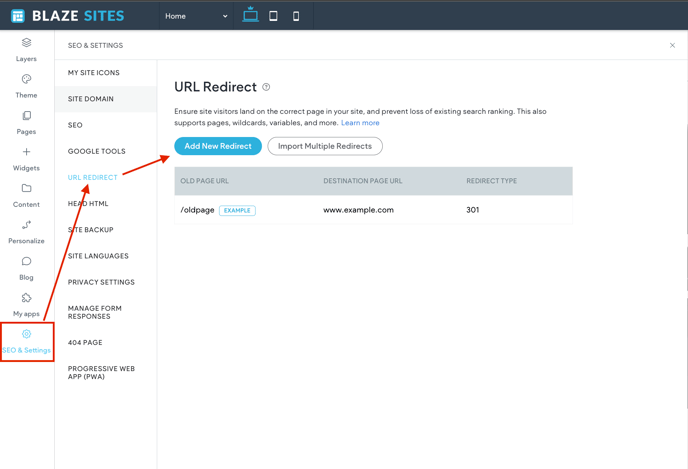
🔄 URL Redirects (If Needed)
If you’re switching from an old site to BLAZE Sites, make sure each old page has a matching new page to keep your SEO rankings.
If you want to remove any old pages, set up a URL redirect to send visitors from the old page to a relevant page on your new site.
To add redirects:
-
In the left panel, click SEO & Settings.
-
Click URL Redirect.
-
Click Add new redirect and enter the old and new URLs.
Still have a question? Check out our comprehensive Knowledge Base