Please reach out to ecomsupport@blaze.me for the DNS records to connect your custom domain to the Mission Control Email Campaigns.
Once the records have been entered to the domain settings, please confirm with ECOM Support to have the custom domain verified for the Email Campaign sending.
Example of DNS record entries:
Once domain is verified, head to Mission Control -> Outreach Campaigns -> Configuration and configure sending Email, Email Name, and Address.
All of these fields in this Configuration tab are required.
Sender Name - name customers can identify who the campaign is from
Sender Email - specific email for campaigns that are not used for other emails, such as orders, etc. (please set up a dedicated marketing email for campaigns)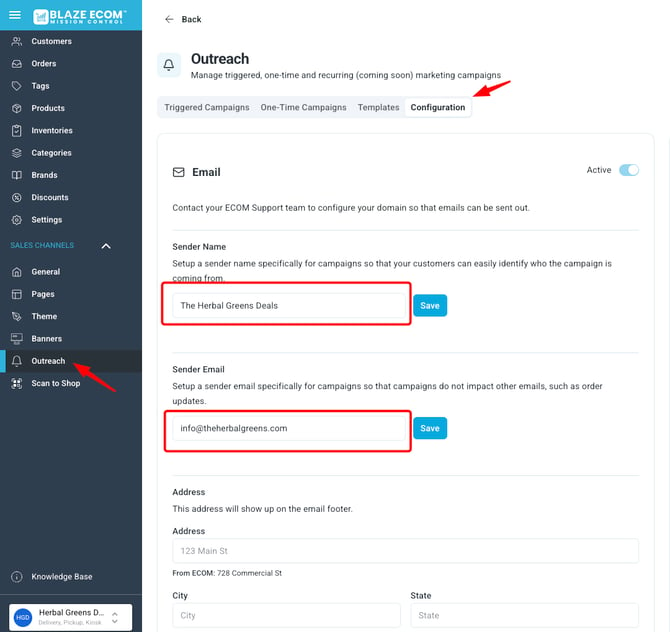
Address - this address field is used for the address that is in the email template footers. This address needs to be included to be compliant.
For delivery only clients you must still include an address. This does not have to be your warehouse location — you can use your LLC address for this section. 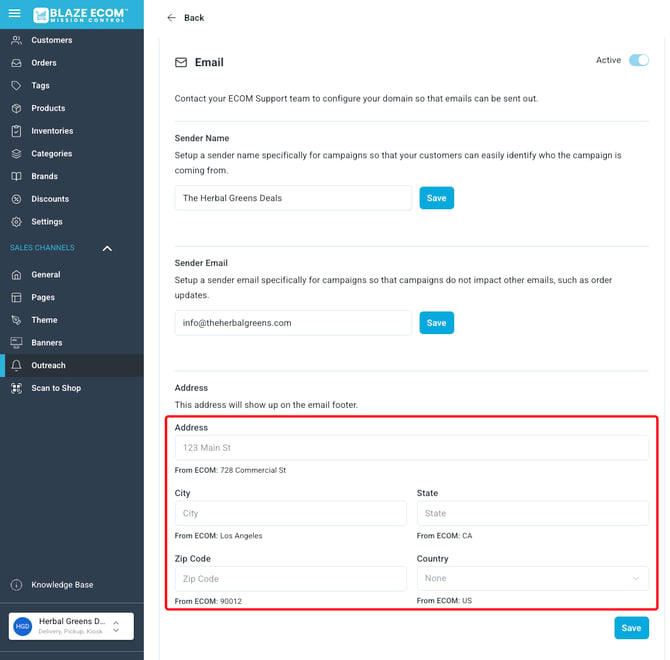
For multi-store operators, every store in the group must have a sender name and sender email configured before email becomes available as a campaign option.
Configure Triggered and/or One Time Campaign.
Triggered Campaigns
Triggered Campaigns are default to Email. To update channels to include SMS > click the 3 dots on a campaign > select Edit > View Campaign > Campaign Setup > Select SMS Channel.


⚠️ Using SMS in your Triggered Campaigns will result in increased credit usage.
One-Time Campaigns


Email campaigns can be configured with text, images, buttons and store variables. Drag the items from the Content Blocks into the email preview below.
Once you drag items from the Content Blocks into the preview, you can click on the preview to edit them.
See the video below for a tutorial on the Campaign Builder
Toggle between Mobile and Desktop at the top of the builder to preview how it will look on each platform.

A test email/push notification can be sent to the user creating the Campaign via Send Test.

Customer must have Marketing Emails enabled to receive marketing campaign emails. They can select this during sign up or edit it later by going into their Account settings.
Have a Blaze mobile app? Click here to learn how to use outreach campaigns to send push notifications
Outreach Analytics
Outreach campaigns have analytics attached to show you Click, Open, Delivered, and Send Rates. These numbers are updated as the customers open and browse the messages you send.

What does this mean?
Clicked - Represents a user interaction signaling direct engagement
Opened - How many users opened the campaign email or push notification
Delivered - How many messages sent were accepted by a users device
Sent - Total amount of messages sent in a campaign (not delivered)
You can get more detailed campaign results by clicking the 3 dots and then open on the respective campaign - you can then filter by campaign delivery type and see additional metrics like Bounce Rate and Unsubscribe rates
Bounce Rate - The percentage of users who leave your campaign messaging after viewing with no action.
Spam Report Rate - How many users reported this message as Spam
Unsubscribe Rate - How many users unsubscribed from marketing channels after delivery
If you have any more questions about Outreach Campaigns reach out to ECOM Support at Ecomsupport@blaze.me