Processing a New Order
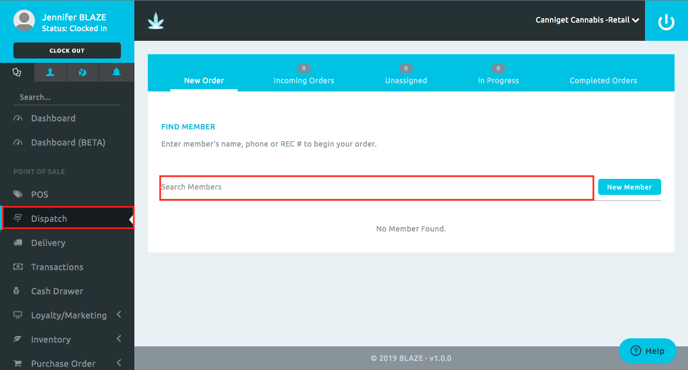
1. Navigate to the Dispatch tab on the left. New orders can be processed by looking up an existing member, or by signing up a new member.
Existing Member:
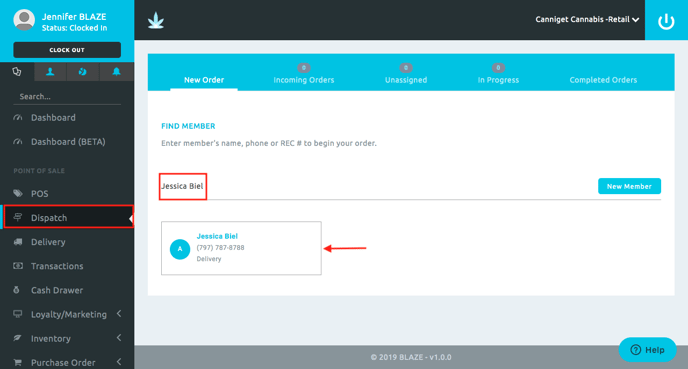
2a. Look up the existing member's info in the search bar (Name, Phone, or Rec #).
3a. Click the member that pops up.
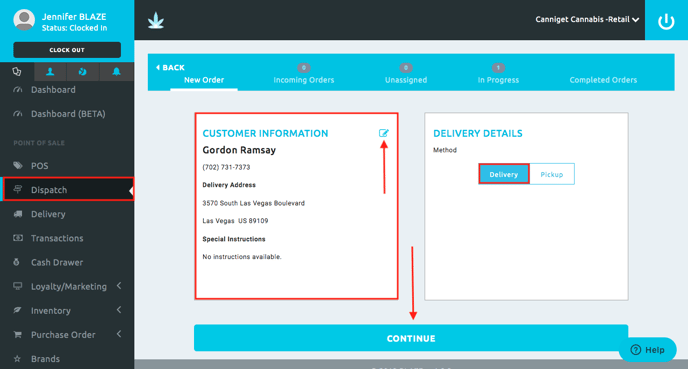
4a. Ensure Customer's Information is correct, modify by clicking the pen icon. Select Delivery Method (Delivery or Pickup), the selection will be highlighted in blue. Click the Continue button.
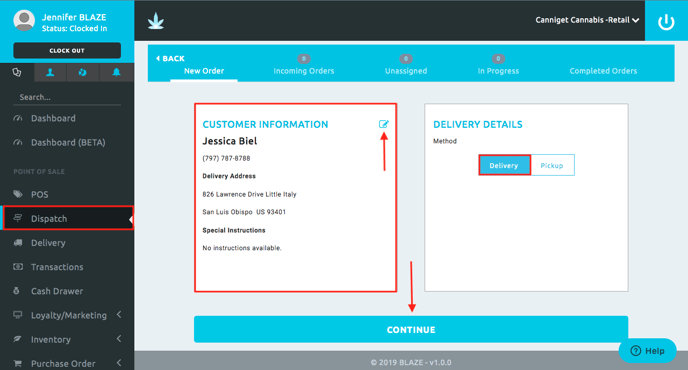
NOTE: Continue to step 5 listed after the New Member section to add products to the order.
New Member:
2b. Click the New Member button.
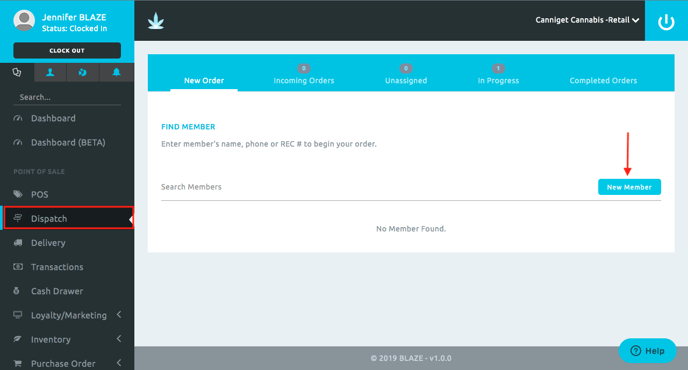
3b. Enter in the mandatory sections (First Name, Last Name, and Date of Birth). For delivery orders, it is important to get their Phone # and Address as well. Scroll down to enter in the other information (License #, License Expiration Date, Photo of License, and/or Notes). To create a New Member, click the Save button. To cancel, click the Cancel button. 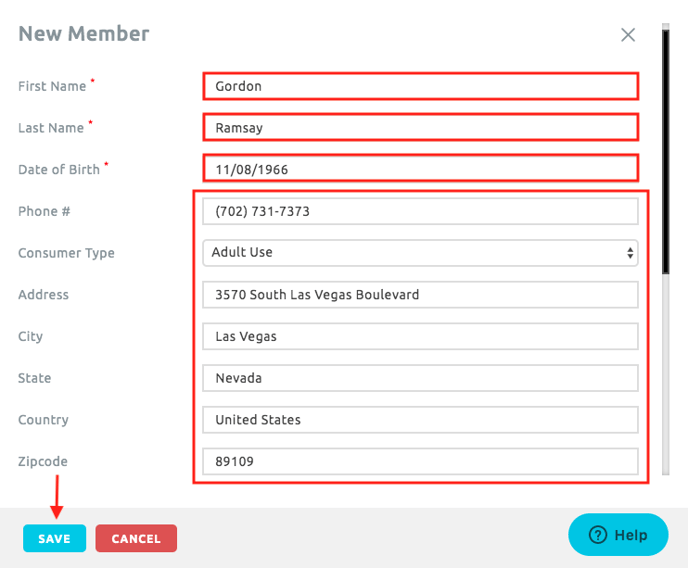
4b. Ensure Customer's Information is correct, modify by clicking the pen icon. Select Delivery Method (Delivery or Pickup), ensure the choice you desire is highlighted in blue. Click the blue Continue button.
NOTE: Continue to step 5 listed below to add products to the order.
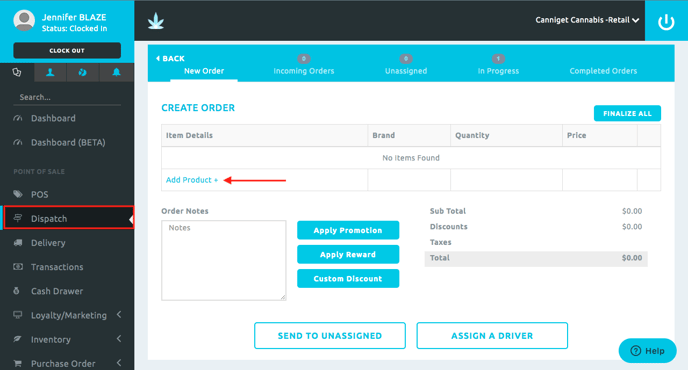
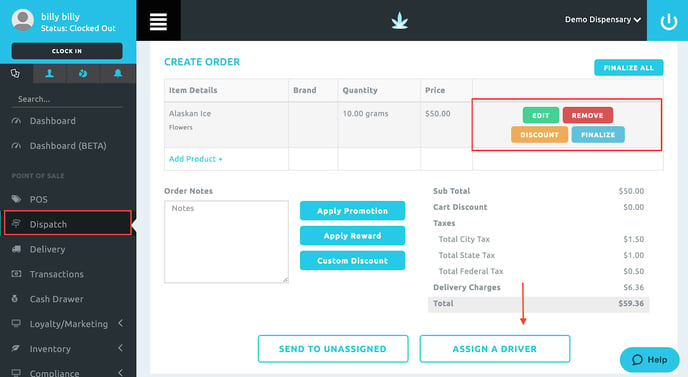
5. Click the Add Product + button to add products.
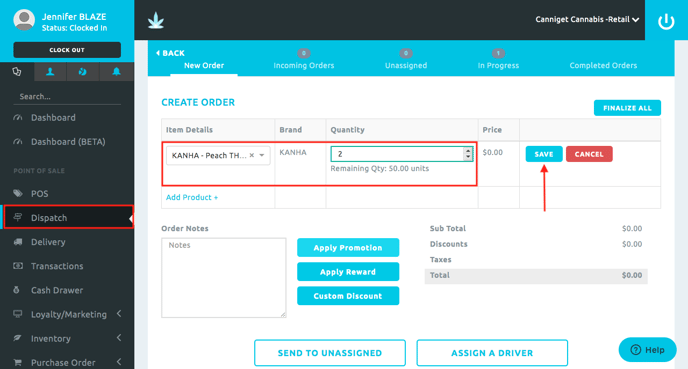
6. Enter the Item Details and Quantity, click the Save button. Click the Cancel button to remove the item.
7. To modify the Item Details, click the Edit button. To delete, click the Remove button.
- Add a line item discount per product by clicking the Discount button.
- The Finalize button locks the current price in.
- When applied, any price changes that occur between the time the order is processed and received by the customer will NOT change the original price quoted.
- NOTE: This feature is useful for those that change prices often, or have long delivery queues that a price change could take place in. While it is useful for those instances, it is not necessary to use it in other situations.
- Enter in any notes.
- Apply a Promotion by clicking the Apply Promotion button and selecting from a selection of available / applicable Promotions.
- Apply a Reward by clicking the Apply Reward button and selecting from a selection of available / applicable Rewards.
- Apply a Custom Discount by clicking the Custom Discount button and entering the amount or percent to discount.
- The Promotion, Reward, and/or Discount that is applied will show up under the Sub Total.
If processing the order immediately, click the Assign a Driver button. If waiting to process the order, click the Send to Unassigned button.
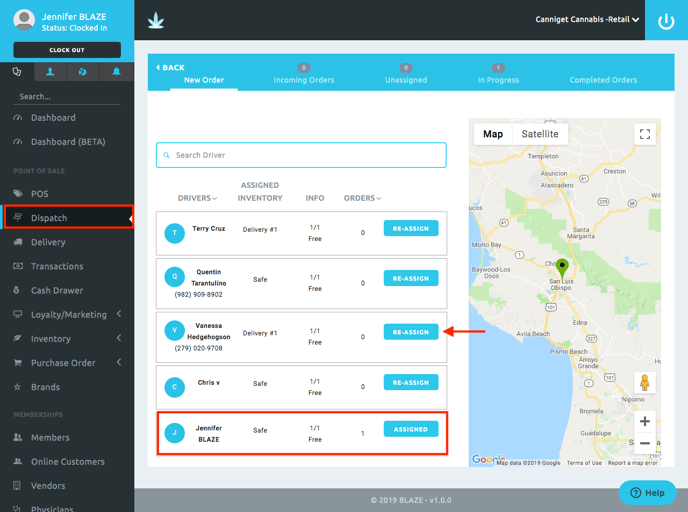
Assign to Driver
1. Click the blue Re-Assign button on the Driver you wish to assign the order to.
The mileage and the time called out is the distance/time from the driver's current position to the members delivery address. The (1/1) shows that the driver has enough inventory to fulfill the order.
NOTE: By default, the order will be assigned to the employee that processed the order.
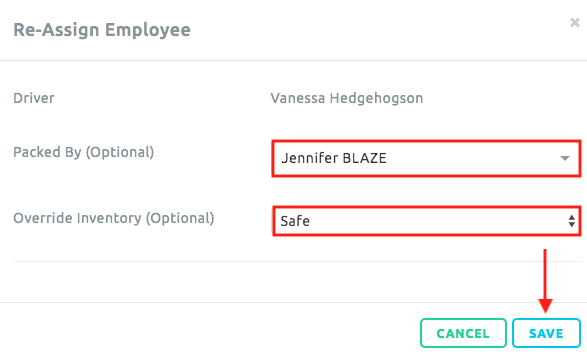
2. A popup will appear. If your drivers are not packing the orders their assigned (the drivers pick up prepackaged orders), note what employee packed the order, and where the inventory was taken from. NOTE: If your drivers prepare their orders from their own inventory, then omit this information. Click the Save button.
3. The order has now been created and reassigned to a driver.
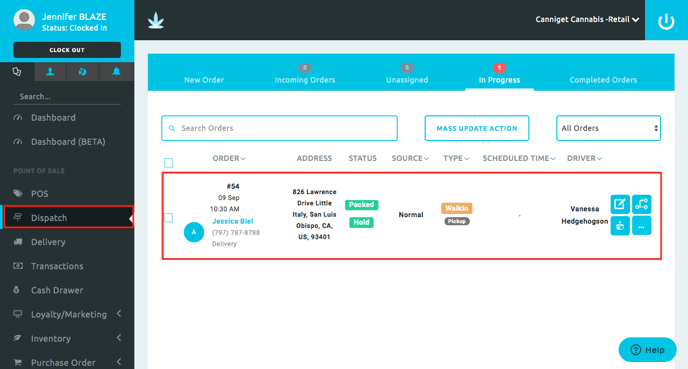
4. This order will appear in the Driver's Queue. To learn more about managing a Queue on an iPad, read this article.