Tymber's integration with Berbix allows you to instantly verify IDs and populate the ID information to your POS. Sync Tymber with Berbix using this 4 step process:
Setting up the integration:
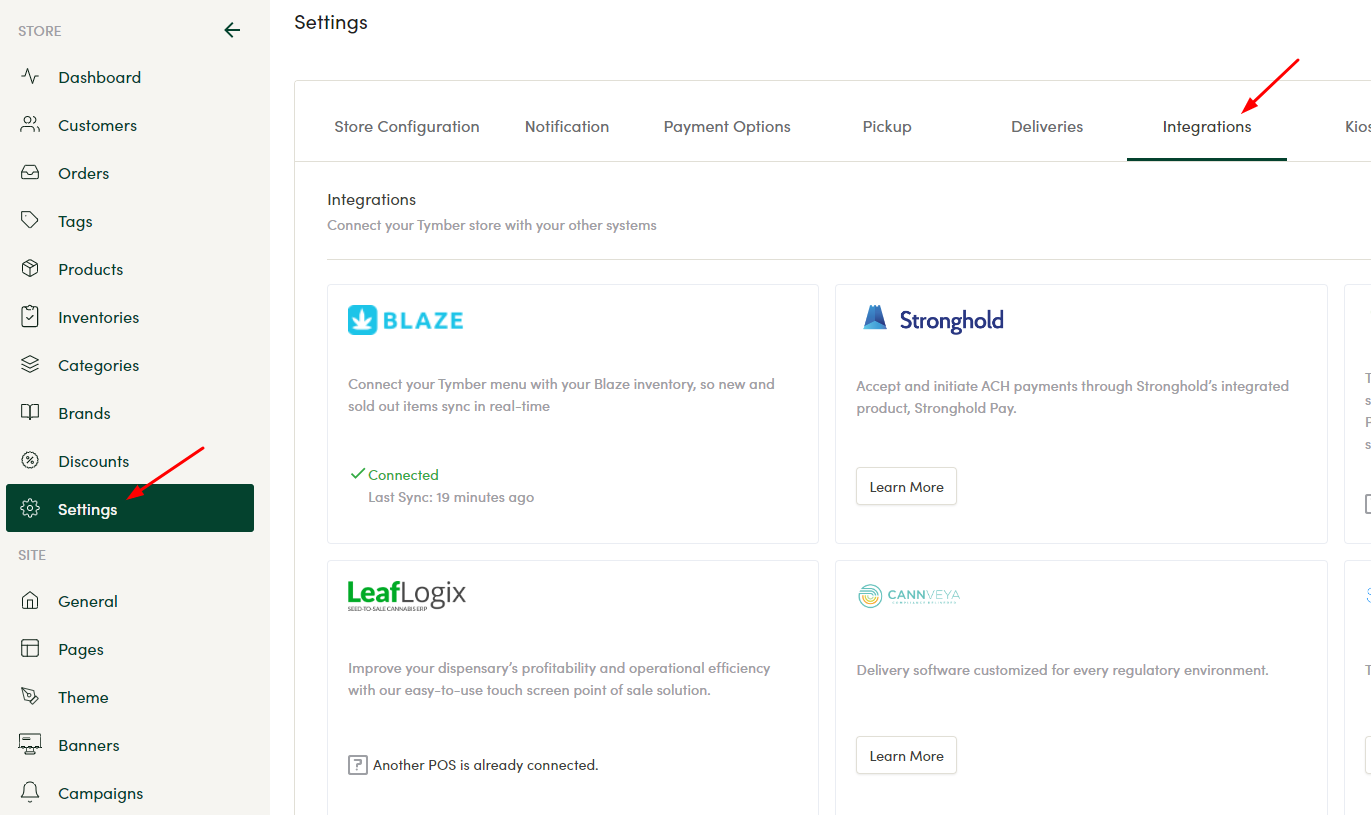
Step 1: To get started using the Berbix integration, navigate to Tymber Mission Control at admin.tymber.io and go to Settings > Integrations > Berbix.
Step 2: From your Berbix account, you'll need to generate an API Key, a Web Template Key and a Mobile Template Key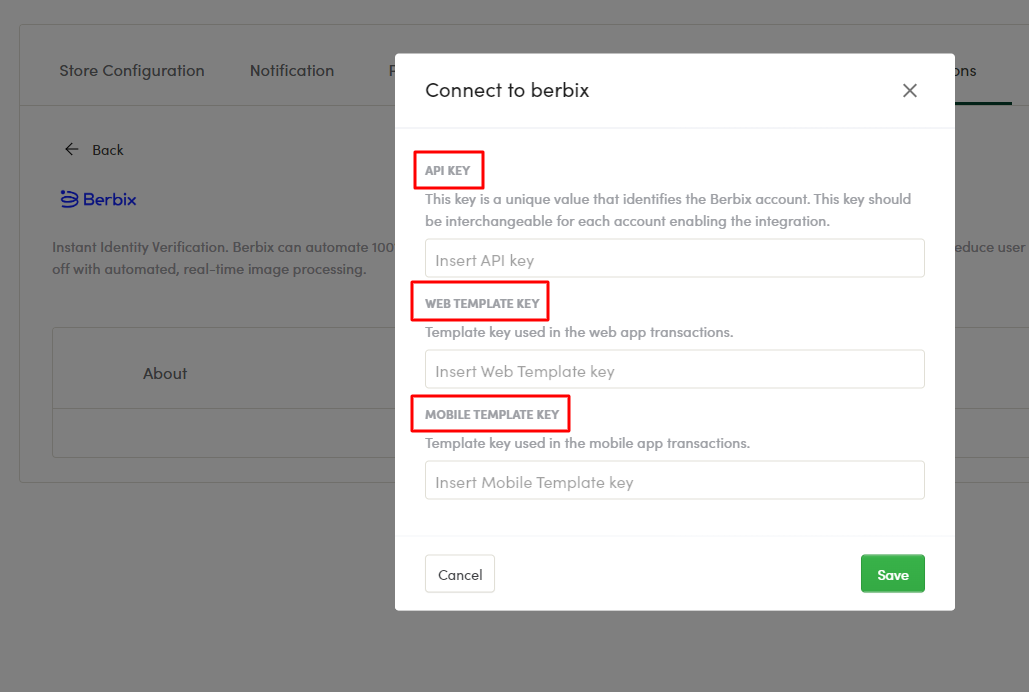
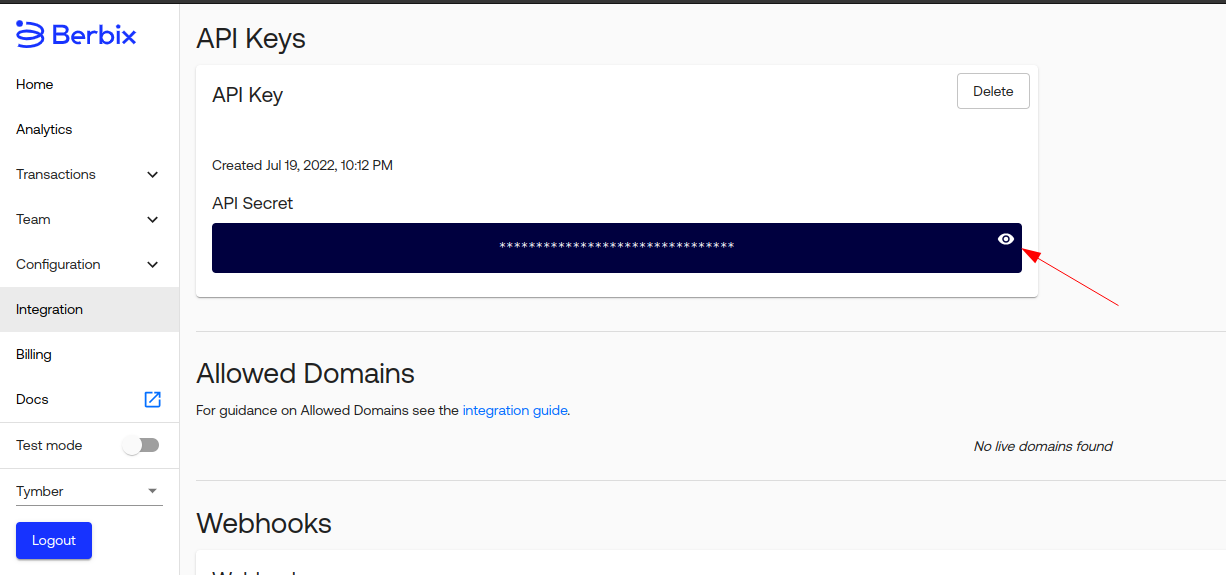
API Key: Go to the Integration page on your Berbix Dashboard to access the API Secret Key
Template Keys: Got to Berbix Configuration > Templates page and identify the Web and Native Mobile Template you want to connect with
-png-1.png)
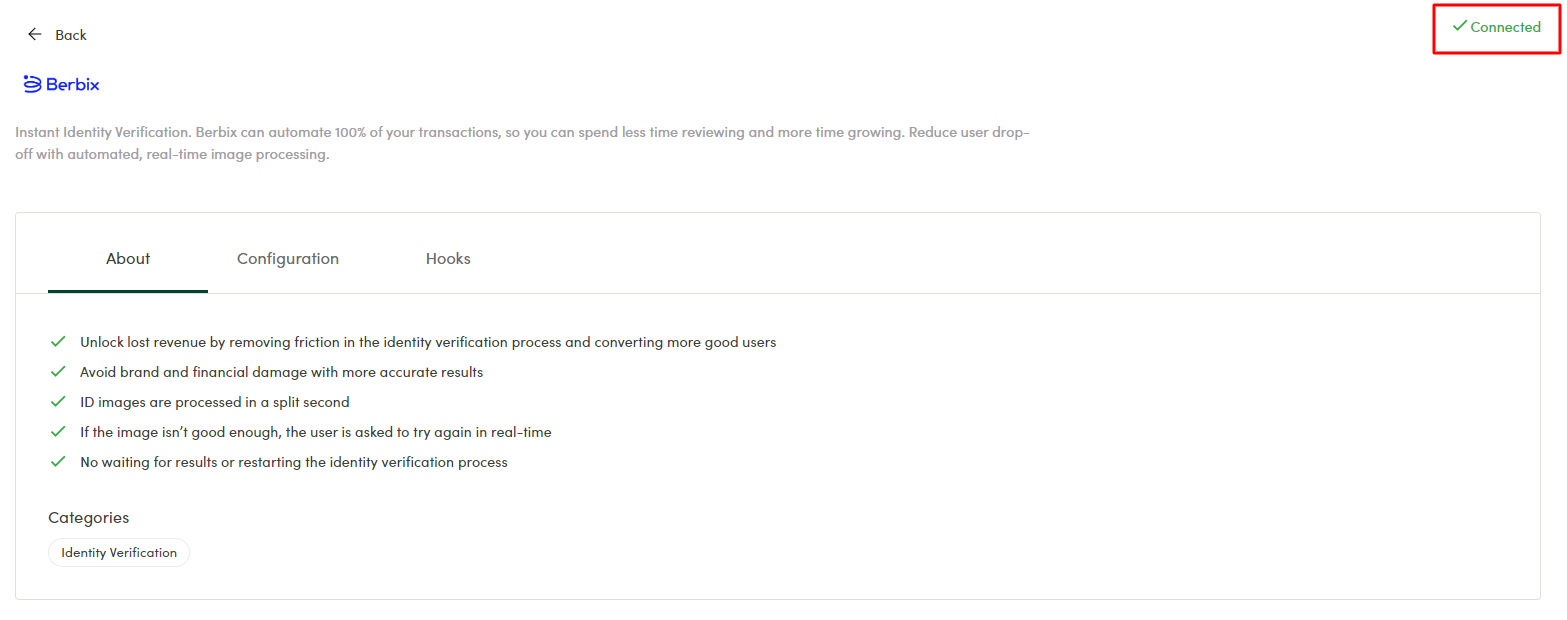
Once, the keys are pasted in, click "Save" and should show it is connected as depicted below.
Step 3: Once Berbix is connected in the integration settings in Tymber Mission Control, you'll see two webhooks generated in the integrations settings under the 'Hooks' tab.
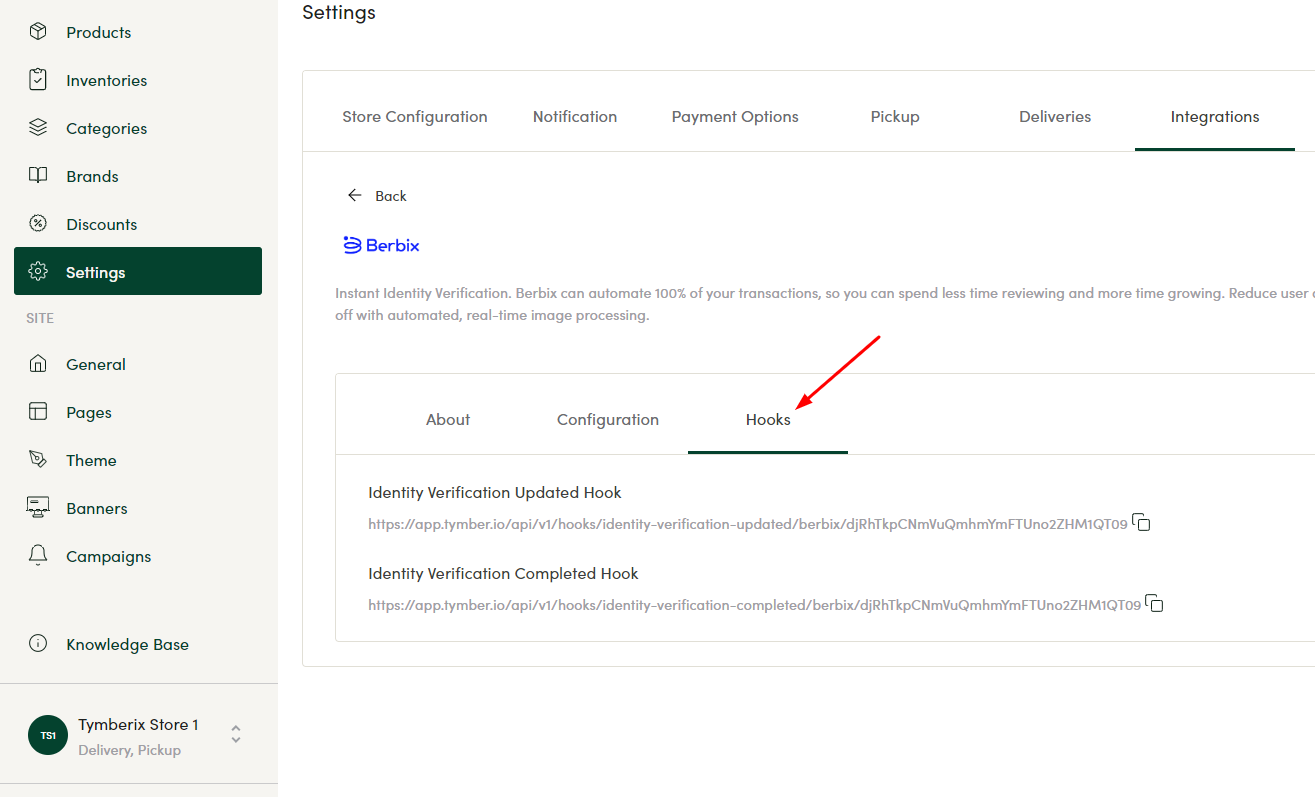
Add those two webhook URL's copied from Tymber into your Berbix integration settings here
-png.png)
Make sure the webhook type matches the webhook URL you are copying from TMC as defined below:
Identity Verification Updated Hook = Verification status changed
Identity Verification Completed Hook = Verification finished
-png.png)
When you are done, you will see 2 hooks under Webhooks as depicted below: 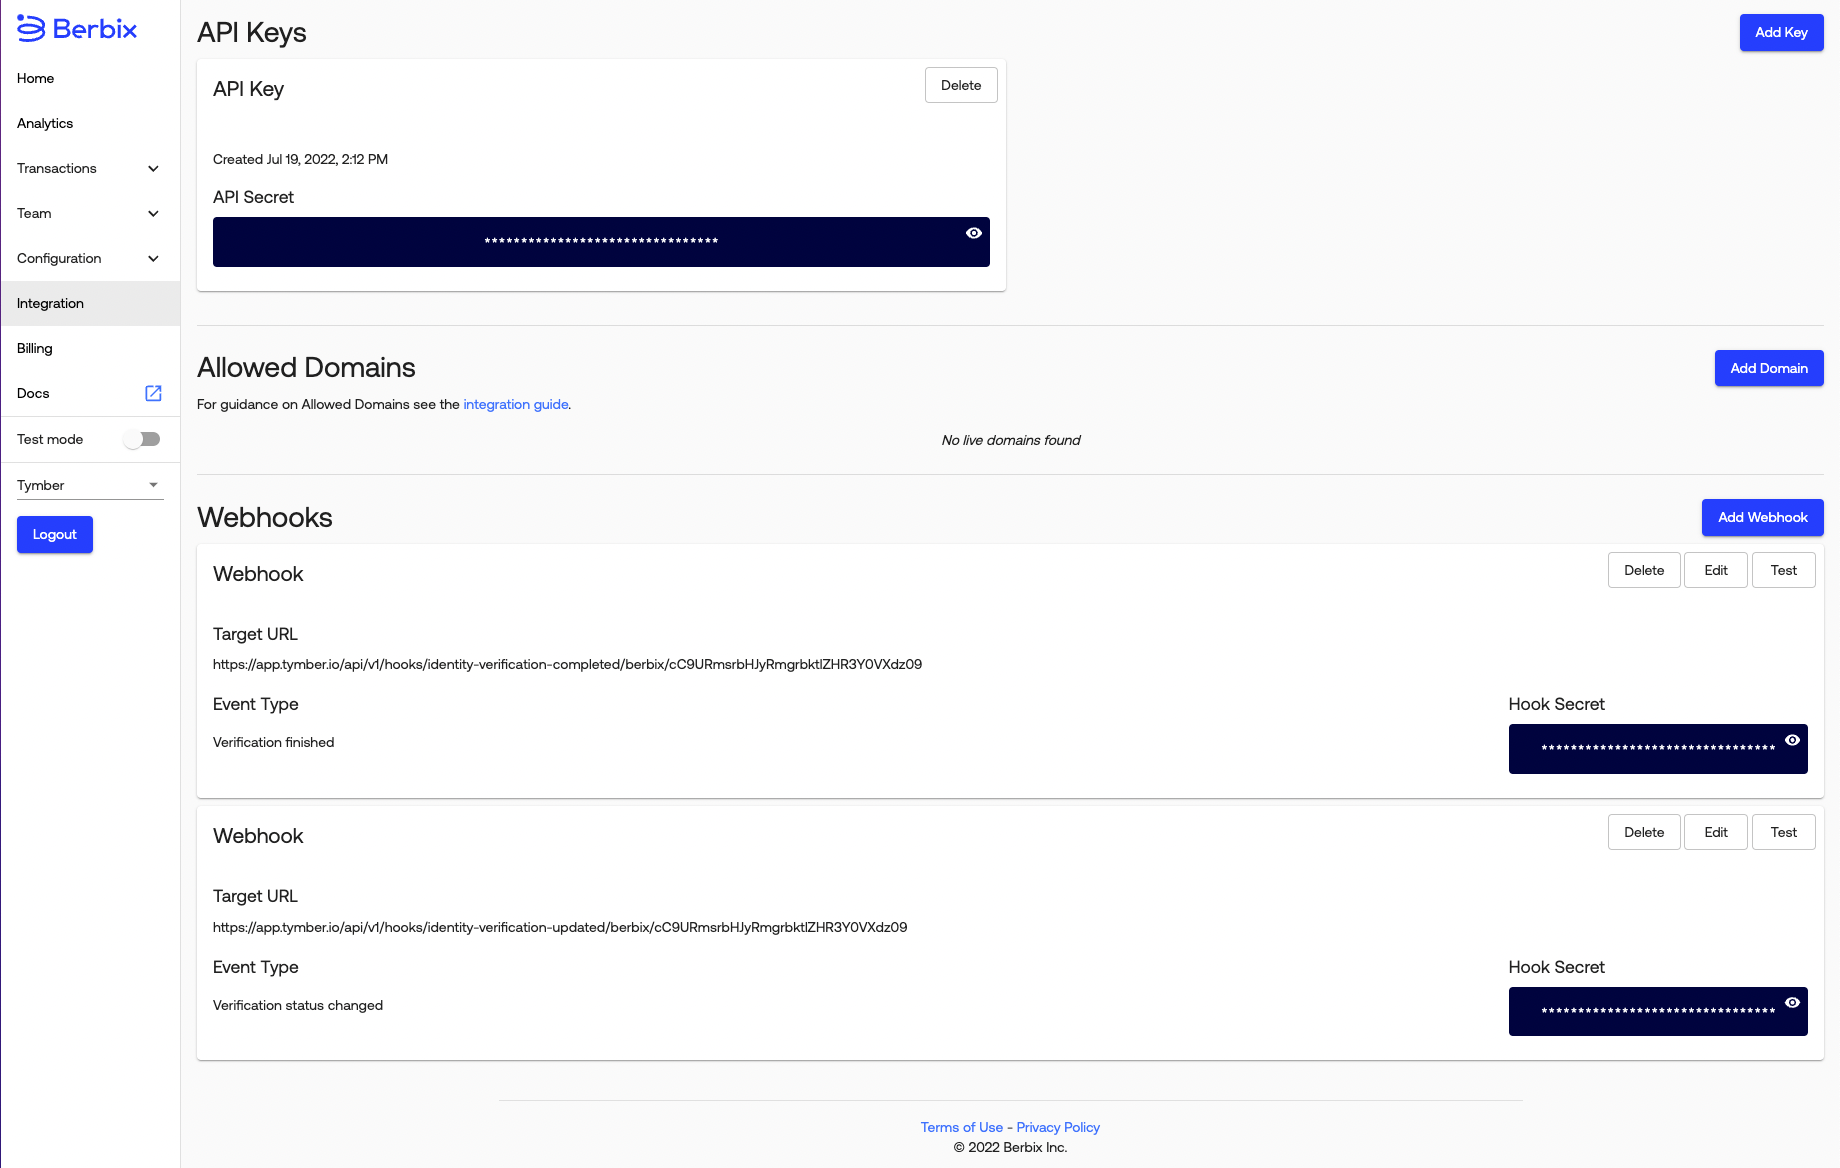
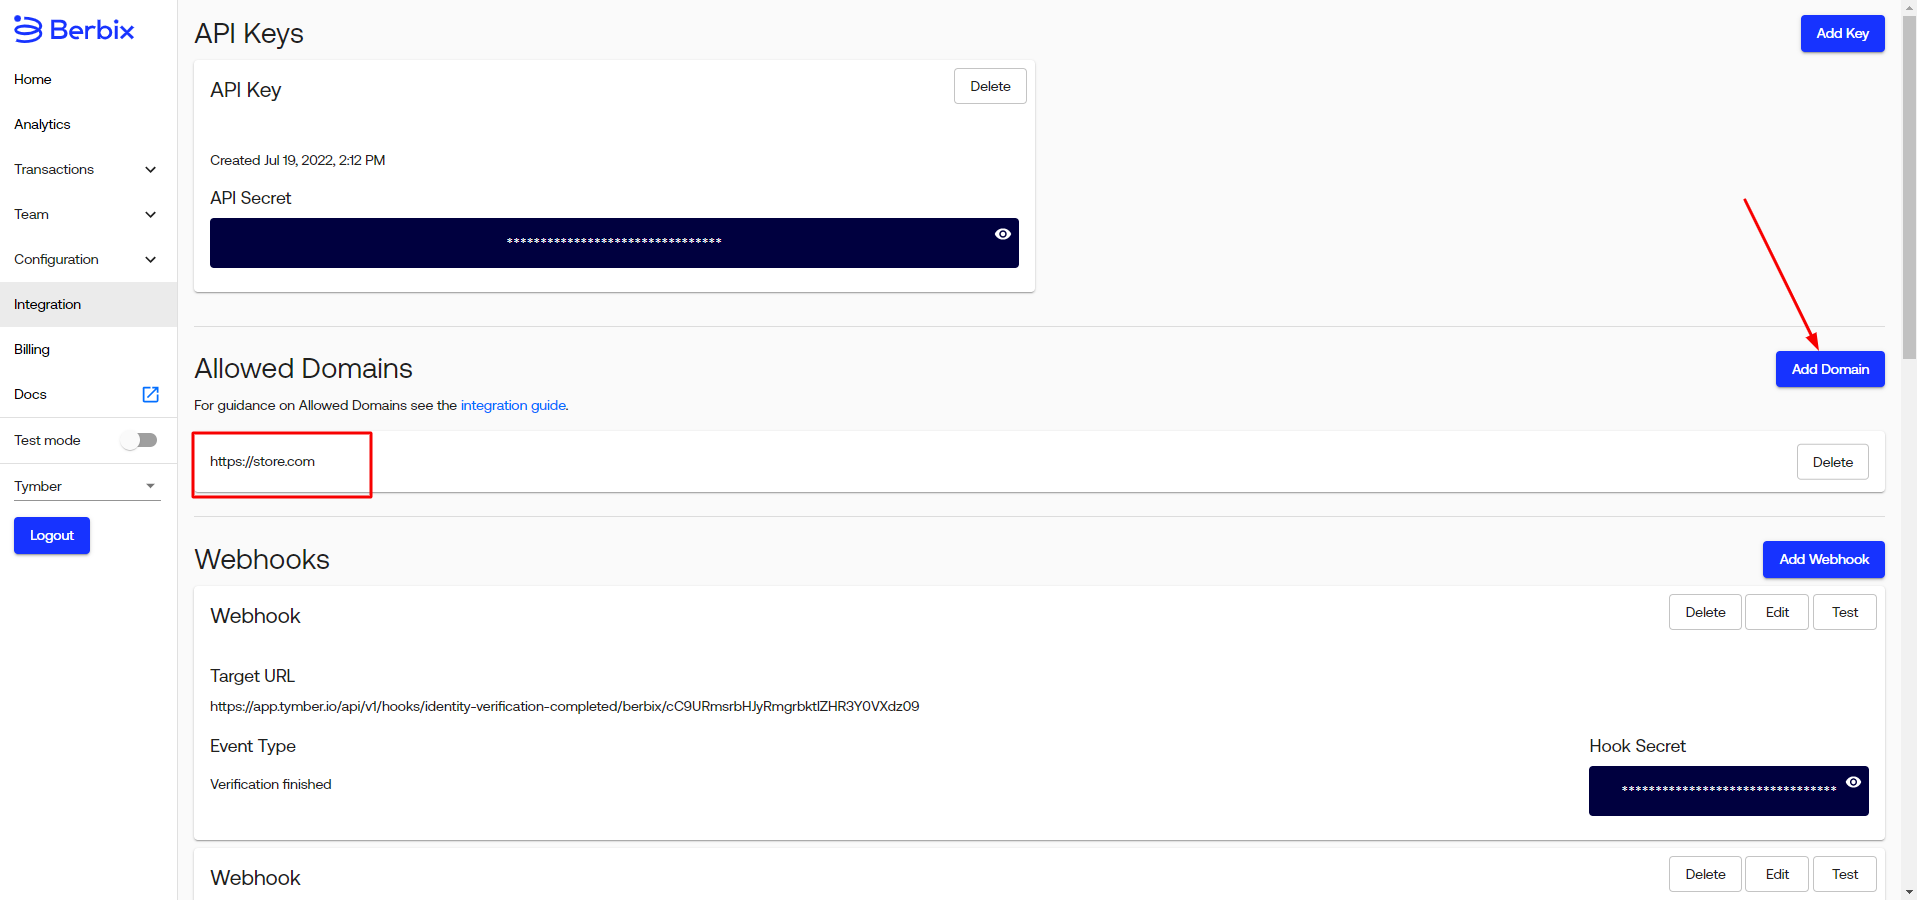
Step 4: While on the Berbix Integration dashboard, click 'Add Domain' and paste in the URL of your Tymber ecommerce website.
- Make sure the URL is your live menu URL -> https://YourStore.com
- Not the beta-site URL -> https://YourStore.tymber.io
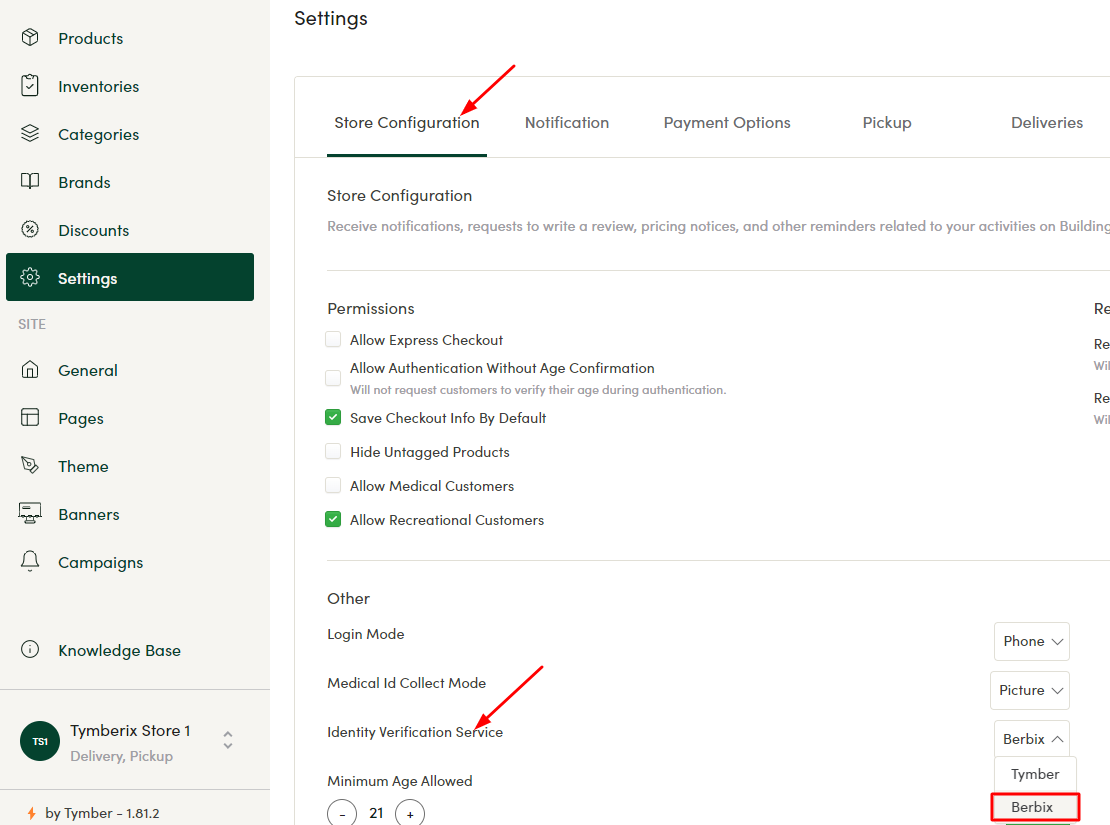
Step 5: In Tymber Mission Control, go to Settings > Store Configuration > Identity Verification Service and select Berbix.
- Once this saves, Berbix ID verification will be active on your website
