This article will explain how to manage product tags in Tymber Mission Control.
- All tags derive from the Point of Sale. To utilize this feature, please configure tags within your POS first.
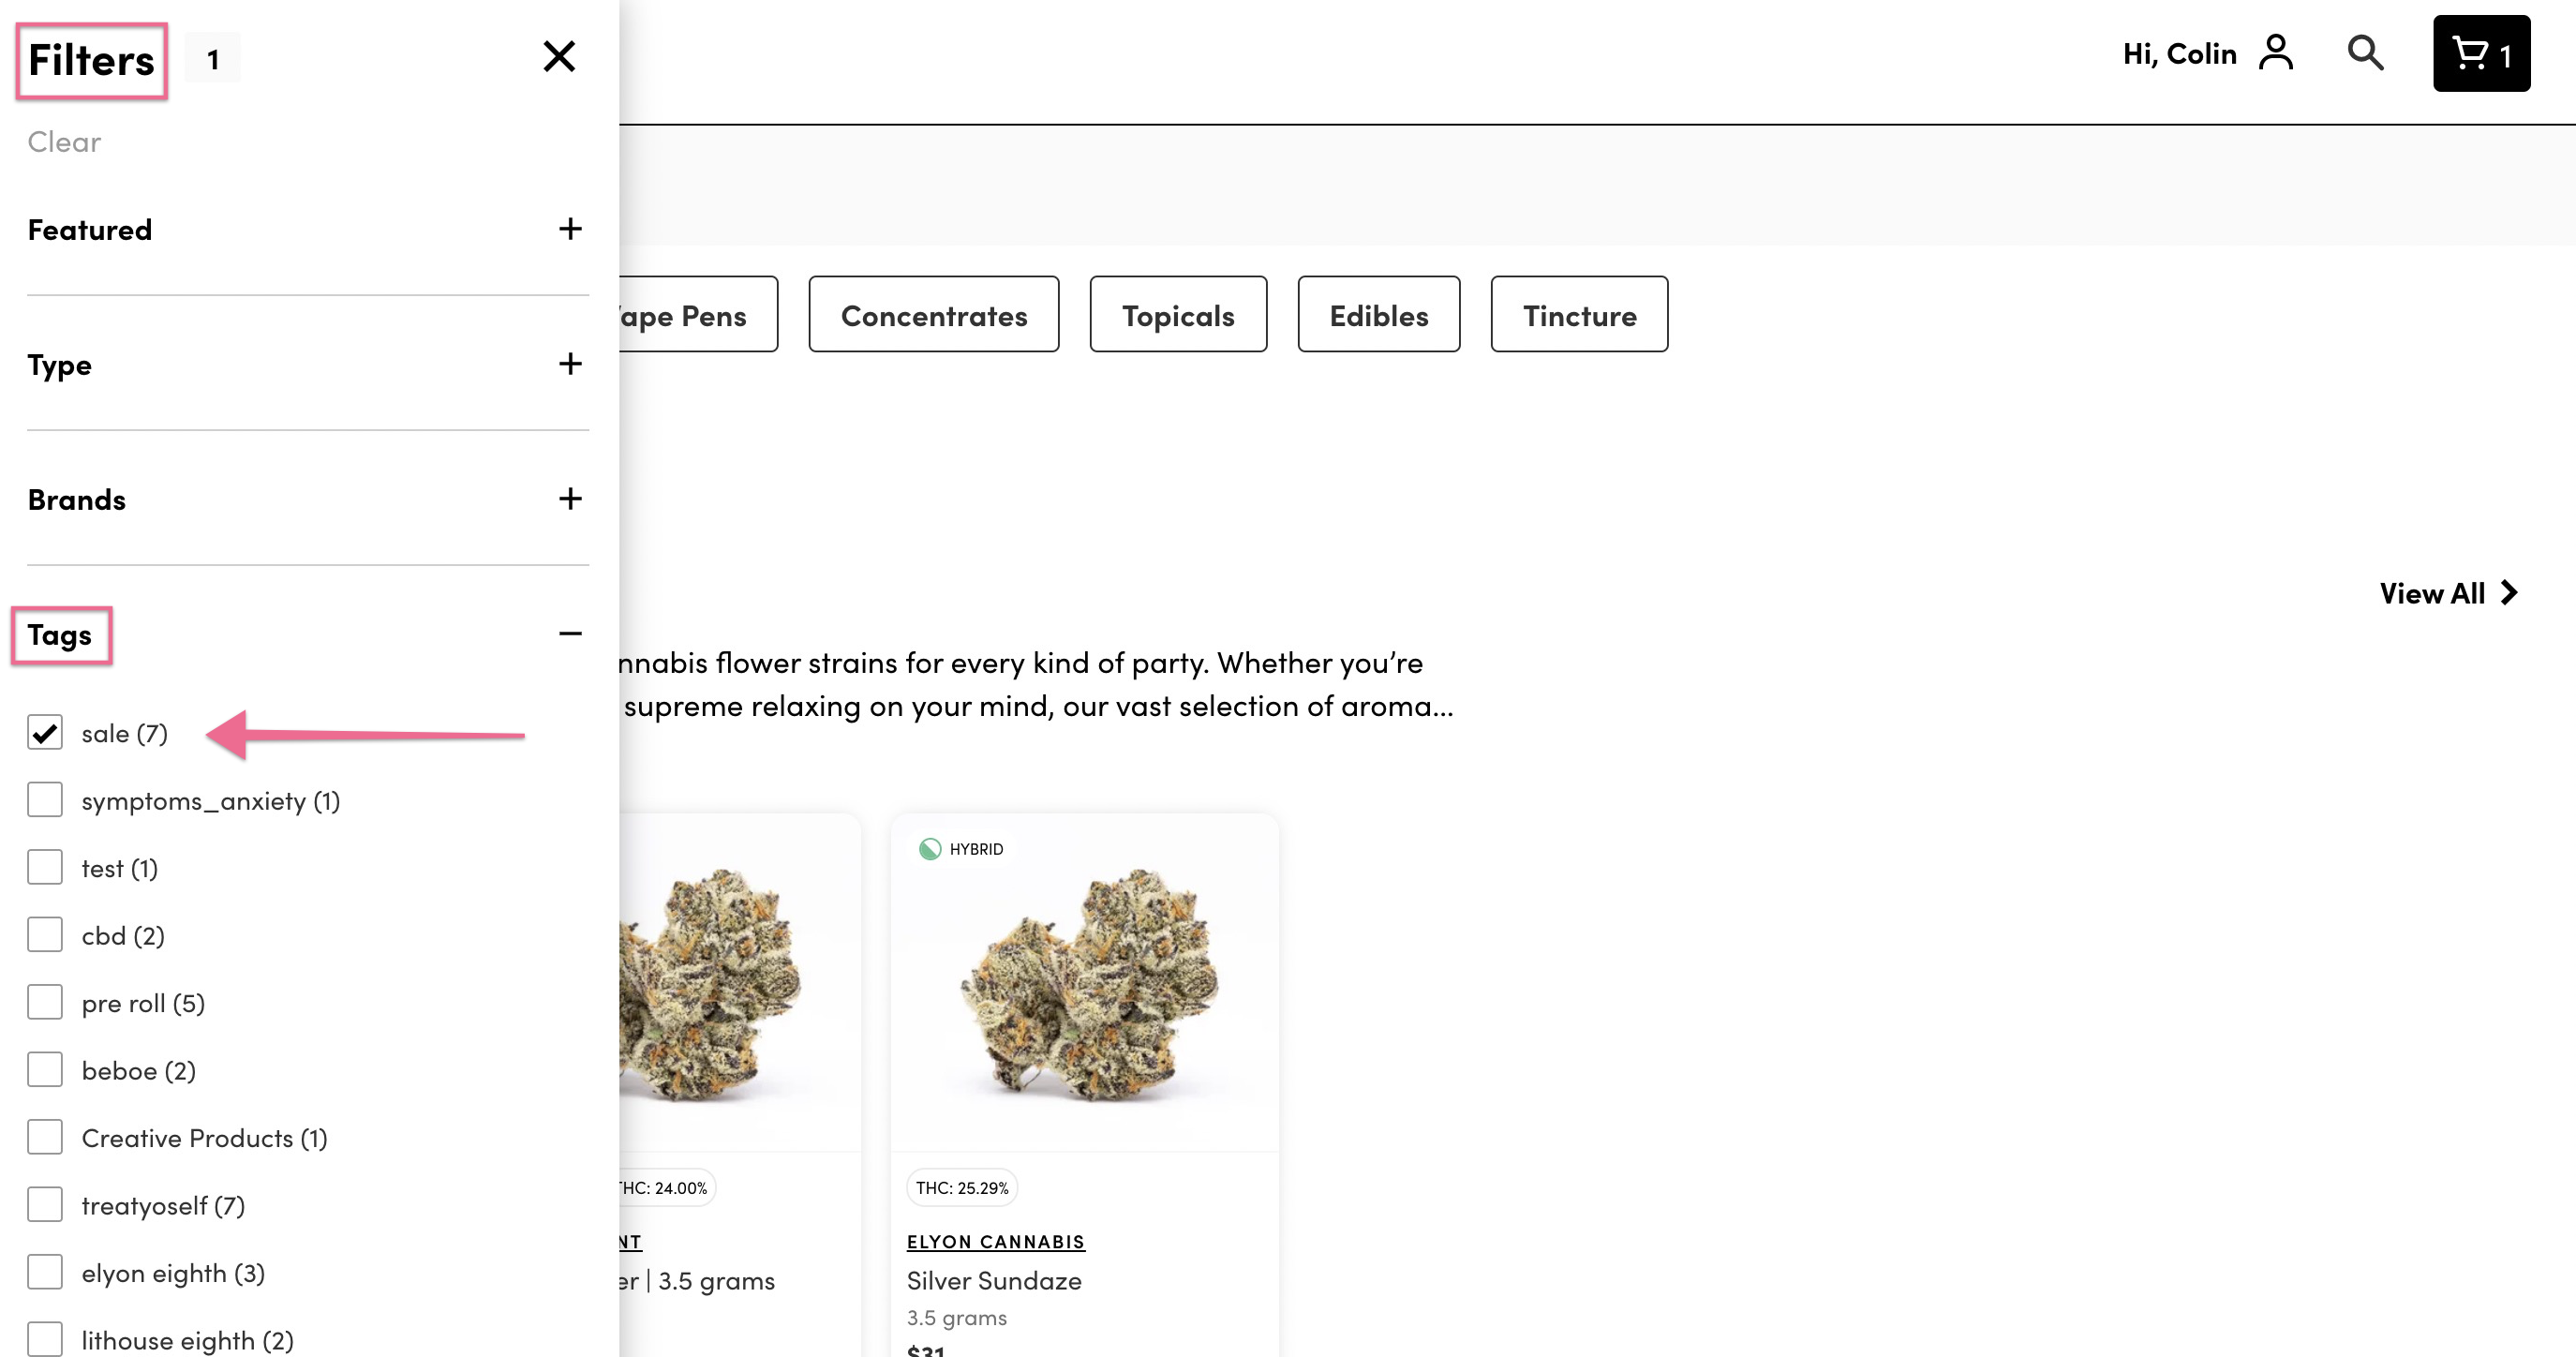
- Tags can be viewed in your store by a customer in the Filters section. Customers can filter by specific tags, so that products associated with specific tags are displayed.
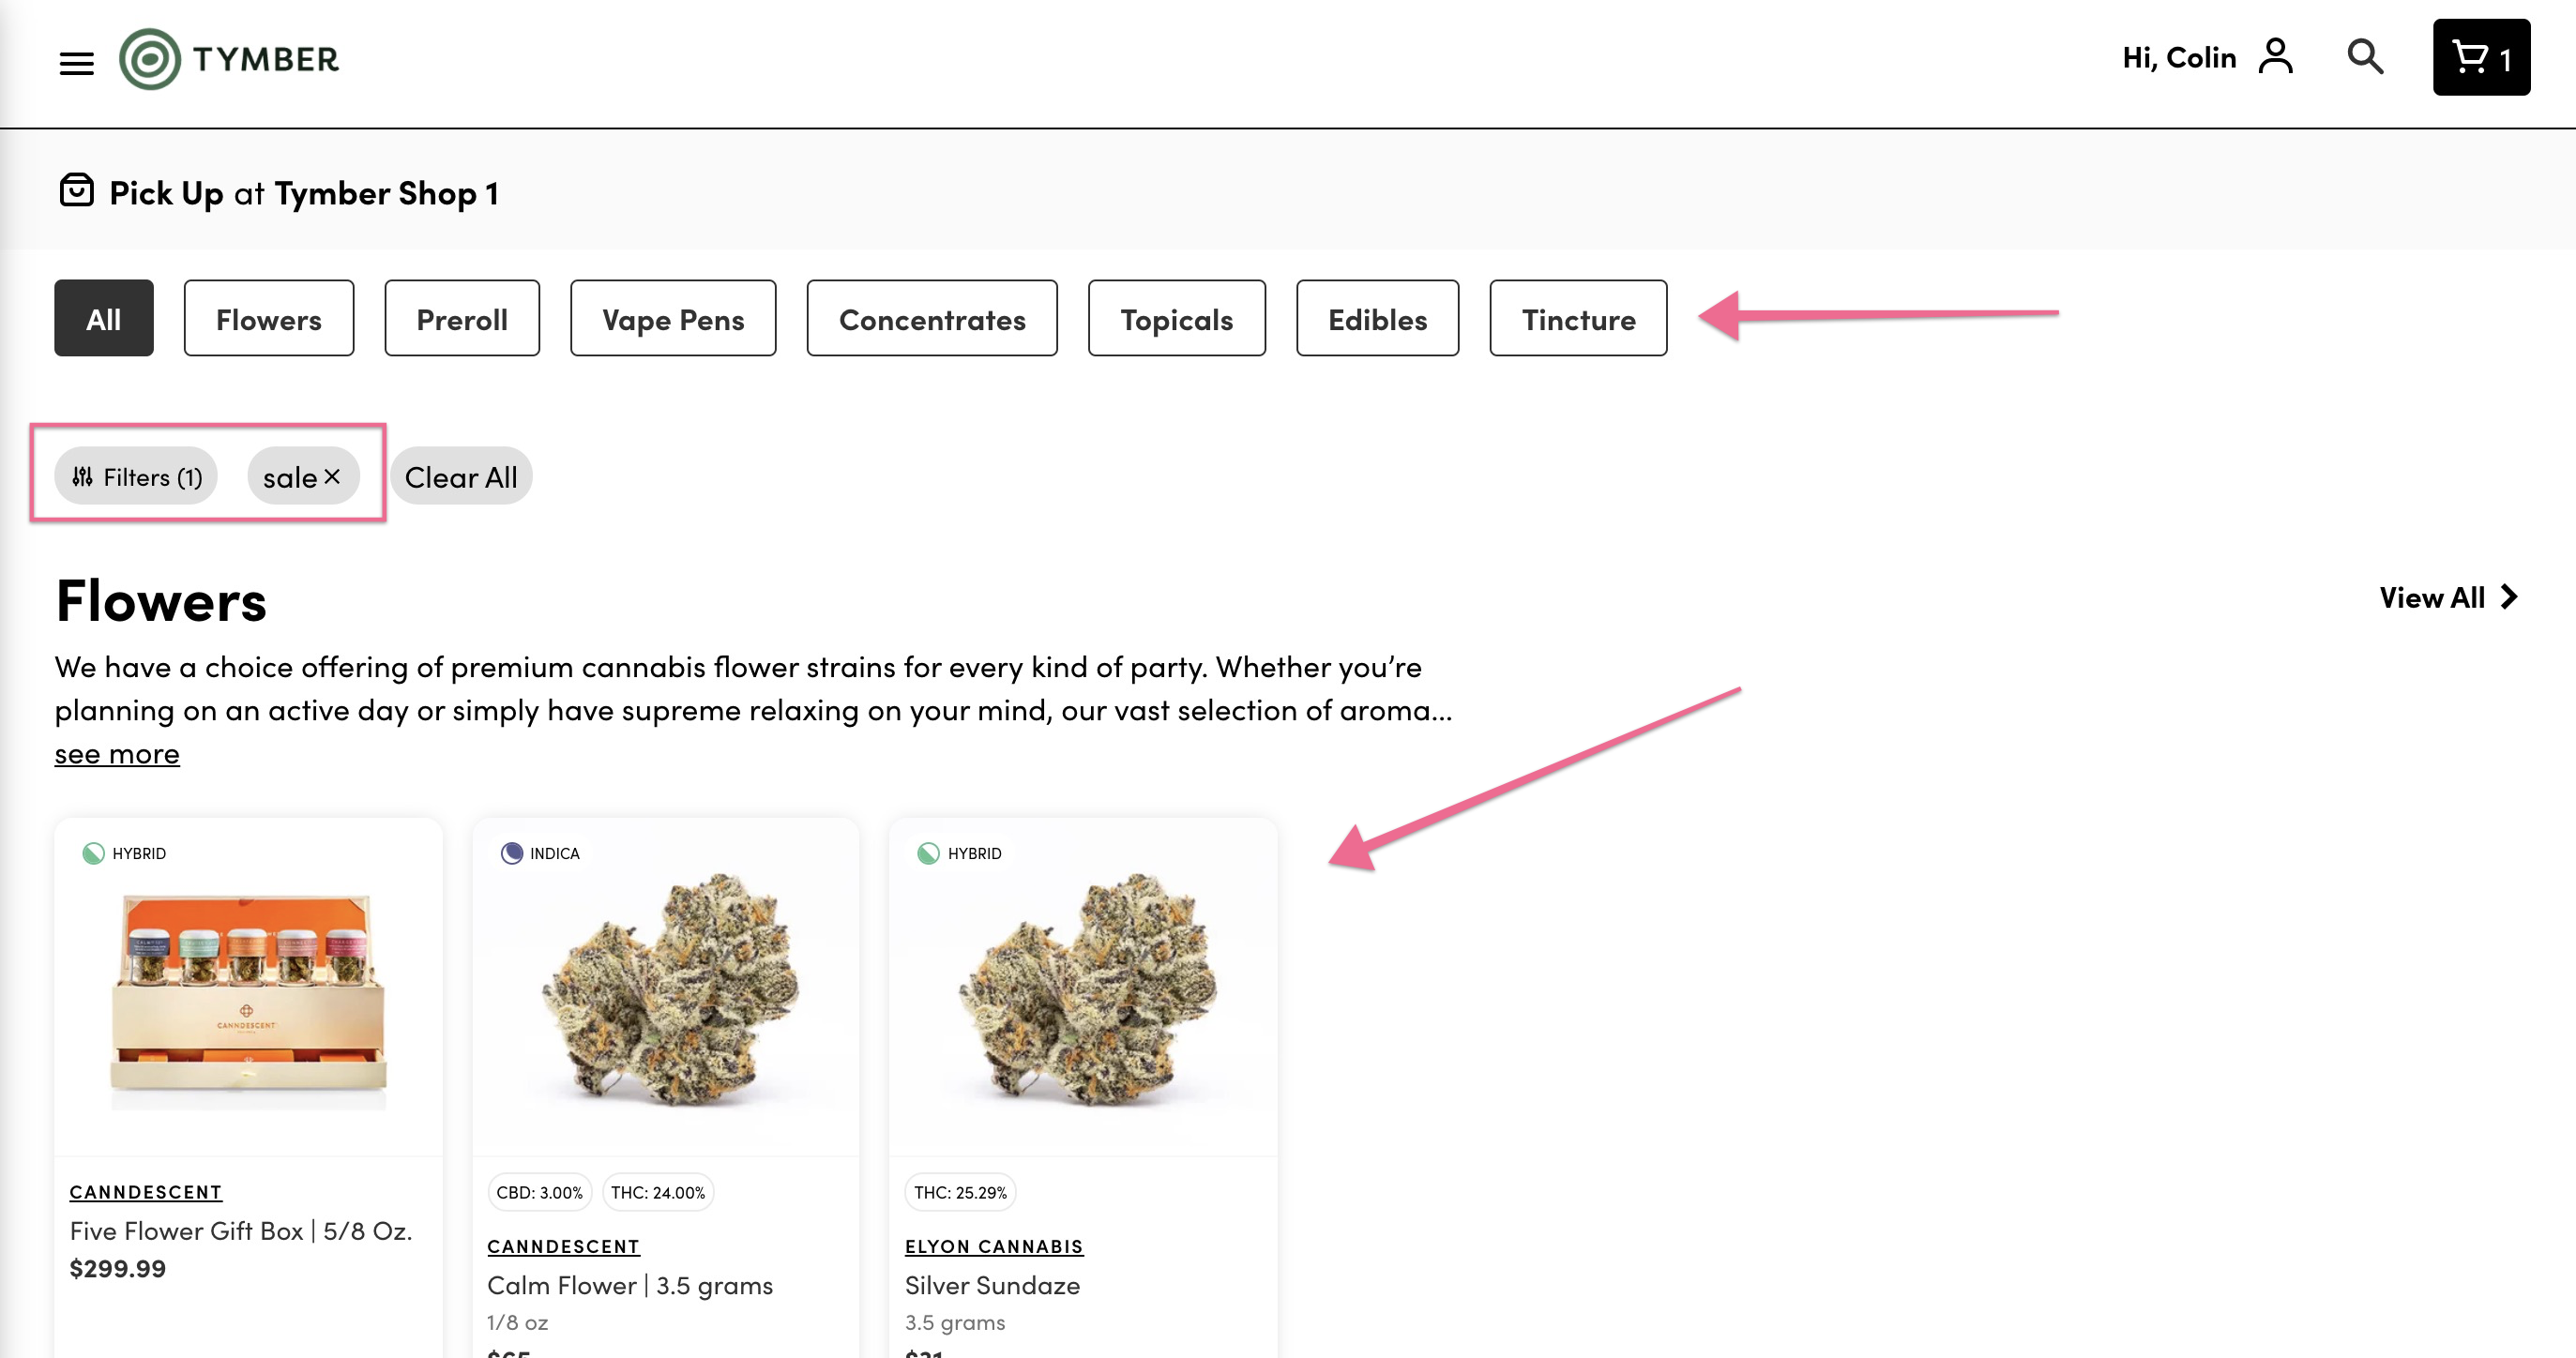
- When a customer filters by a tag in the store, products associated with that tag (or multiple tags) will be displayed by Category. Customers can then scroll through the filtered results or click on a specific Category to view products with the filtered tag associated.
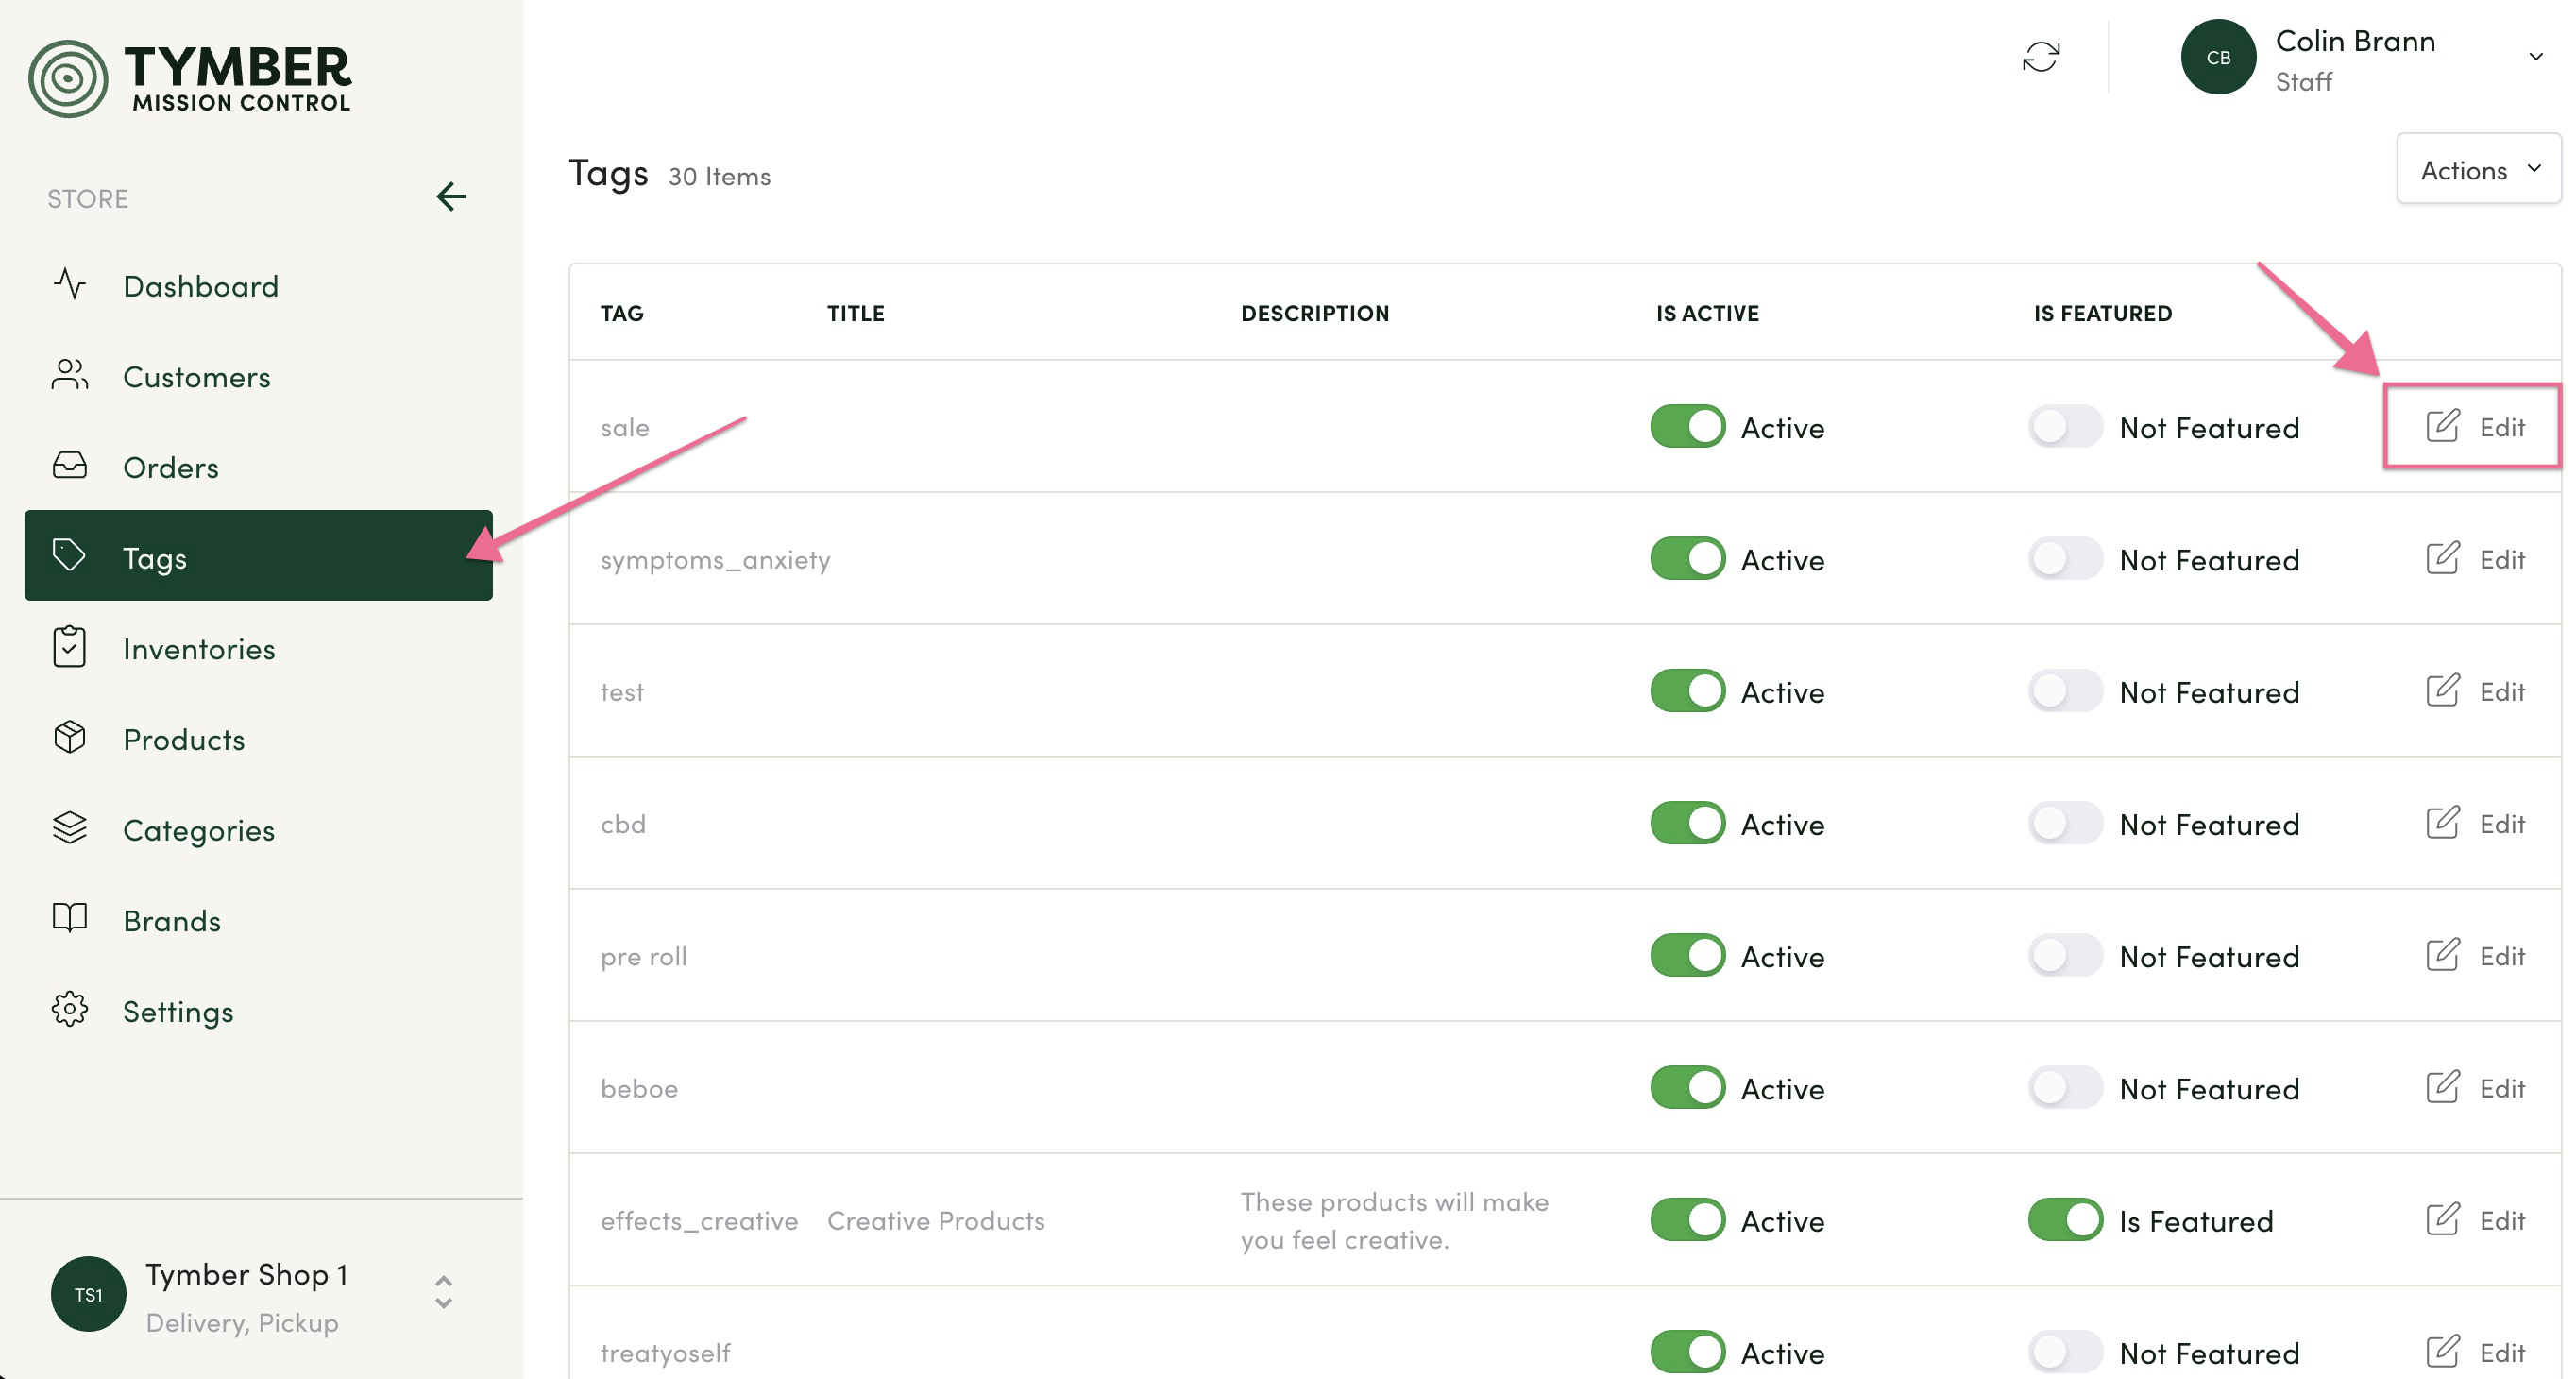
- To make edits to the tags, login to your Tymber Mission Control at admin.tymber.io
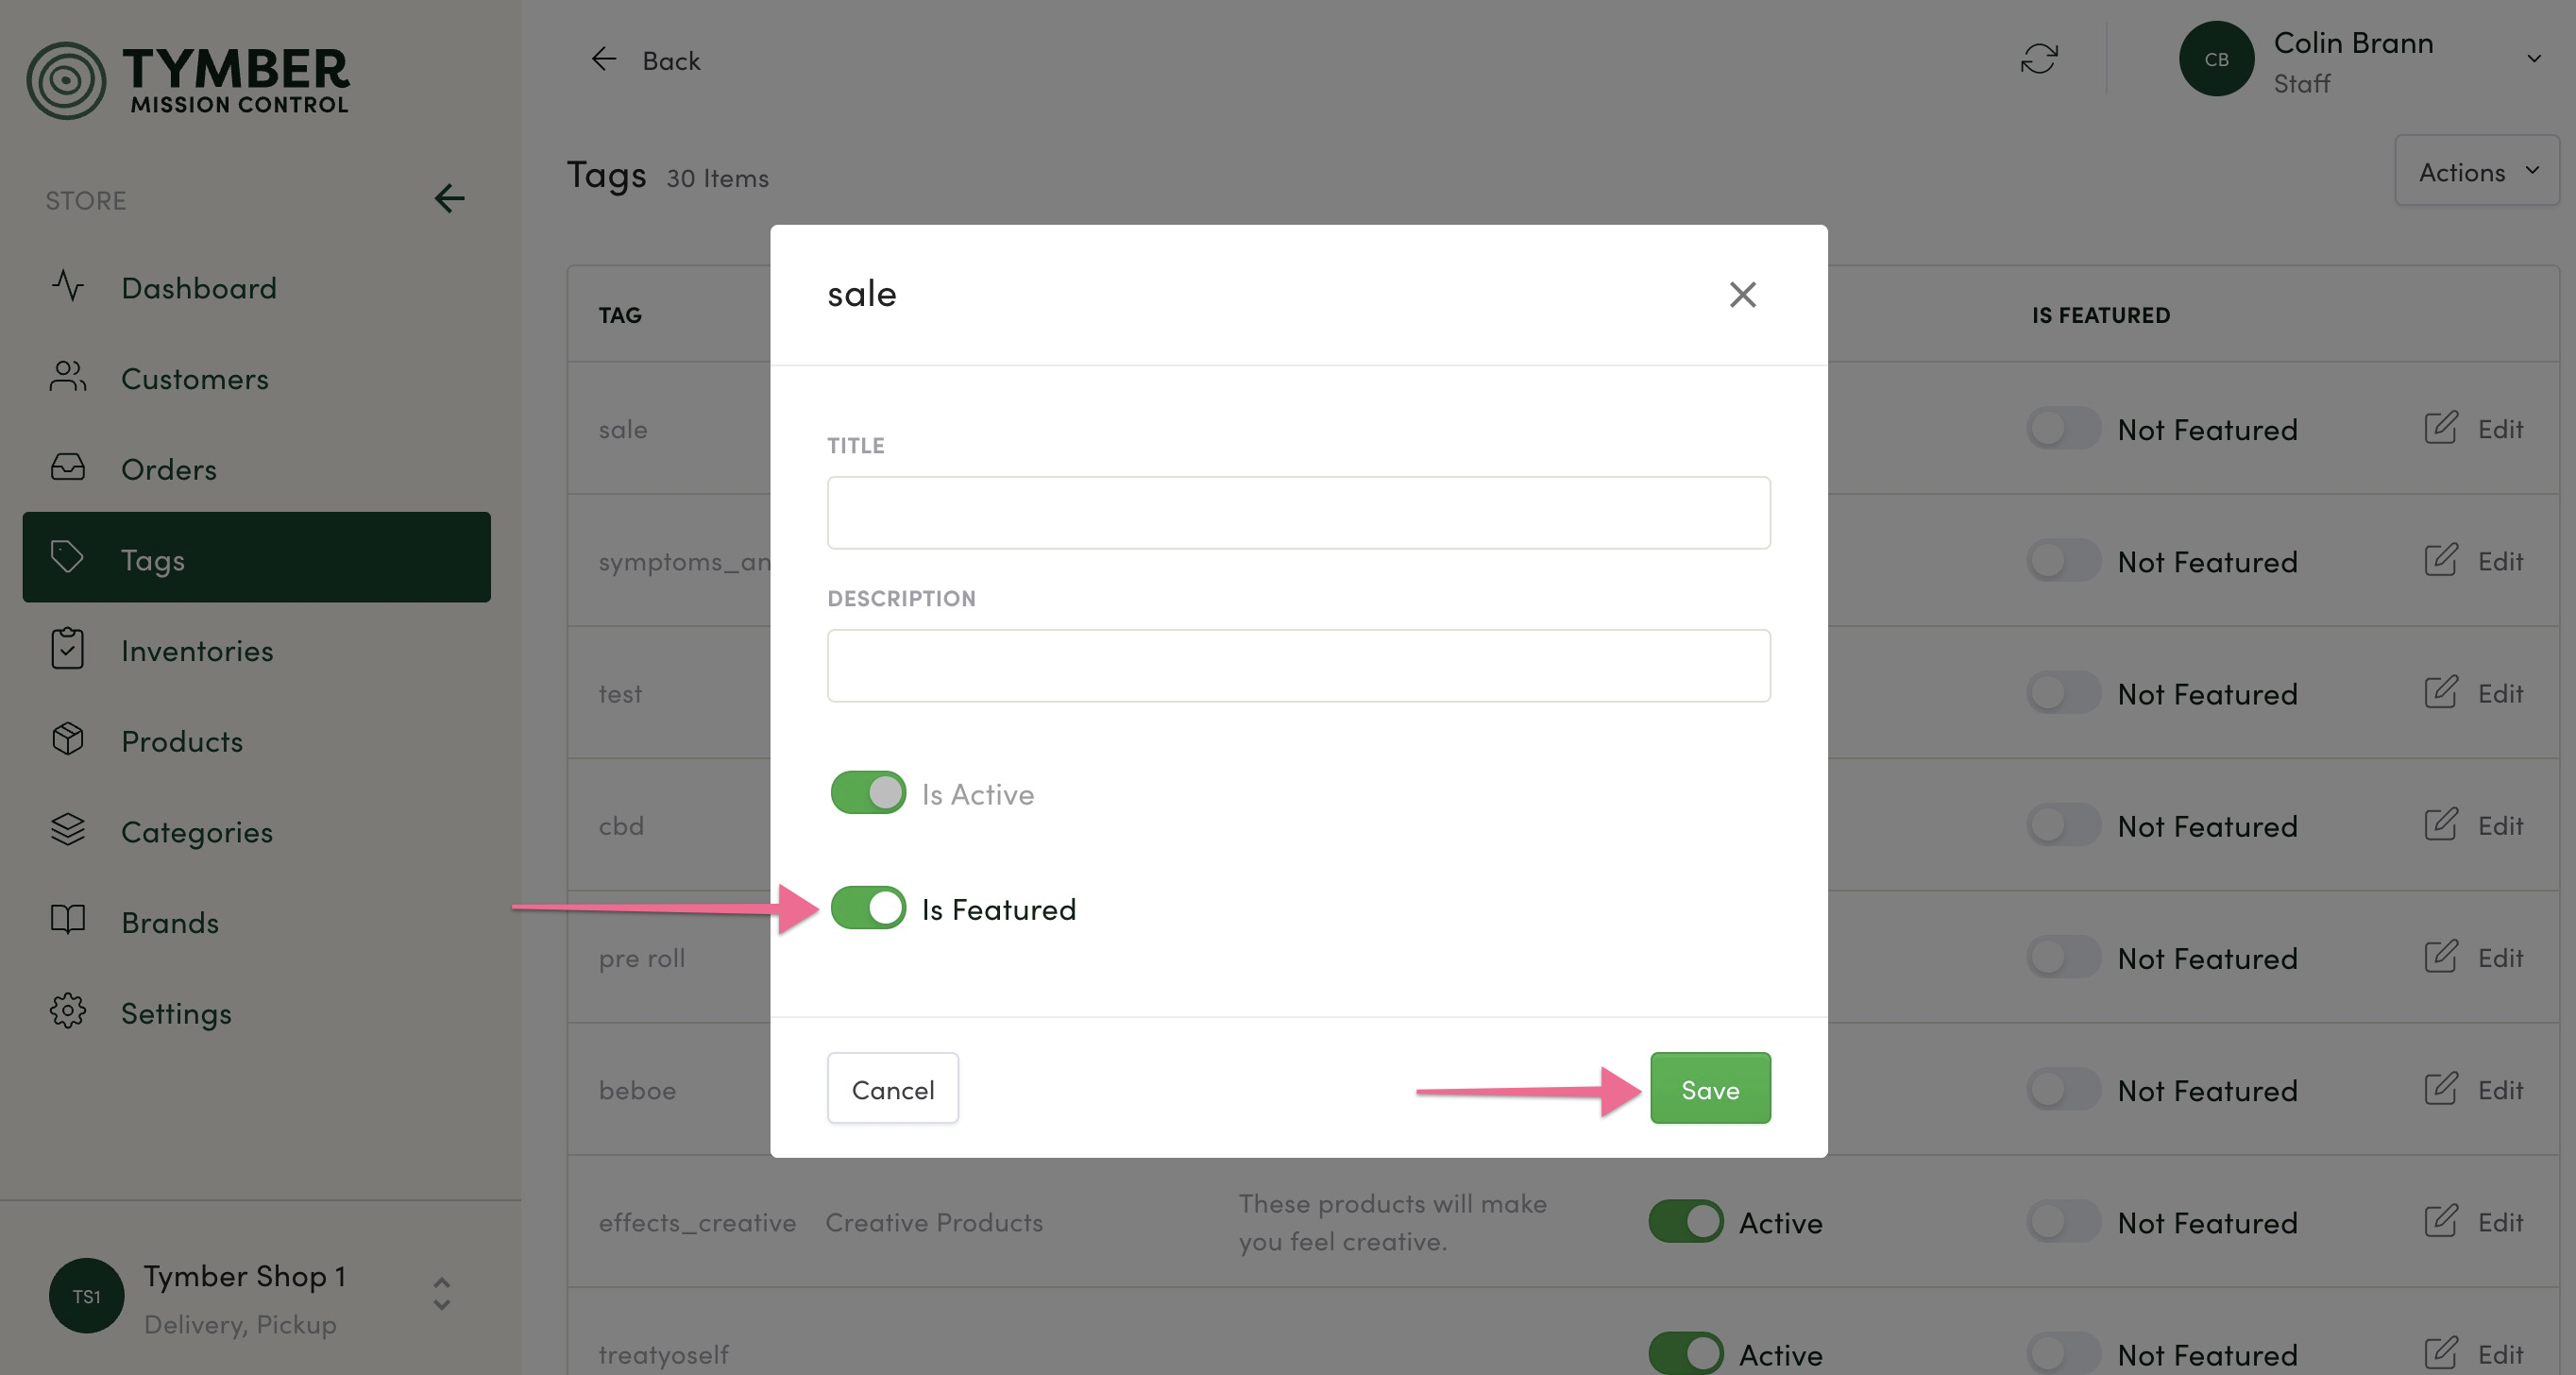
- Click on the Tags tab to view tags that have been created and synced from the POS. Tag Titles and Descriptions can be edited and toggled between Is Featured/Not Featured by clicking on the Edit button to the right of the tag row.
- We have another detailed knowledge base article that explains how to edit and use tags to create a featured section in your store. This goes into more detail about the Is Featured/Not Featured option.
- To make the product associated with the Inactive tag searchable again, the tag would need to be removed from the product in the POS.
- Edit the Title and Description text and click the Save button. This text will now display in the store as a Category when the tag is set to Active and Is Featured.
The Title will also replace the name of the tag on the Filter section shown in Step 2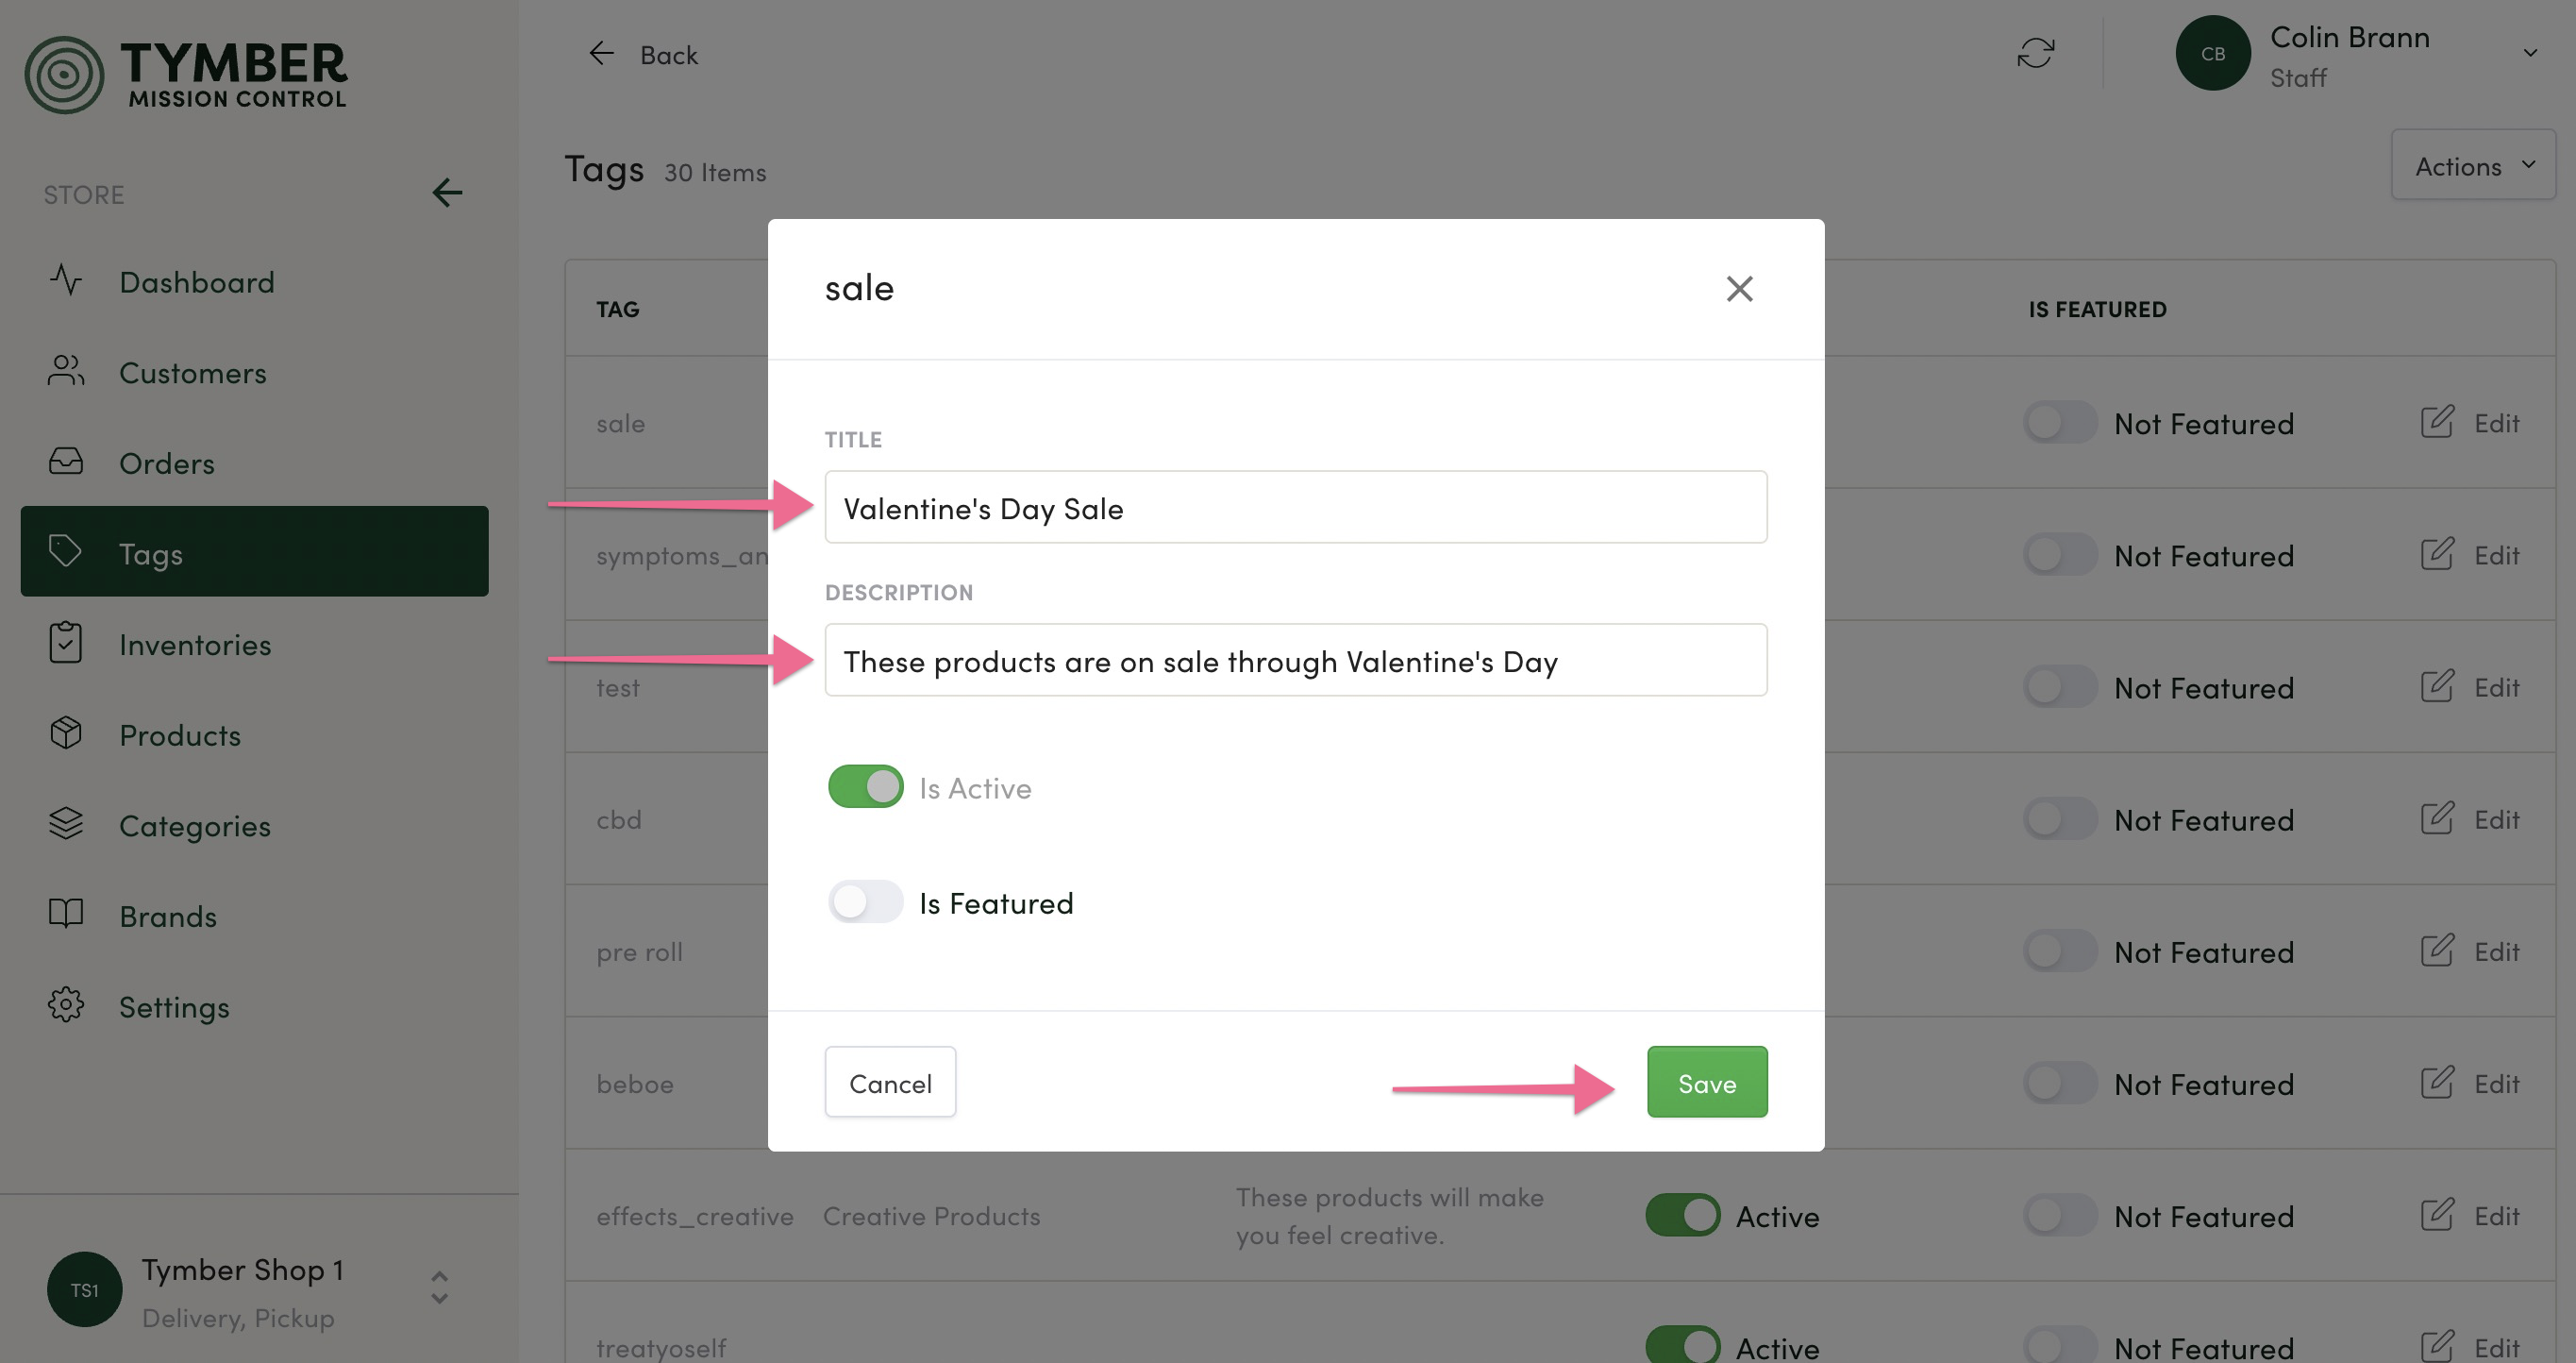
- Click the Not Featured/Is Featured toggle to switch between those options, then click the Save Button.
- Still unsure about the Active/Inactive and Is Featured/Not Featured options? Don't worry! As mentioned earlier, we cover these in more detail in this knowledge base article.

