Note: Upon launching your app, we will connect the app integrations in your Mission Control. The tracking link and smart banners will be enabled by default.
You can enable of disable any of these tools through your Mission Control portal.
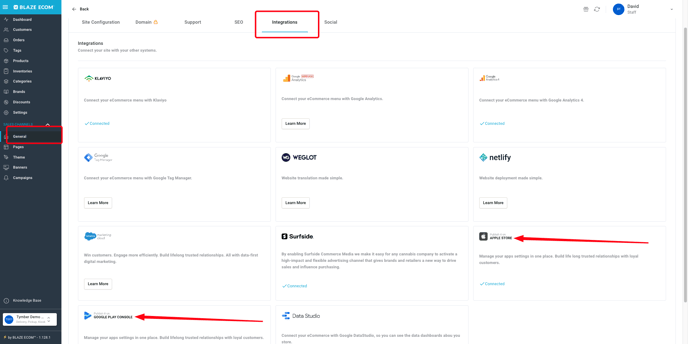
Part 1: Find Your Integration Pages
Within Mission Control, go to General > Integrations to find Apple and Google app integrations
Part 2: Access Integration Settings
Once you click on an app store integration, navigate to the Settings tab.
You will have a different settings page for your Apple and Google apps, however each one will have the same options. Enable unique settings for each app.

Part 3: Settings Defined
You can see there are 4 settings to enable or disable. 3 of the 4 settings are promotional tools that direct customers shopping on mobile devices to download your app.


1) Show Smart Banner: Enables a banner at the top of the screen when users are browsing your menu in Safari on their mobile device (enabled by default).
- Only works with Safari browser and iOS app
- Will prompt user to download the app if they don't have it or open the app if they do have it

2) Promote Mobile App in Menu: Creates a mobile landing page that promotes your app. Users will land on this when going to your ecom site on a mobile device. There are 2 options to enable.
- "Optional": Gives mobile users the choice to press a link to download the app or press "continue to the website" (shown in screenshot below)
- "Required": Mobile users are not given the option to continue to the website and must download the app to proceed to your menu

3) Promote Mobile App in Checkout Success (Mobile): Adds a "Track your order in the app" link to the order confirmation screen on mobile browsers (enabled by default).
- Users are taken to the app page in the App Store when they click on the prompt

4) Promote Mobile App in Checkout Success (Kiosk): Shows a QR code on the kiosk order confirmation screens (enabled by default)
- Customers can scan the QR code to download the app