Steps to add a new Vehicle:
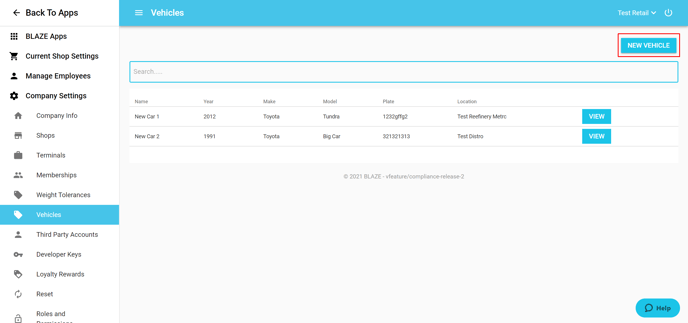
1. Selecting the "New Vehicle" button in the top right corner of the page will allow you to create a new vehicle for your driver.
2. After the "New Vehicle" button is selected you will be required to enter the data for the vehicle we are adding.
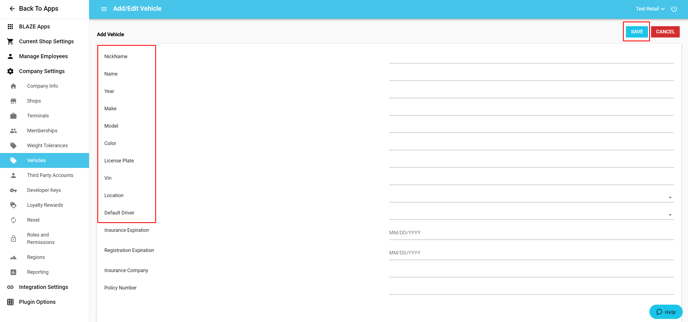
3. Once the data is entered into the fields the save button will need to be selected in the top right-hand corner of the screen.
Required Vehicle Information:
- ID - Created when the vehicle is added.
- Internal ID - Created when the vehicle is added.
- NickName - Shop nickname for the vehicle.
- Name - Shop name for the vehicle.
- Year - The year the vehicle was made.
- Make - The Brand of the Car. (Ex. Ford, Kia, BMW, etc.)
- Model - Model of the vehicle from the brand. (Ex. if you drive a Ford Fusion, Fusion would be the model of the vehicle.)
- Color - Color of the vehicle.
- License Plate - License plate of the Vehicle.
- Vin - Must contain 17 digits or an error will be present.
- Location - Shop that the vehicle will be associated with.
- Default Driver - The name of the employee that will be driving the vehicle.
Optional Vehicle information:
- Insurance Expiration - Expiration of Insurance.
- Registration Expiration - Expiration of the Registration.
- Insurance Company - The company associated with the Policy Number.
- Policy Number - Policy number for insurance.
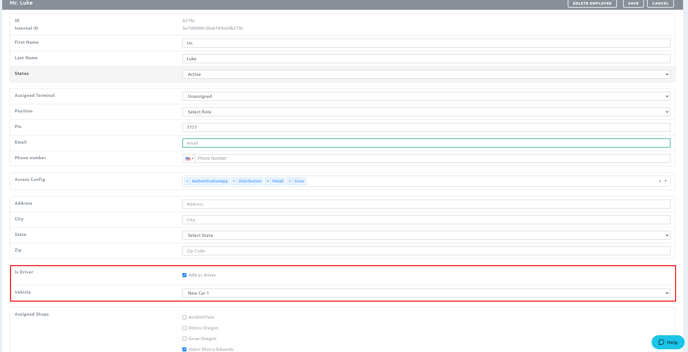
4. After the vehicle is created you are then able to link the vehicle through their employee profile