New Order
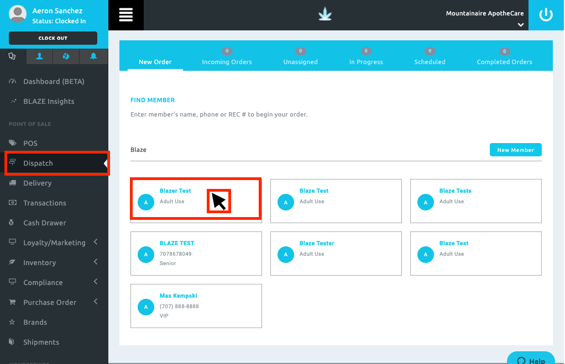
To create an order, navigate to Dispatch and either Find Member or create a New Member.
- Select the existing member by clicking into the Member box.
Note: Clicking on the Member's name will take you to the Member Profile.
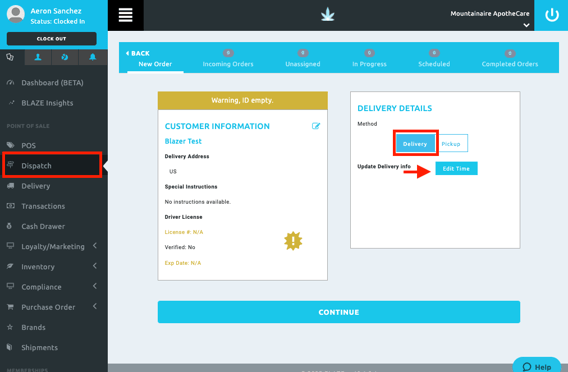
The Delivery Details Method defaults to Delivery.
- You are able to set up a delivery window by clicking on the Edit Time button.
- Click Continue.
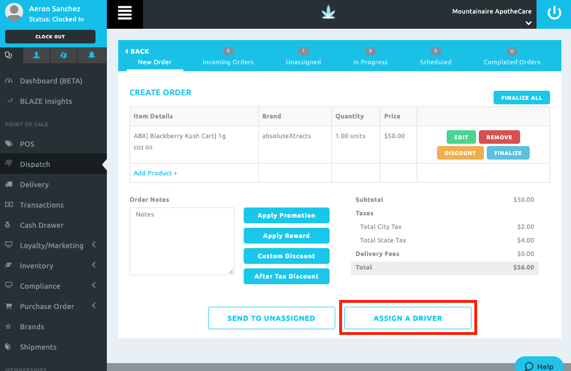
After your order is completely entered, click Assign A Driver.
Note: Click here to skip to the Re-route Driver window.
Existing Order
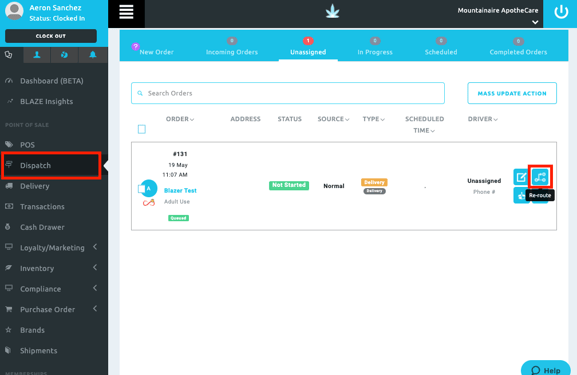
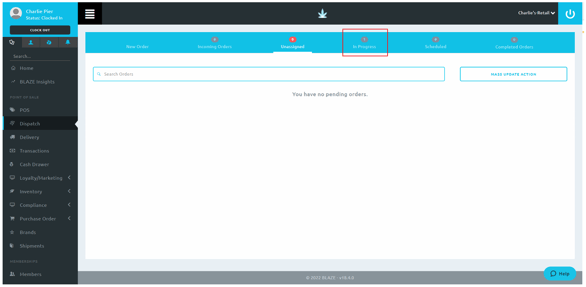
You are also able to Re-Route existing orders in Dispatch while in the Unassigned, In Progress, and Scheduled queues. 
On the right side of the order, you have 4 square icon options.
1. Edit: Will take you to the Cart Order
2. Re-route: This will allow you to assign or re-assign the Order/Task
3. Packed By: Allows you to see or assign who packed the order.
4. The 3 Dot Icon
- Send to Onfleet: Allows you to assign to Onfleet if the options are enabled
- Delivery Address: Allows you to update the Delivery Address
- Update Scheduled Time: Allows you to set the Delivery Time parameters
- Update Tracking Status: This allows you to update the Status of the order
- Claim: Allows you to claim the order
- Mark as Paid: Allows you to mark the transaction as PAID
- Lock Transaction: Allows you to lock the transaction
- Add/Edit Tags: Allows you to Add and/or Edit tags
- Print Receipt: Allows you to print the receipt
- Print Delivery Manifest: Allows you to print the Delivery Manifest
- Print Transaction: Allows you to print the Transaction
- Print Labels: Print labels by going to Inventory in the Main Menu and to Print Labels
- Remove from Queue: Allows you to remove from the queue
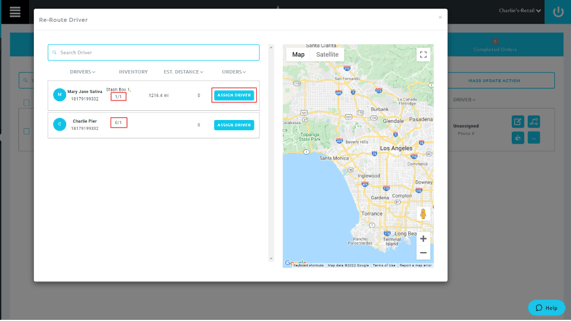
Click Re-route
In the Re-Route Driver window, there is a Drivers column that lists all drivers that are signed in.
Under Inventory, you see the 1/1 and 0/1.
- 1/1 indicates that there is 1 item in this order and 1 item that the driver has in their inventory.
- 0/1 indicates that the driver does not have that product in their inventory
There is also a column for Estimated Distance for the delivery and how many Orders each driver is assigned.
We are going to assign Mary Jane to this order by clicking Assign Driver.
Packing an Order in the shop
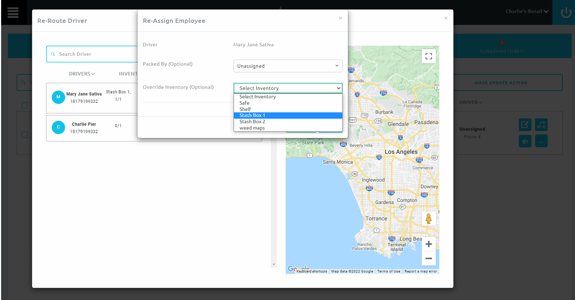
Another window will populate to Re-Assign Employee. You will see the driver's name defaulted.
Packed By (optional) - Packing an Order is the process of getting the ordered products ready to sell and packed into their packaging material in order to deliver to the customer.
- If this is Pizza Delivery Style then you more than likely have someone packing your orders before they leave the shop. If orders get packed in the shop before leaving, select the person who packed the order.
- If this is an Ice Cream Truck model then, you will be packing the orders in the field as the orders come in.
- We are leaving this Unassigned as it will be Packed by the driver in the field.
Override Inventory (optional), Make sure to select the correct inventory this is being sold from.
Once the order is assigned, the order will proceed to In Progress.
Now the driver will be able to see this Order as a Task in the App as well.
To see the Delivery App please view: