.png?width=140&height=37&name=BLAZE-Logo-Blue%20(2).png)
Prerequisites
- BLAZE Web Dashboard (Global Settings access)
- BLAZEPAY (BPay) CATM Payment Terminal / Card Reader
- Wi-Fi Network supporting 2.4 GHz connection
- Merchant Key (issued by your BLAZE Onboarding Representative)
- Terminal Credential IDs
Connecting the Payment Terminals to Wi-Fi
- Ensure your network supports a 2.4 GHz connection for terminal functionality.
- On the terminal keypad, select the white button in the top right, then select Admin Mode.
- Enter the password 123456A to access the Admin menu functions.
- Scroll to Tetra Admin.
- Select 3-Configure Wi-Fi.
- Select 1-Scan Networks.
- Select your network from the list and enter the network password.
- Verify that the Wi-Fi icon displays solid green, indicating a stable connection.
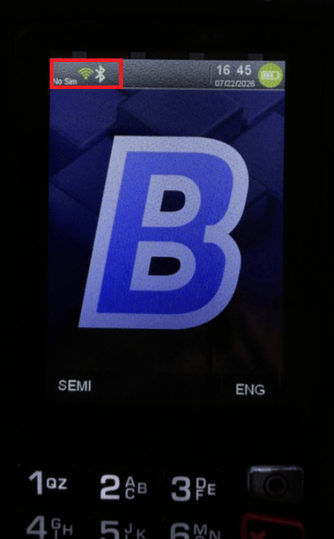
NOTE: The Admin menu password (123456A) is case-sensitive.
Connecting the Payment Terminals in BLAZE
- Log in to the BLAZE Web Dashboard and navigate to Global Settings.
- Under Current Shop Settings, select the Payments tab.
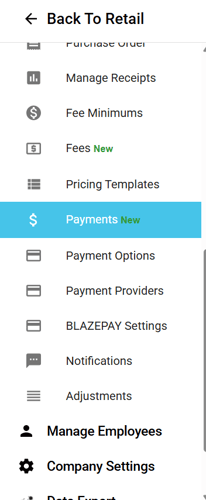
- Locate BLAZEPAY Cashless ATM (Make sure to select the correct BPCATM option if you have any questions reach out to support@Blaze.me) and click CONNECT.
- In the pop-up window, paste your Merchant Key into the available field.
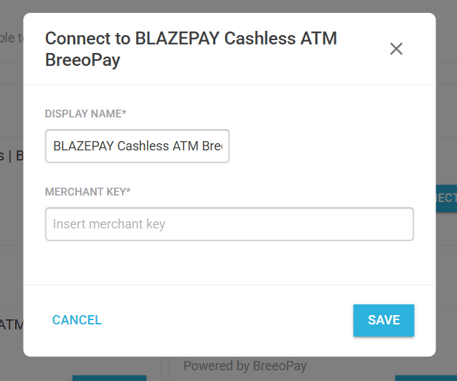
- Click SAVE. A "Payment Service Updated" notification confirms a valid Merchant Key integration.
- Click the gear icon next to the integration settings.
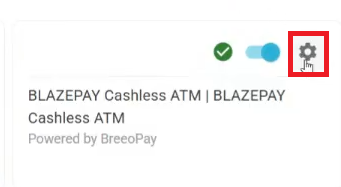
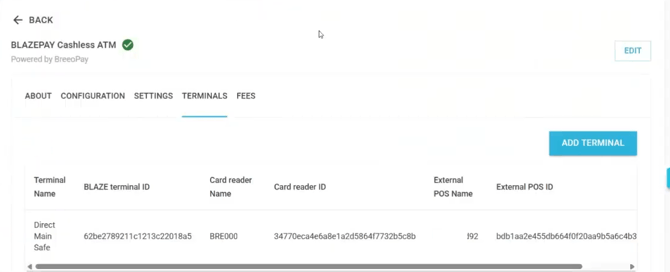
- Select the Terminal tab to begin mapping payment terminals to cash drawers.
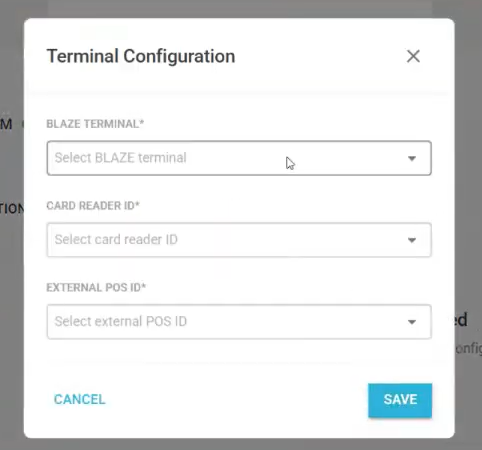
- In the Terminal Configuration window, select the appropriate Cash Drawer, enter the corresponding Terminal Credential IDs, and click SAVE.
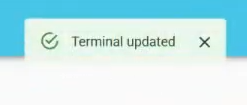
- A "Terminal Updated" notification will appear to confirm a successful connection between the payment terminal and the BLAZE Cash Drawer.
NOTE: Your Merchant Key will be provided by your assigned BLAZE Onboarding Representative.
Adding a CATM Fee in Blaze
The primary processing fee is set by the payment processor and automatically applied on the terminal during standard transactions. However, adding this fee in BLAZE settings is required to ensure accurate calculations during manual transaction entries.
- Navigate to the Fees section under Payments (NEW) settings.
- Click ADD FEE.
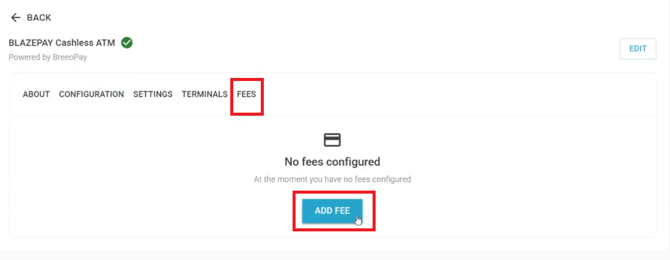
- In the Fee Configuration window, enter the processing fee in the Fee Amount field.
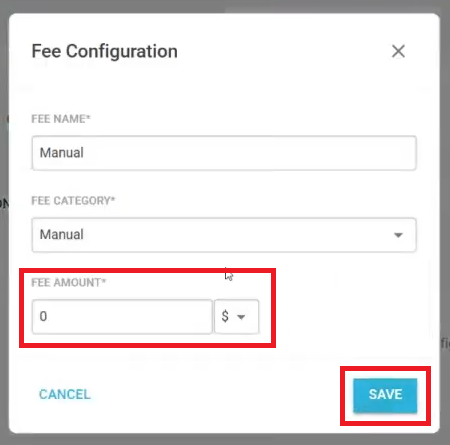
- Click SAVE.
TIP: If you do not know your exact processing fee, your BLAZE Onboarding Representative can confirm the amount with the payment processor, or you can process a test transaction to verify the fee on the receipt summary.
Once completed, your payment terminals are fully configured and ready to process integrated BLAZEPAY CATM transactions.
Related Articles:
Retail | Manual BLAZEPAY Cashless ATM
Retail | BLAZEPAY Cashless ATM In-store Workflow
Retail | BLAZEPAY Cashless ATM Deposit and Sales Reconciliation