Prerequisites
-
App: BLAZE Web Dashboard
-
Requirement: You must first accept and receive the incoming transfer manifest directly within your Metrc account. Once received in Metrc, the manifest will sync to BLAZE.
- Note: Products in Metrc measured in pounds (LBs) are not officially supported nor recommended in BLAZE.
Navigation
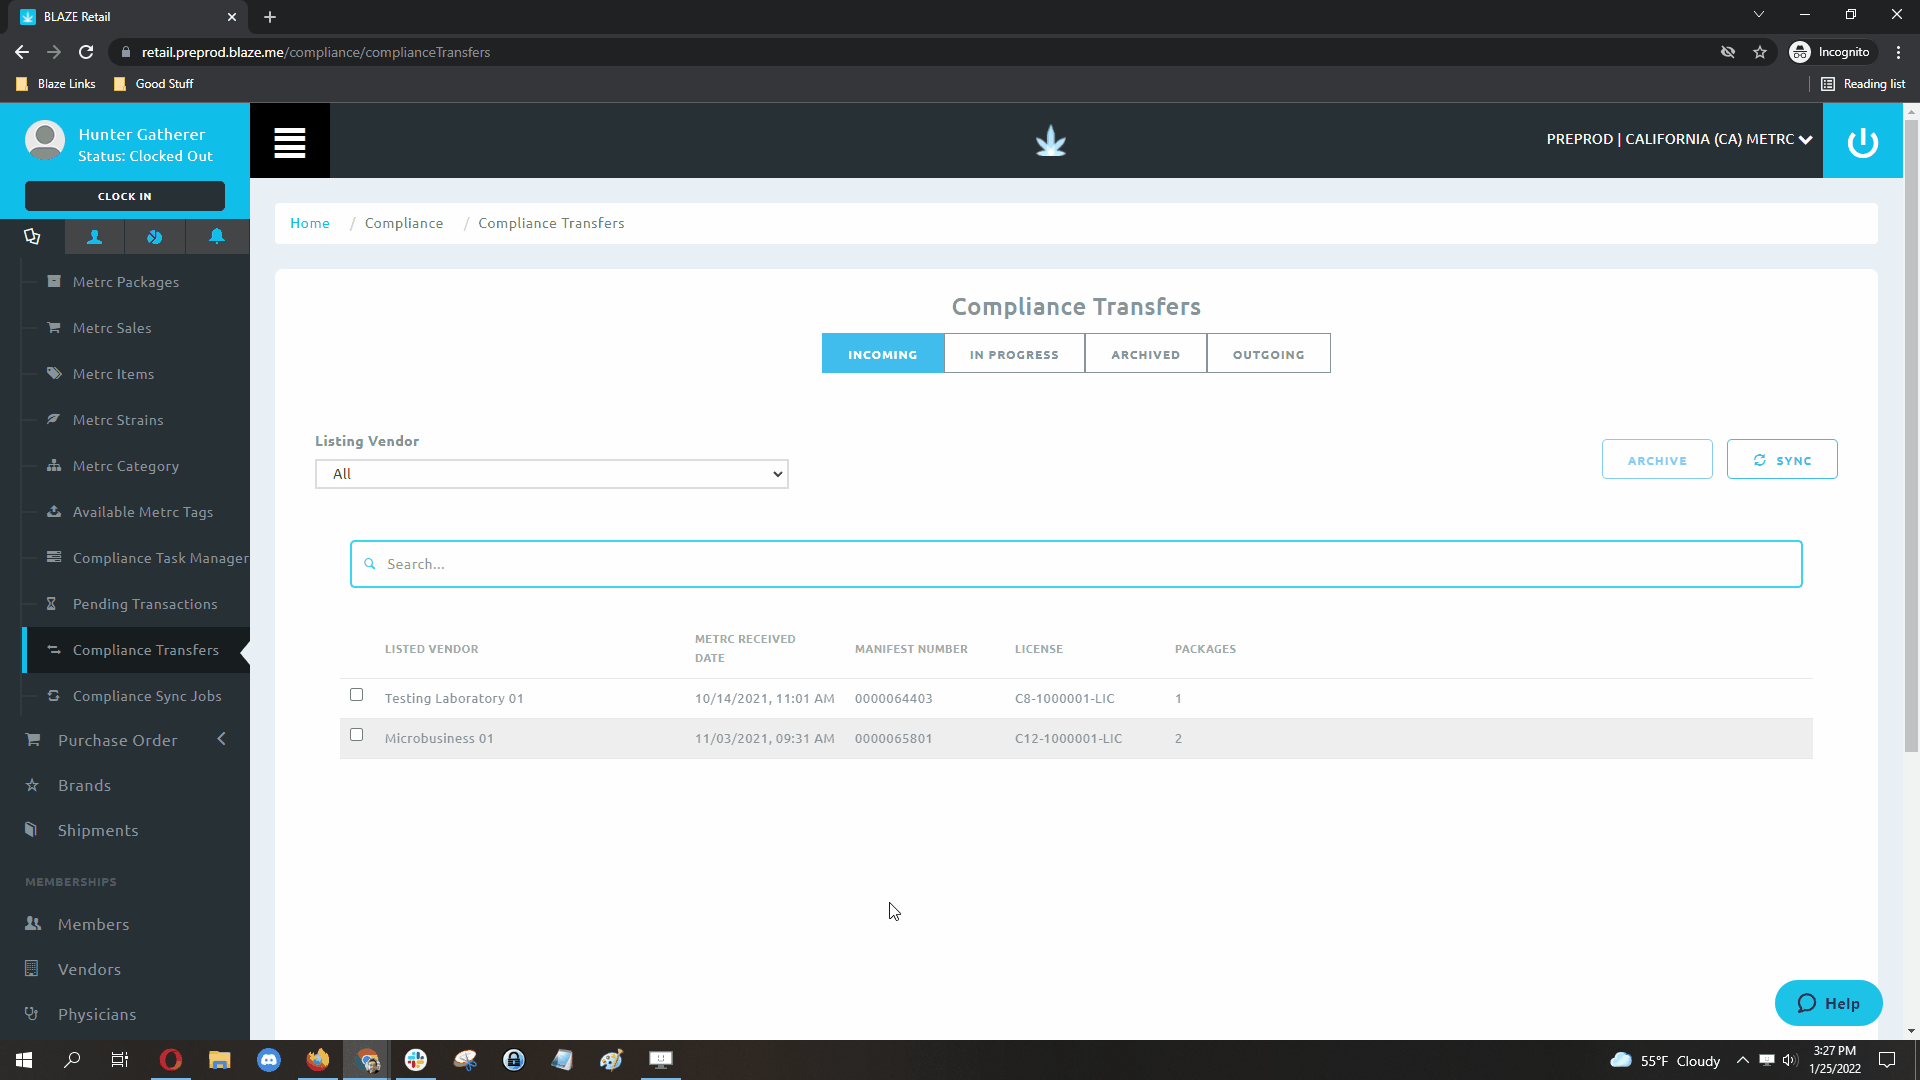
Retail Web > Compliance > Compliance Transfers

Creating a Purchase Order from a Manifest
Creating a Purchase Order Manually
Archive Purchase Orders
Troubleshooting
Appendix
-
Choose Your Method
Depending on your workflow, there are two primary ways to receive a compliance transfer:
- Creating a PO from a Manifest (Recommended): Use this standard method when a Metrc transfer has successfully synced to BLAZE and you want to automatically pull package data into your intake workflow.
- Creating a PO Manually: Use this method if you need to bypass manifest selection or if you are intaking items that do not have a synced manifest.
-
Method 1: Creating a Purchase Order from a Manifest
1. Log into BLAZE using your email and password.
2. Navigate to the Compliance section on the left-hand menu, then select Compliance Transfers.
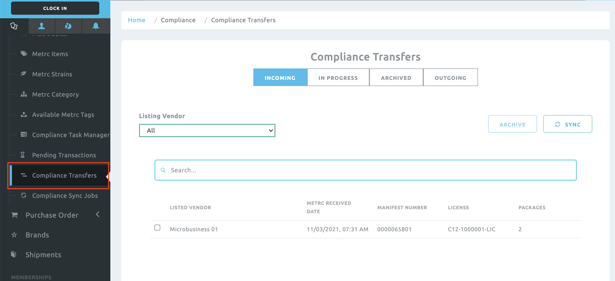
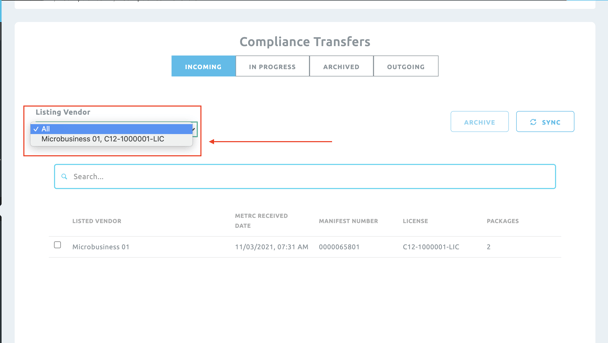
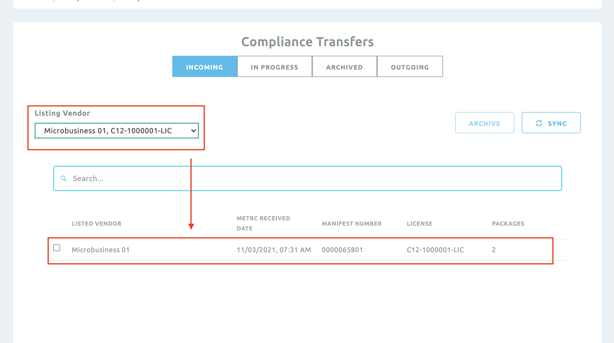
3. Using the LISTING VENDOR dropdown filter, select the vendor/manifest you would like to accept.
4. After filtering, click the vendor/manifest line item to view the associated packages.
5. Select the packages you wish to receive by checking the corresponding box, then click Create PO.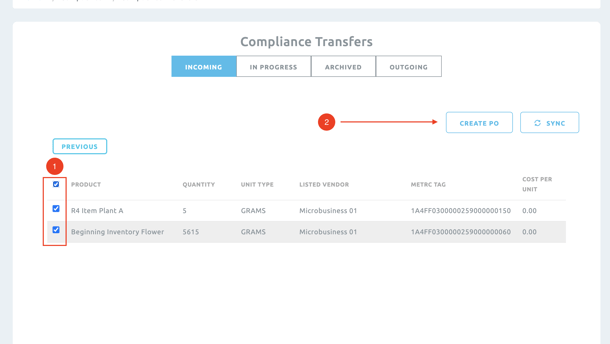
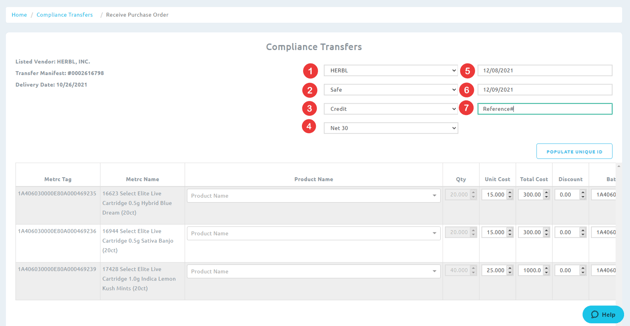
6. Enter all applicable information associated with this vendor/manifest to create the PO:
| Field | Description |
| Vendor | Name of the vendor the items are purchased from. |
| Inventory | The inventory location the items will be added to upon intake. |
| Payment Options | Form of payment used. |
| Terms | Payment terms of the purchase order. |
| Purchase Date | Date the product was purchased. |
| Delivery Date | Date the product was delivered. |
| Reference # | Internal purchase order reference number. |
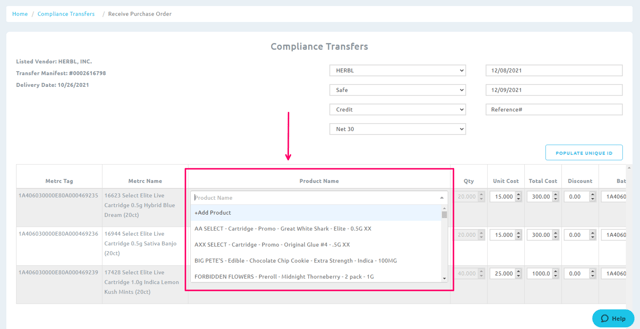
7. Associate the cannabis products in BLAZE to the items being received from Metrc by clicking the Product Name dropdown and selecting the corresponding BLAZE product per line.
NOTE: ONLY cannabis products associated with a Cannabis category will be available to associate with Metrc packages.
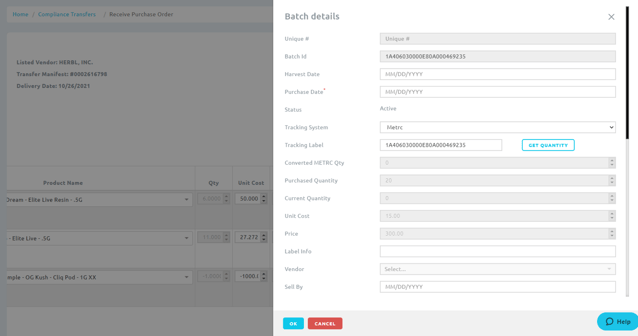
8. Edit Batch Details - After selecting the Product Name to associate your product, you can edit the batch details by clicking the icon on the far right of each line item.
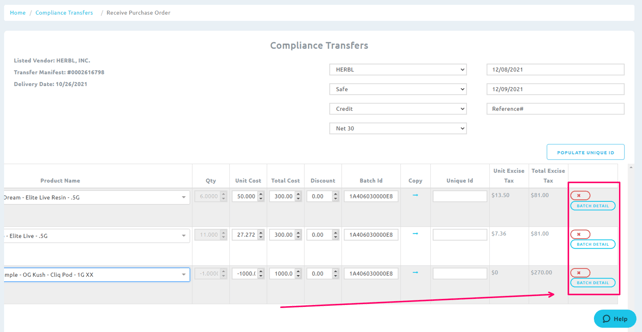
This will open the batch profile. Add or edit the batch information, then click OK to save.
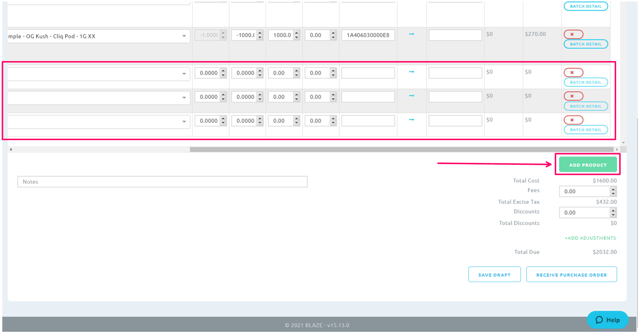
9.(Optional) To add non-cannabis products to the PO, click the Add Product button. 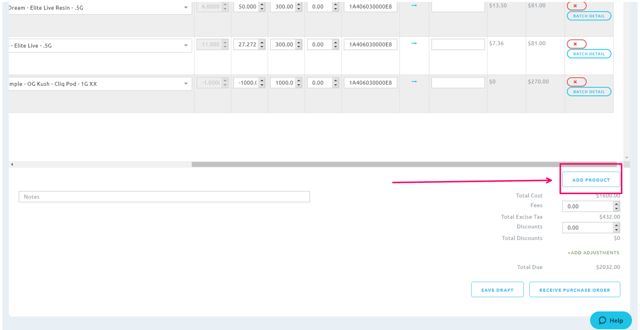
You can add multiple lines to enter your non-cannabis products. Added products must be associated with the same Vendor as the PO prior to starting this process.
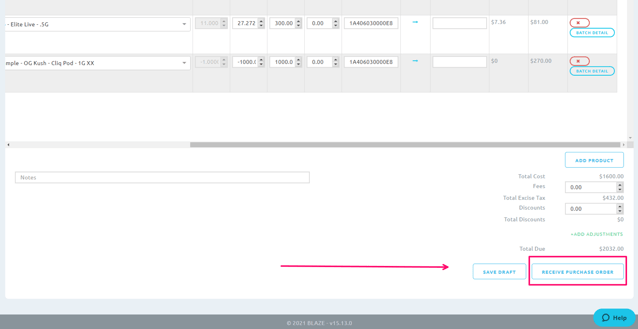
10. To finalize the PO, click Receive Purchase Order in the bottom right corner.
11. Alternatively, you can click Save Draft to revisit the draft later under the In Progress tab.
WARNING: After a PO has been received, no additional changes can be made.
NOTE: After you have successfully created your purchase order, you can navigate to Inventory > Purchase Orders and select the Active POs tab to view it. Creating the PO also automatically generates a shipment bill that allows you to add payments within the Bills tab.
-
Method 2: Creating a Purchase Order Manually
If you need to bypass the manifest selection, you can manually generate a purchase order directly from the Compliance Transfers screen.

-
Click the Create PO button without selecting a manifest or its associated packages.
-
The standard Compliance Transfer UI will populate. You must first select a Vendor from the dropdown menu.

-
Click the Add Product button located in the bottom right corner.
-
Manually add your line items to the PO (because packages were not pre-selected from the previous screen).
-
Complete the remaining PO details and finalize by clicking Receive Purchase Order or Save Draft.
NOTE: Selecting a vendor is required so that the product mapping list can be accurately curated for that specific vendor.
-
Archive Purchase Orders
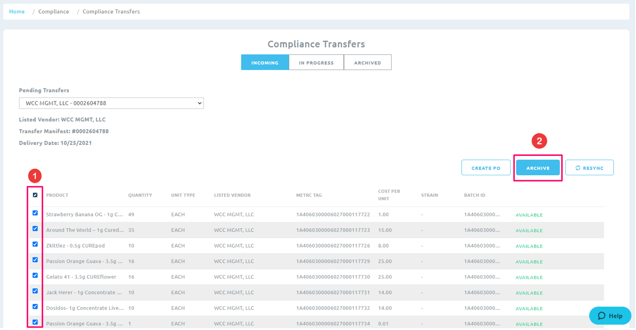
If you need to clear out pending transfers that you do not intend to receive:
-
Select the manifest from the pending transfer dropdown.
-
Check the boxes for the packages you wish to remove.
-
Click Archive. This will move the selected items into the Archive queue and declutter your Incoming tab.
-
Troubleshooting
What if the vendor doesn't appear in the dropdown?
If you cannot find the vendor in the LISTING VENDOR dropdown, ensure that the vendor profile is created and marked as active within your BLAZE system. Navigate to left-hand side bar > Vendors to add or activate the missing vendor.
What if the Metrc transfer isn't syncing to BLAZE?
First, log into your Metrc account and verify that you have fully accepted the incoming transfer manifest. If it is accepted in Metrc but not showing in BLAZE, navigate to Compliance > Compliance Sync Jobs and click Resync to force a manual data pull ro check your compliance settings for corresponding errors.
What if you can't associate a product because no cannabis categories are available?
If your product dropdown is empty, your BLAZE categories are likely not mapped correctly. Navigate to Inventory > Manage Categories and ensure your BLAZE product categories are assigned to their corresponding Metrc Categories. Only products within a mapped cannabis category will be eligible to link to Metrc packages.
-
Appendix: Understanding Compliance Transfer Tabs
When navigating to Compliance > Compliance Transfers, you will see several tabs at the top of the page to help you manage your transfer queues:
| Tab | Description |
| Incoming | Where your active Metrc manifests sync to after being successfully received in Metrc. |
| In Progress | Where your saved drafts are stored so you can resume intaking them at a later time. |
| Archive | A storage location for archived/discarded manifests to keep your active UI decluttered. |
| Outgoing | Shows a log of your outgoing transfers. |