Retail POS App | How to Connect Your Wifi TSP Printer to an iPad
Star TSP100 IIIW Wifi Printer Configuration
Are you setting up a wifi TSP printer to an iPad? This article will go over the printer configuration, connecting the wifi printer to the BLAZE Retail POS app, and printer troubleshooting. Please navigate to the section you wish to learn more about.
Connect the Star TSP100IIIW Wi-Fi printer to your network, assign a static IP Address, and configure it to use with BLAZE POS on your iPad. If setting up for the very first time, this printer will be on its own network and is not connected to the Internet. The first task is to get the printer configured on to your Local Area Network (WLAN).
NOTE: Star Micronics printers will only connect to a 2.4G network.
NOTE: Star Micronics printer model TSP100IIIW can not connect to an iPad via USB.
Two options to connect your TSP100III to your iOS device:
1. Connecting by WPS
2. Connecting by Ad-Hoc using IP Address
Connecting by WPS
WPS (Wi-Fi Protected Setup) is a standard for making easy connections between wireless networking devices. Depending on the manufacturer, the buttons that have been displayed as "AOSS," "Easy wireless start," "JumpStart," etc, may also function as WPS.
- Press and hold the Pair button until the blue LED of the printer blinks (see the diagram below)"the printer's Mac address
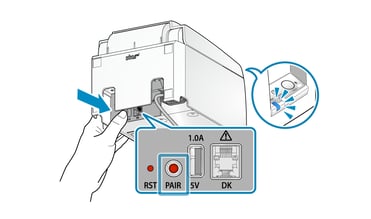
- Press the WPS (or equivalent) button of the router.
-
When the printer connects to the network, the blue LED will stop flashing and become solid blue. The printer will print off its connection information including its IP Address.
-
Your printer is now set up on your network
Connecting by Ad-Hoc using IP address
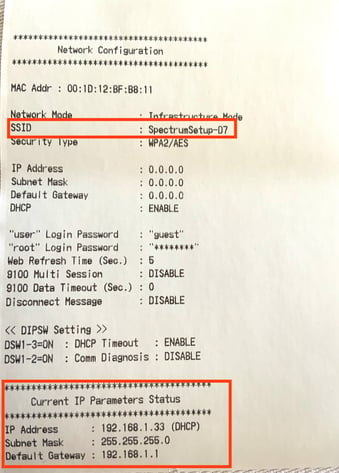
1. The first step is to get the printer's Mac Address. To do this, we need the printer to self print its settings.
- With the printer switched off, hold down the feed button while you switch the printer on.
- It will print out something similar to the image below with the printer's own network (SSID) name listed and the printer's IP Address at the bottom.
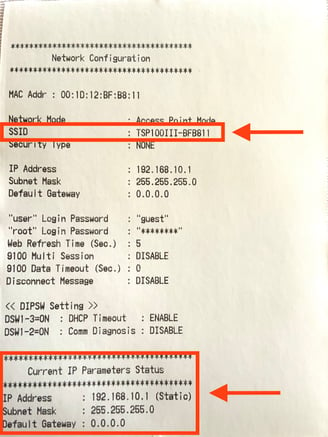
2. Now open the Wifi Settings on your iPad.
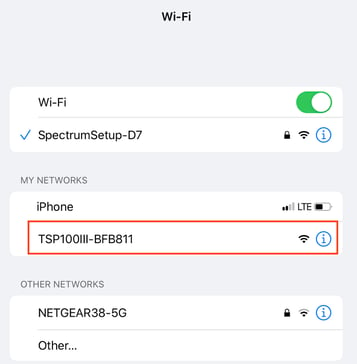
- Among the list of networks, you should see the TSP100III listed with the last six digits of the Mac address beside it (see below).
- Tap on the TSP100III network to join.

- Tap Cancel, it's not necessary to change the password.
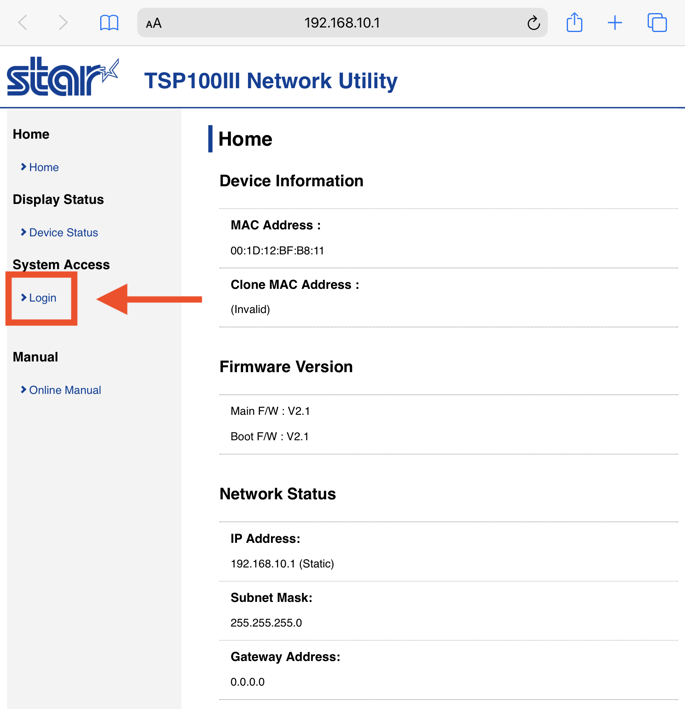
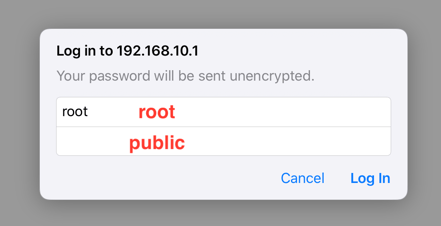
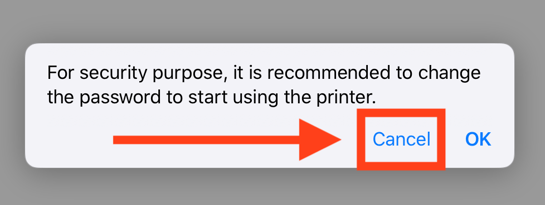
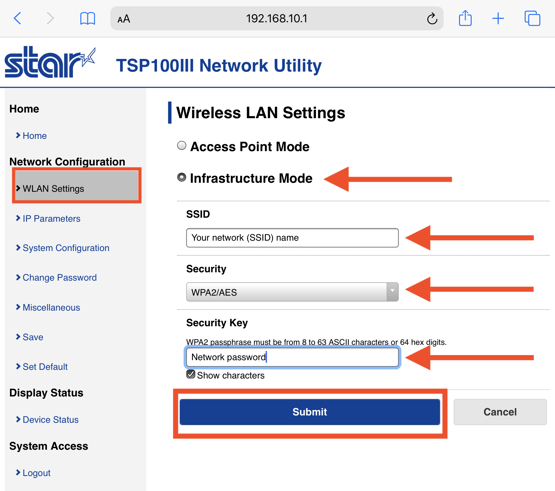
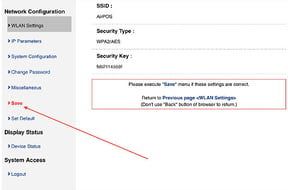
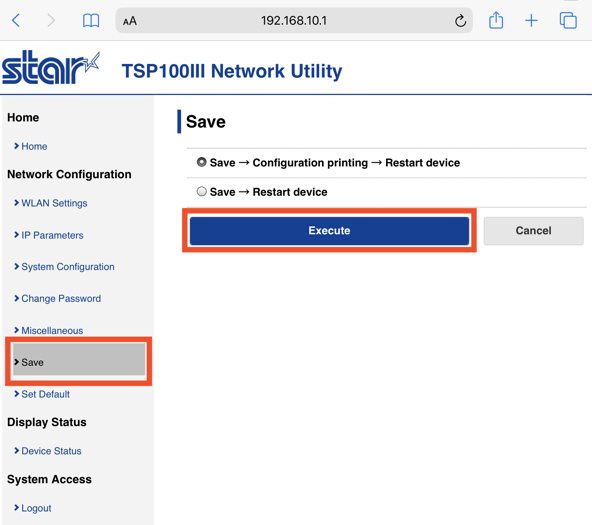
- Your printer is now connected to your network.
- Go to your settings and connect to your network wifi.
Configuring Your Printer on BLAZE POS App
1. Pin into BLAZE Retail POS App.
2. Go to the Settings tab (Gearwheel icon).
3. Tap the Receipt Printer Setup button.
4. The app will search for available printers and show up as the (TSP100III-######).
5. Disable "Persist Connection" if enabled.
6. Select the printer, then test print to ensure configuration.
Contact Star Micronics if the connection is unsuccessful, as well as see other configuration setups below.
Printer Troubleshooting
How to Reset TSP100III Wifi Printer
Reset Instructions for TSP Wifi Printer
Contact Star Micronics Support
If a new router is installed, a reset on the printer will be needed to work on the new network. After resetting, follow the instructions above in the Retail POS App | How to Connect Your Wifi TSP Printer to an iPad.
Star Micronics Support Articles
Wifi: TSP100III W Online Manual
Lan: TSP100III LAN Online Manual
USB: TSP100III USB Hardware Manual
Bluetooth: TSP100III BI Online Manual