In order to print labels from the iPad, using the Brother QL-810W printer, you will need to confirm a few things:
- Confirm your printer and iPad are connected to the same wireless network at your facility
- Here is a short video on how to configure your printer to be connected to your desired network
- Connect the iPad to the same network, through the "Wifi" settings on the device
- Confirm the size of the label you are going to be printing on, in millimeters
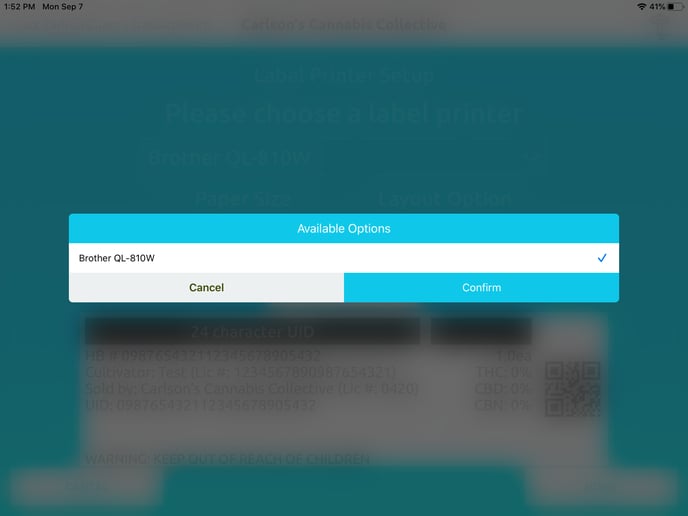
Select the Brother Printer
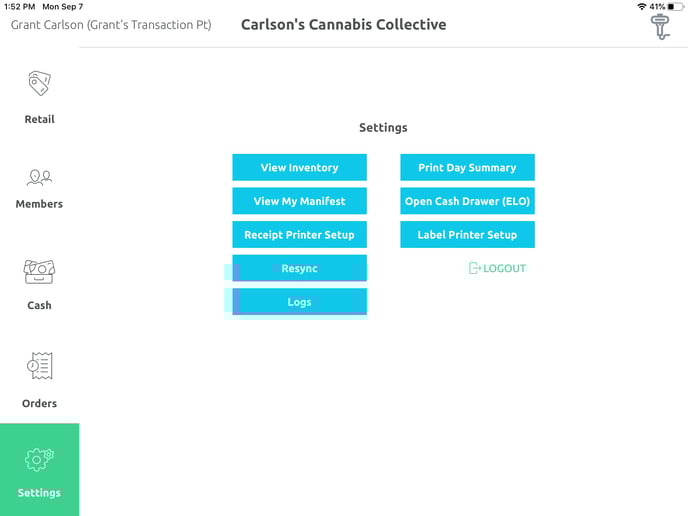
1. After these confirmations, head into the Settings area of the unlocked app, then select the Label Printer Setup from the available options.
2. Once selected, the next page will prompt a search of available printers on the network the iPad is connected to. The Printer will always need to be selected from the top dropdown.
3. Even if there is a printer displayed, you will need to select/confirm the printer from that dropdown.
NOTE: If you do not have any devices available in this window, you will want to ensure that both devices are connected to the same network.
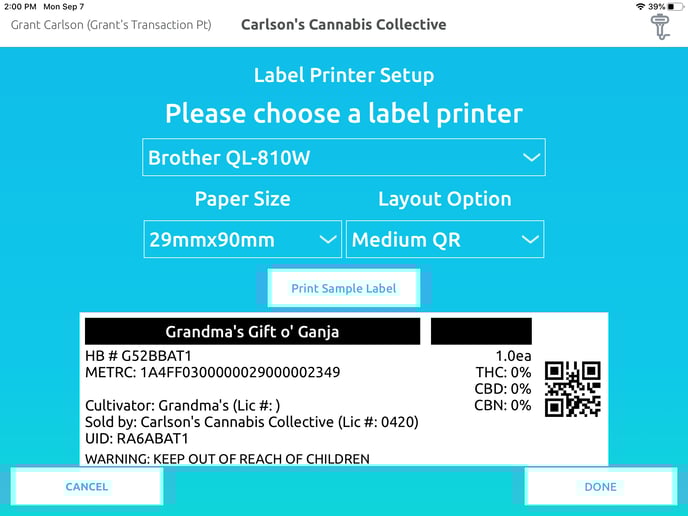
4. After your printer is selected, the next step is to select your paper size and layout.
NOTE: If the incorrect paper size is selected, the printer will NOT print when prompted. Select the "Print Sample Label" to allow for a quick confirmation.
NOTE: The layout is less important and just depends on the information you want to have displayed on the label (photo examples are being developed).
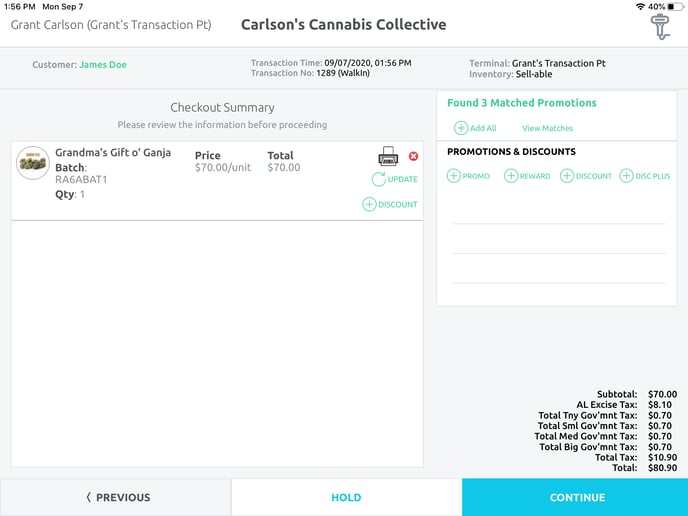
Print a Transaction
1. Once the Printer is connected to the iPad, the page size and layout are selected, and you will be able to print a label from the transaction.
- This action can only happen at 1 point, through the Checkout Summary page, while processing a transaction.
- Utilizing the printer icon that is available per line item, you can prompt the printer to print a label specific to the customer, product/batch, and quantity.