Retail | Receiving Inbound BioTrack Transfers
Here we'll walk through receiving a BioTrack transfer by creating a purchase order in BLAZE®.
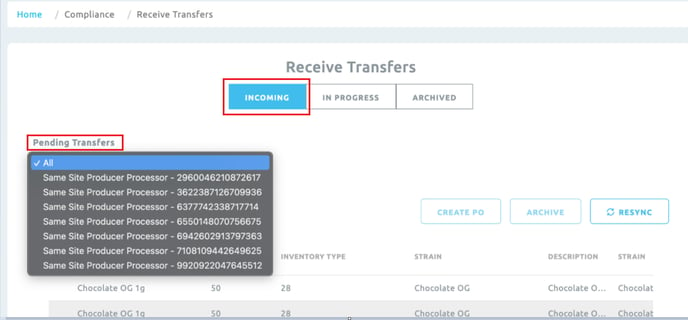
1. From BLAZE® Retail, navigate to the Compliance section on the left-hand menu and click Compliance Transfers. Along the top of the page there are 3 tabs;
- Incoming - Displays all active BioTrack manifests and products.
- In Progress - Displays incomplete purchase orders to resume at a later time.
- Archived - Archived manifest to declutter the page.
2. Click the Incoming tab.
3. Using the Pending Transfers dropdown, select the manifest you would like to create a PO for; this will filter the packages associated with this manifest.
NOTE: A transfer must be created in BioTrack for it to appear on this drop-down.
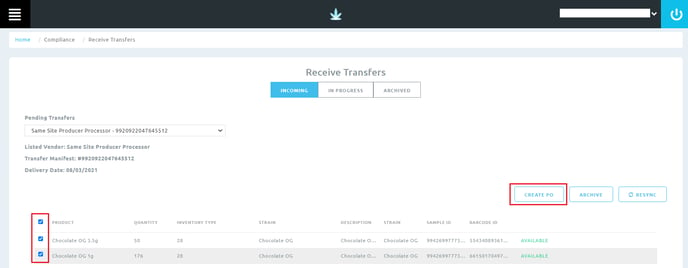
4. Next, select the products being received from this manifest and click Create PO.
NOTE: If there are no packages displayed in the table, click Resync.
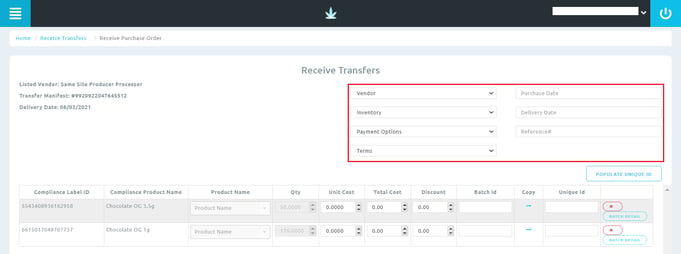
5. Complete the purchase order detail fields at the top of the page for the following:
- Vendor: Name of the vendor the items are purchased from.
- Inventory: The inventory location the items will be added to upon intake.
- Payment Options: Form of payment used.
- Terms: Payment terms of the purchase order.
- Purchase Date: Date product was purchased.
- Delivery Date: Date product was delivered.
- Reference #: Internal purchase order reference number.
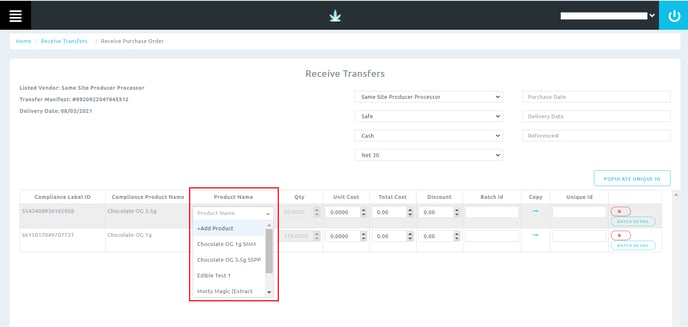
6. Associate the cannabis products in BLAZE® to the items being received from BioTrack by selecting the Product Name dropdown and selecting the product in BLAZE®.
NOTE: Only Cannabis products associated with a Cannabis category will be available to associate with BioTrack packages.
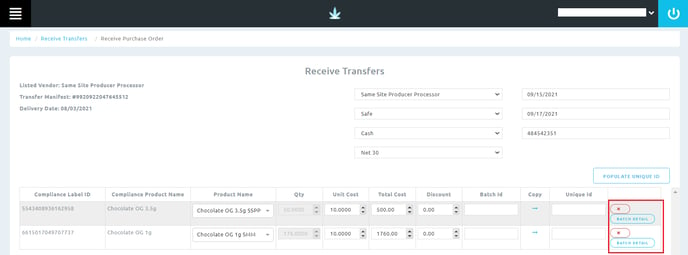
7. Edit Batch Details
- After selecting the Product Name from the dropdown, you will be able to edit the batch details from the far right of each line item. When selected, this will pop up the batch details page for this product.
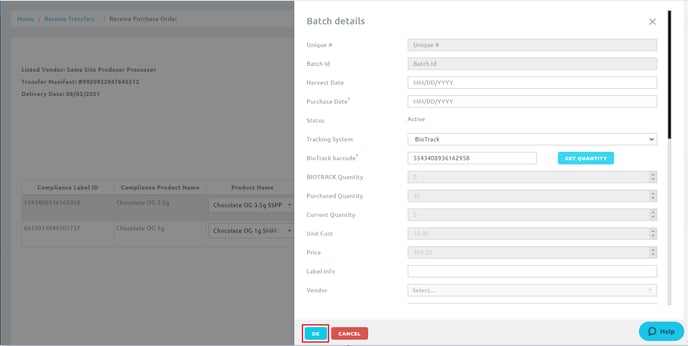
- From here, add and edit the batch information then select OK to save.
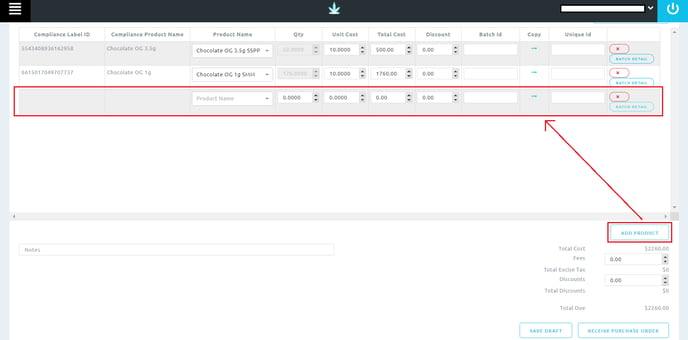
8. *OPTIONAL* Add non-cannabis to the PO. At the bottom of the PO, select Add Product. This will add multiple lines to enter non-cannabis products. Added products must be associated with the same Vendor as the PO prior to starting the process.
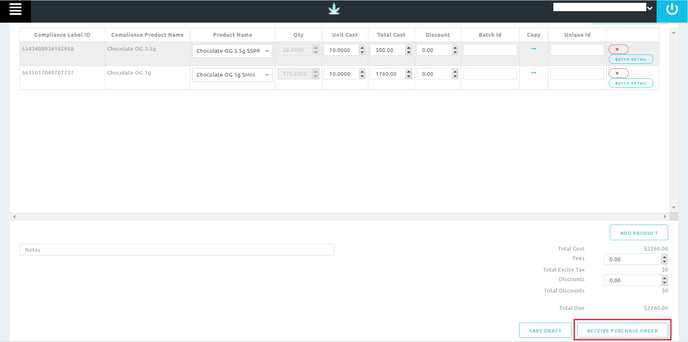
9. To finalize the PO, select Receive Purchase Order in the bottom right corner. After a PO has been received, no additional changes can be made. You can also select the option to Save Draft and revisit the draft from the In Progress tab within the Receive BioTrack Transfer section.
NOTE: After you have created your purchase order, you can navigate to the Purchase Orders tab and select Active PO's to view your newly created PO. Creating the PO also creates a shipment bill that allows you to add payments within the bill's tab.