Our Two-Step Fulfillment System Involves 2 main steps: Preparing and Fulfilling the order.
Global Settings
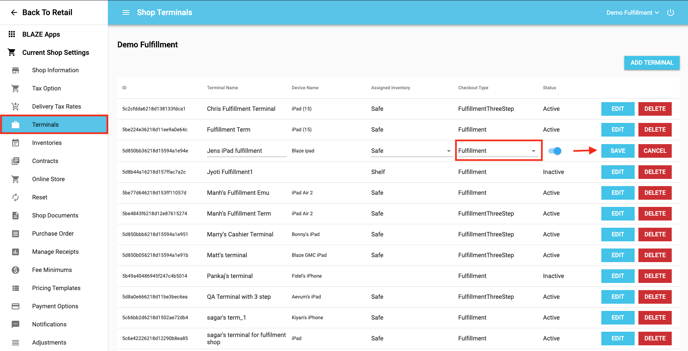
Before using the Two-Step Fulfillment System, it must be enabled for the terminal(s) using it. This can be done on the Web in Global Settings.
- Navigate to BLAZE > Global Settings > Current Shop Settings > Checkout Process > Select Fulfillment
-1.png?width=688&height=77&name=mceclip0%20(8)-1.png)
- Navigate to BLAZE > Global Settings > Current Shop Settings > Terminals
- Click the Edit button for the desired Terminal to be enabled for Two-Step Fulfillment
- Checkout Type: Select the Fulfillment option
- Click the Save button
- Repeat as necessary
- The modified Terminal(s) are now ready to process orders using BLAZE's Two-Step Fulfillment
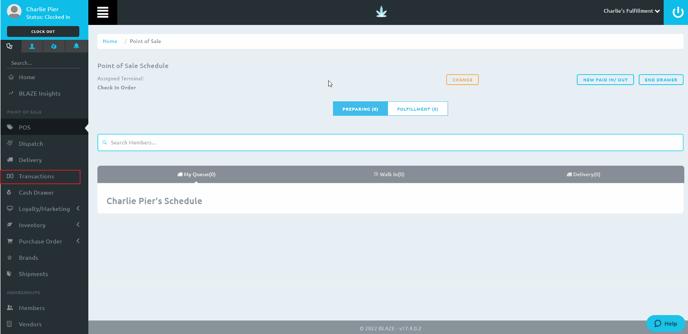
Prepare the Order
To start, make sure you have an open Cash Drawer
Navigate to POS in the Menu
- To change Terminals click the Change button
- Click Start Drawer
-1.png?width=688&height=333&name=mceclip0%20(9)-1.png)
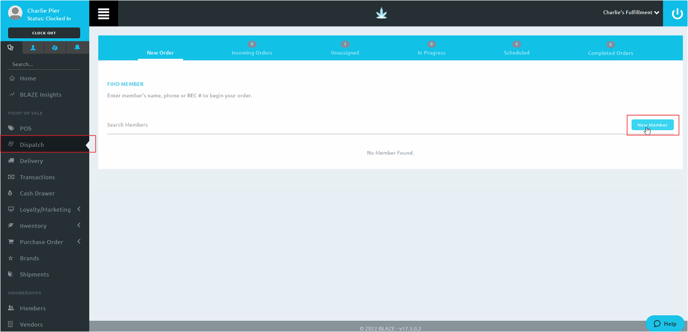
Navigate to Dispatch in the Retail Menu.
New orders can be processed by looking up an Existing Member or creating a New Member.
Existing Member
- If a Member already exists, navigate to Find Member.
- Search the member's name in the search bar
- Click inside the box to add the member to the queue
- NOTE: Click the member's name to be taken to the member's profile
.png?width=688&height=339&name=mceclip1%20(4).png)
2. You will be able to see any alerts or expiry dates for your member. Edit if needed.
- Select Pickup for a walk in order
- Click Continue
-1.png?width=688&height=336&name=mceclip0%20(10)-1.png)
3. Click Send to Unassigned
.png?width=688&height=333&name=mceclip1%20(5).png)
4. You now see you have an empty transaction for your member in the Unassigned queue.
.png?width=688&height=187&name=mceclip2%20(2).png)
NOTE: To continue preparing the order, skip to step 7 in the following New Member section.
New Member
1. To sign up a New Member, navigate to Dispatch and click New Member
2. Enter in the Member information and click Save
NOTE: You are able to scroll down on the New Member window.

3. We are alerted here that we need to enter their Driver License information
- Click on the Member's name to view their profile
-1.png?width=688&height=334&name=mceclip0%20(11)-1.png)
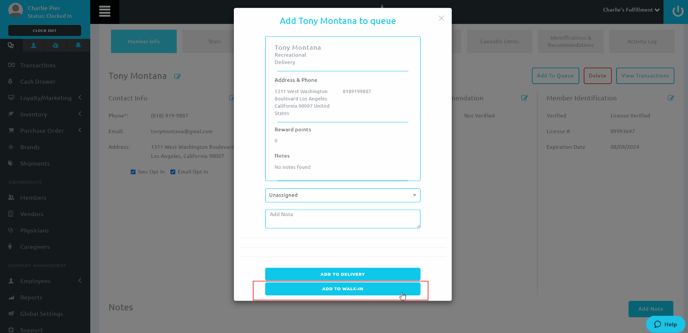
4. Here you are able to see the full Member Profile and make any changes that are needed
- Driver License information is located in the Member Identification section

5. After updating the information, click Add To Queue
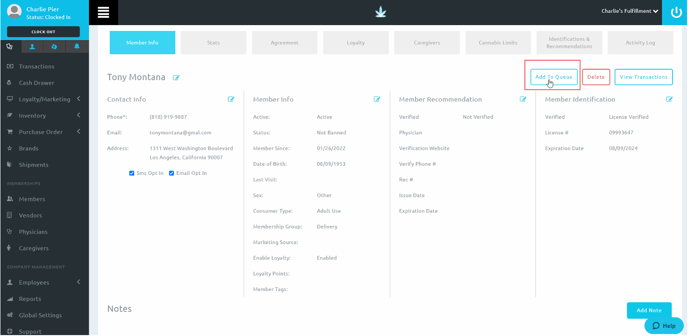
6. Select Add To Walk-In
7. Once your member is in your queue, navigate to POS
- You will see the order is in the "Preparing"
- Select Walk In to see the transaction
- Click Start/Resume
.png?width=688&height=333&name=mceclip6%20(1).png)
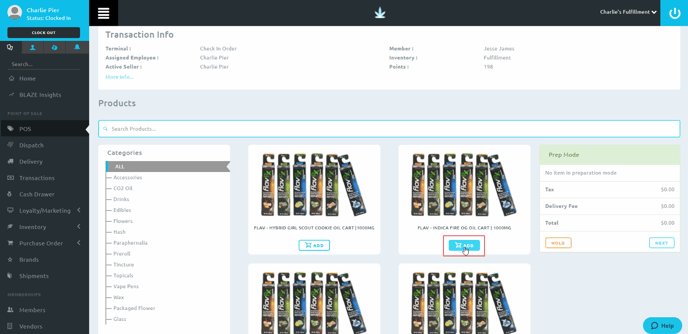
8. Select the products for this transaction by clicking the ADD button of each product needed
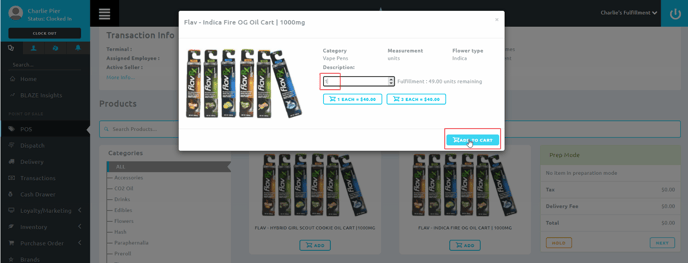
9. You will be given a window to choose the quantity of product needed
- Click Add To Cart
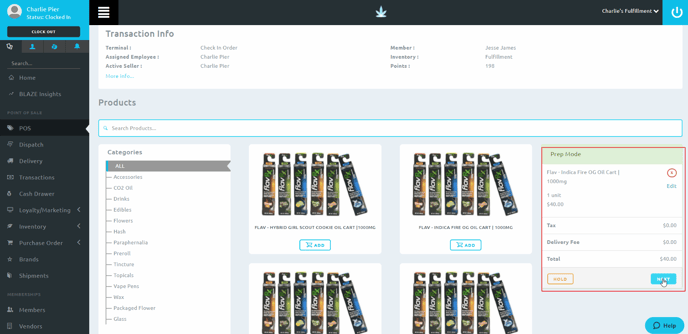
10. You will see the products selected in the Prep Mode window
- Click Next
11. In Checkout you have the opportunity to edit your order if needed
- You can also add Promotions or Discounts to the order
- Click Send To Fulfillment
.png?width=688&height=330&name=mceclip9%20(1).png)
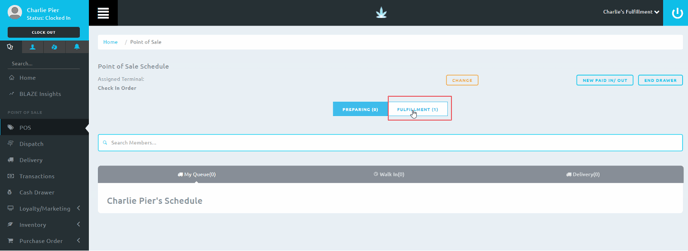
Fulfill
1. You will see this transaction is now in the Fulfillment queue
- Click Fulfillment
2. In Fulfillment go to the transaction and click Start/Resume
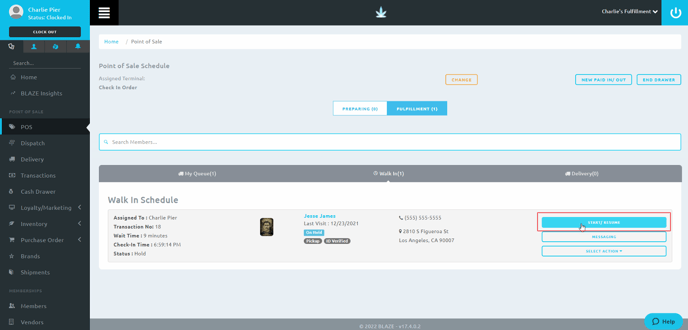
3. When the order is ready to be packed, click Fulfill
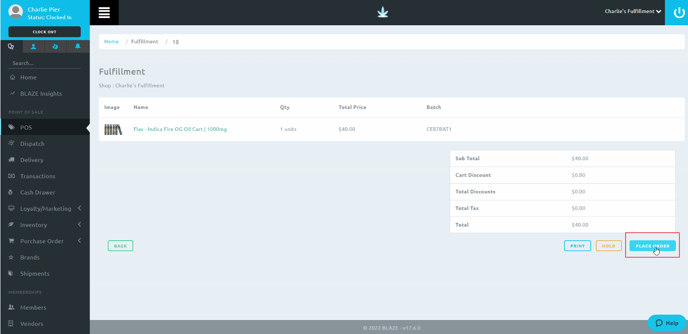
.png?width=688&height=329&name=mceclip1%20(6).png)
4. The transaction is now ready to be tendered
- Click Place Order
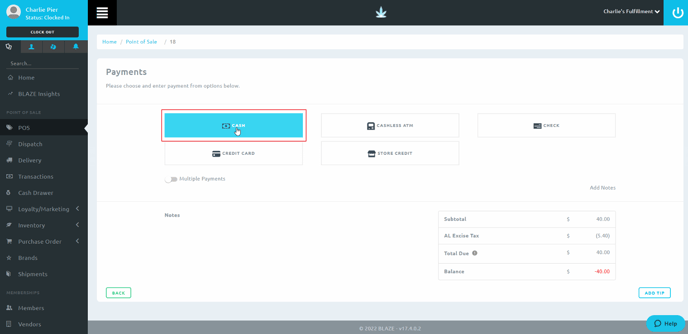
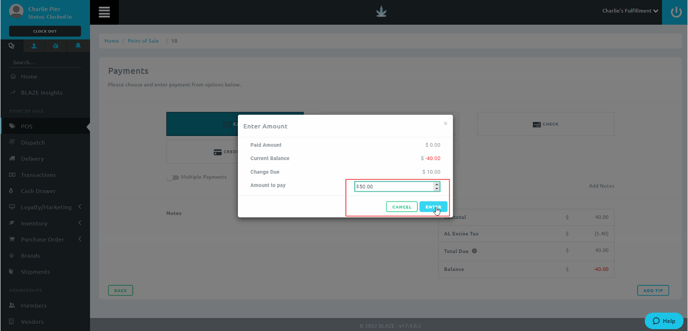
5. You will be in taken to the Payments screen
- Choose the payment option needed
- NOTE: if using multiple payment options, click Multiple Payments before selecting a payment method
6. Enter your payment amount in the Enter Amount window
- Click Enter
7. On the main screen you will see the amount of Change Due
- You will get a pop up window to Print which will print the transaction, Print Receipt, Go To Queue or Send Receipt
- Click one of the options
.png?width=688&height=337&name=mceclip2%20(3).png)
8. You will then see that the transaction is completed and no longer in the queue
- Note: You can go to the Menu on the left and click into Transactions to see your past transactions