NOTE: This option will need to be enabled first, for it to be used. Follow the steps below to enable permission to void a transaction and how to use the void feature.
Enable the Permission to Void Transactions
1. Navigate to Global Settings, select Company Settings, then click Roles & Permissions.
2. Along the top of the page, select Web.
3. Select the user role to grant voiding permissions.
4. Click Edit and scroll down to the "Transactions" section.
5. Enable the permission Transaction void on the web.
6. Click Save.
7. Repeat as necessary for the other roles if you want to have this permission.
See Void Transactions for more information.
Void Transactions
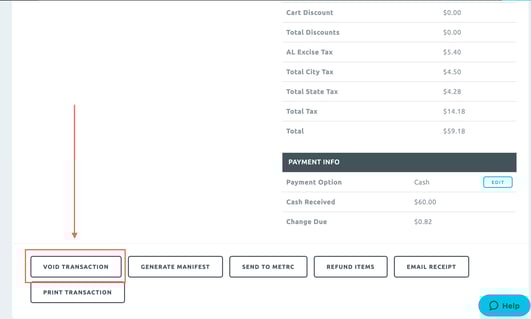
1. Once the permission is enabled, navigate to the completed transaction and scroll to the bottom of the page.
2. Click Void Transaction.
3. After a transaction is voided, it will move to the cancellations tab in the transaction page and show the status "Void Sales." Inventory will be restocked back to the original inventory the items came from and the associated sale in BioTrack will be voided.
NOTE: The BioTrack Sales ID may still be listed in BLAZE®, but in BioTrack the sale will be voided.