The first thing you will want to complete, now that you have a retail location, is to set your company information. This is done from a browser on the web application. Click HERE to navigate to the login page.
NOTE: We recommend adding this to your bookmarks bar to quickly navigate in the future.
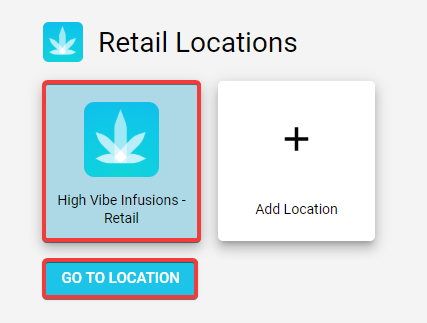
1. Log in to BLAZE and select the retail location you wish to edit. Click the Go to Location button.
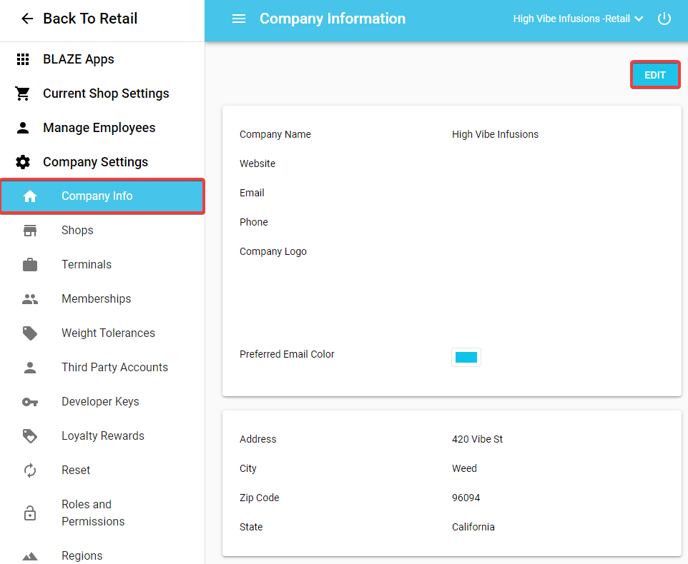
2. Next, we will navigate to your Company Information.
- To do so, select the sandwich menu icon in the top left corner of the page.
- Scroll down and select Global Settings.
- This open a new menu, scroll down again and select Company Settings.
- From here we will click Company Info and the EDIT button in the top right corner.
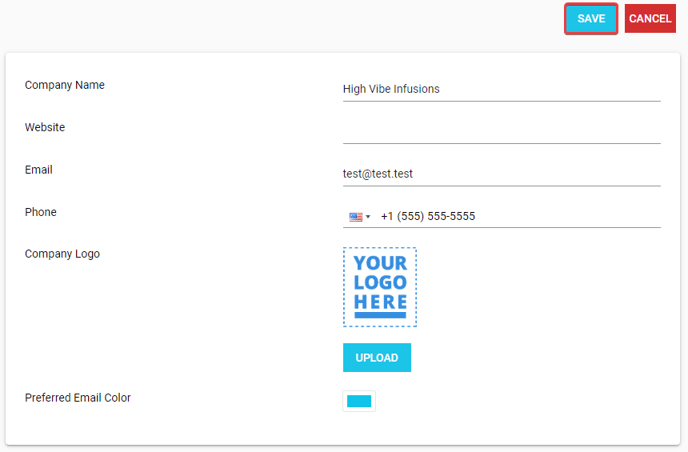
3. Now you can fill out and edit the information for each field in this section. When done click the Save button in the top right corner.
- NOTE: Be sure to Upload your Company Logo and choose your Preferred Email Color. This will be used when you send a customer's receipt to their email.
4. Next, we are going to add your other shops. If you have one shop please skip to step 6.
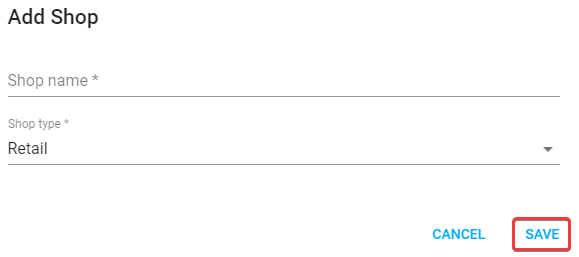
- Click Shops under Company Info in the menu and select Add Shop.
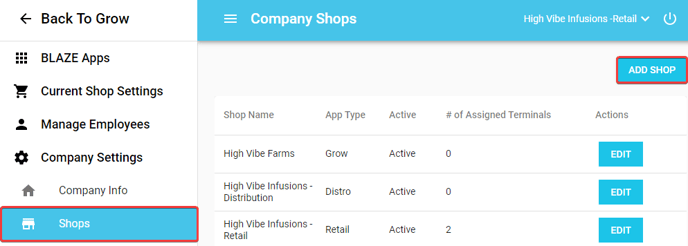
5. In the pop-up window please enter your Shop name and select the Shop type, then click Save.
- Repeat this step until all of your shops are entered.
6. Now we should set up your terminals.
- Terminals are used to process sales.
- Click Terminals found under Company Settings and select Add Terminal.
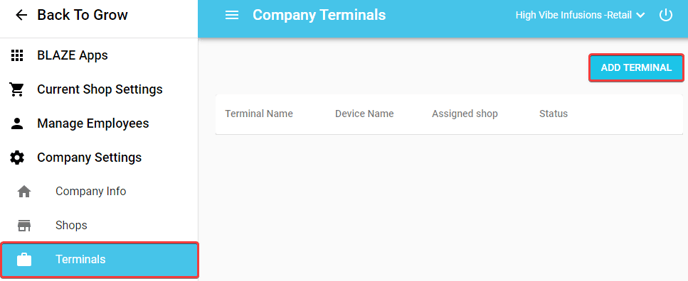
7. Add the Terminal Name, select the Assigned shop from the dropdown menu, change the Status to on, and click Save.

NOTE: Terminals can also be added by installing the point of sale application on your iPad. To learn how this process works and how to assign terminals to specific employees please click here.
8. Navigate to Memberships, also found under the Company Settings.
- Membership groups allow you to group certain members together and give them discounted rates.
- For example, you could create a "VIP" membership and set an automatic 5% discount to apply for all members with this group.
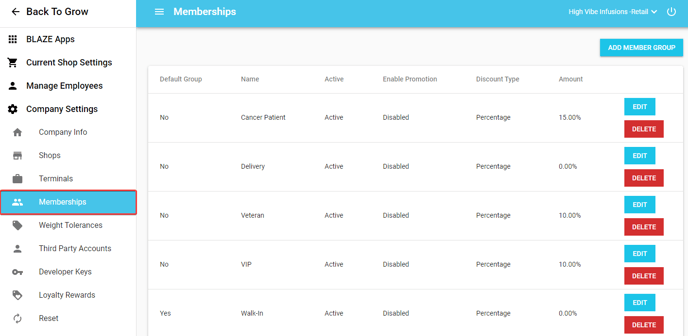
9. To add a new group click Add Member Group.

- Default Group: When you enable this all new patients will be auto-assigned to this member group.
- Name: Name of your membership group.
- Active: If this is enabled the group can be applied to members' accounts.
- Discount Type: Select the discount type from the dropdown menu; percentage, or cash.
- Amount: Enter the numeric value associated with the discount type.
- Enable Promotion: Toggle this on after setting your Discount Type and Amount to lock it into place.
- Save: Click save when done.
NOTE: Please be sure to review the preset membership groups and change any settings to ensure they are properly applied to new members' accounts.
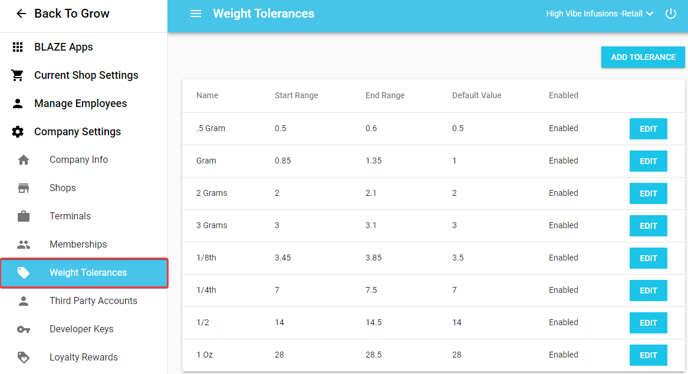
8. Lastly, let's set your companies weight tolerance.
- Please navigate to Weight Tolerances under the Company Settings.
- Weight tolerance allows you to set a tolerance range for each unit measurement in grams so that you can weigh a little under/over and still charge a standard price.
NOTE: Please take a moment to review the preset tolerances to ensure they are set to your preferences.
- To change the range or disable one that does not apply to your business click Edit.
- Additionally, you can add your own custom weight by clicking Add Tolerance.
Awesome! You just completed your company set up. If you have any questions please don't hesitate to reach out to our support team. If you are ready to set up your shop information please click here.
If you have further questions, please reach out to us at support@blaze.me !