- Payment Options names come directly from the Point of Sale.
- Payment Options must be enabled in the POS to be made active in Mission Control.
- Mission Control allows you to change the display name of a payment option on the check out screen, while keeping the payment aligned with your POS.
- Payment Options can be separated by Fulfillment Type:
- Example:
- Delivery can be Stronghold/ACH only
- Pickup can be Cash, Debit and Stronghold
- Example:
- To configure Payment Options, log into Mission Control, then click on the Settings tab and select the Payment Options tab.

- The grey Payment Option name comes directly from the Point of Sale. To edit the display name, click the edit icon for that specific payment option.


- For example, you can change the display name "Cashless ATM" to "Debit", which may be a more recognizable payment option for customers.

- Select the fulfillment type(s) that the Payment Option will be available for: Pickup, Delivery and/or Kiosk. This can separate available payment options by fulfillment type:


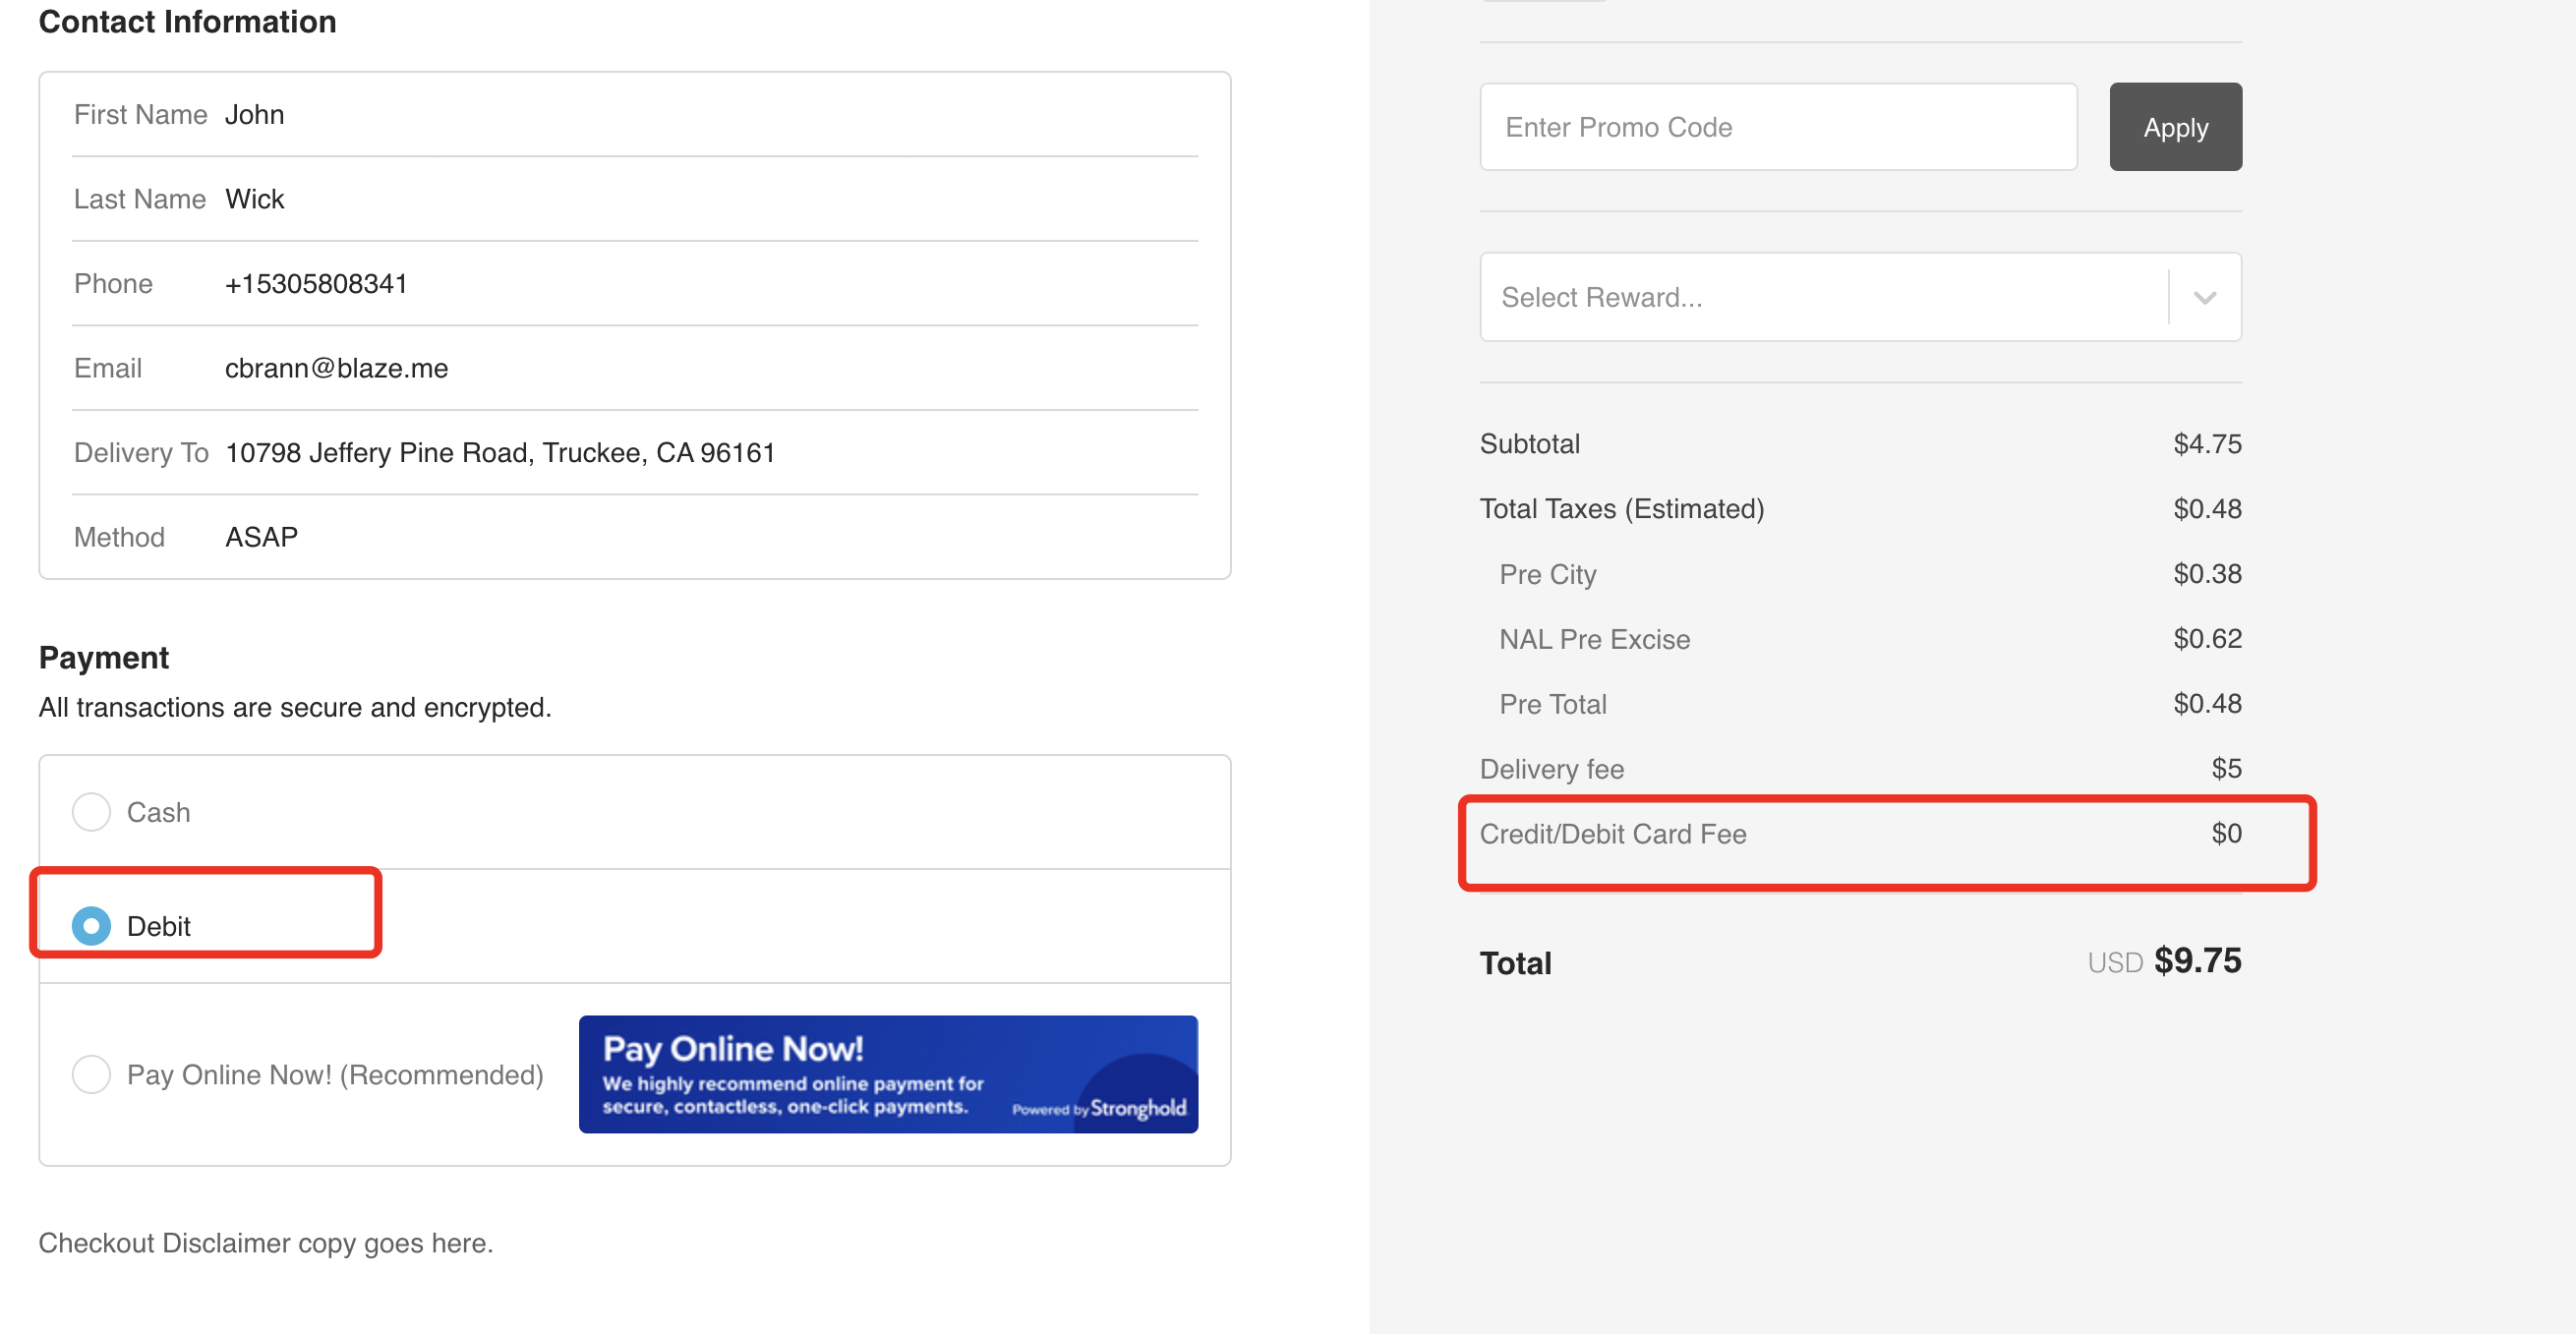
- Optional fees that are setup in the Point of Sale for each payment option are also visible to customers in the checkout process. For example, there is a $5 fee assigned to the cashless_atm payment option, which we have renamed to Debit. The fee is automatically added to the Cart Totals when Debit is selected for payment.
To recap:
- The payment option name in grey is coming directly from the Point of Sale.
- The display name is editable in MC and will stay aligned with the POS payment option when renamed.
- Optional fees are visible to customers.
- Payment Options can be separated by Fulfillment Type:
- Example:
- Delivery can be Stronghold/ACH only
- Pickup can be Cash, Debit and Stronghold
- Example: