.png?width=140&height=37&name=BLAZE-Logo-Blue%20(2).png)
Prerequisites
- URL: Dynamic Portal
- Need access? To add users or request credentials, please contact support@blaze.me.
Settlement Schedule
BLAZEPAY Cashless ATM commonly operates on a next-day funding schedule:
| Transaction Day | Expected Deposit Day |
| Monday | Tuesday |
| Tuesday | Wednesday |
| Wednesday | Thursday |
| Thursday | Friday |
| Friday–Sunday | Excluded from next-day funding (Settles on standard business days) |
NOTE: Next-day funding excludes weekend transactions (Friday–Sunday) and holidays. Processing networks determine their own cut-off times regardless of terminal batch times. To request a specific batch cut-off time or to confirm your location's settlement schedule, please contact support@blaze.me.
How to Access the Settlement Summary Report
The Settlement Summary report matches your bank deposits. The amounts listed in this report represent the exact funds that settle into your account.
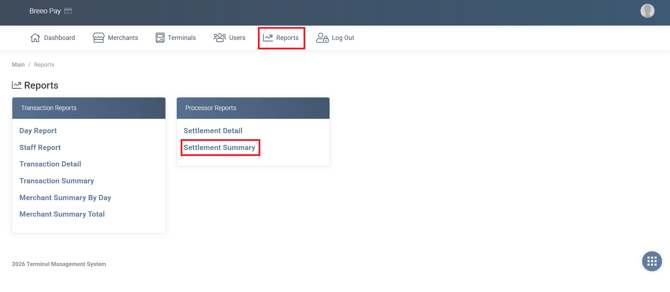
- Navigate to the Reports tab and select Settlement Summary.
- Select the Start Date and End Date to set your desired timeframe (click the Calendar icon or enter dates manually).
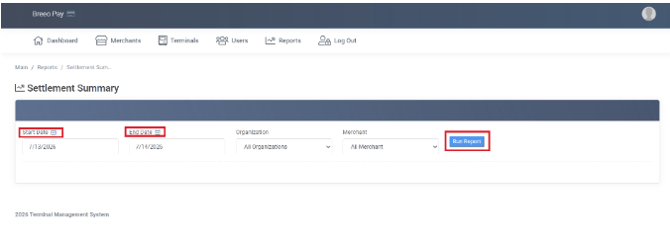
- Click Run Report.
Report Breakdown:
- Terminal IDs
- Deposited amount per terminal
- Approved transaction count
- Declined transaction count
- Total settlement deposit amount
- Settlement date range
- Transaction date range
How Deposits are Calculated:
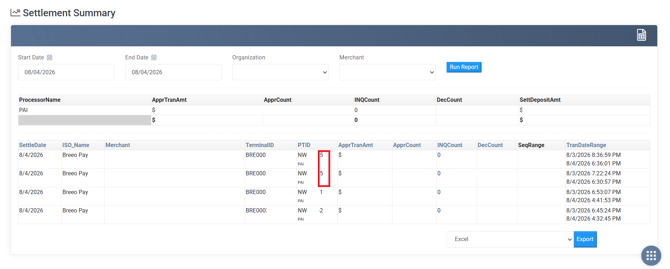
Deposits can be paid per individual terminal or in a lump sum. To determine if deposits are being paid by terminal, in a lump sum, or by both methods, check the PTID.
In the Settlement Summary, the PTID field indicates whether there is a unique ID per terminal, a shared ID, or a combination of both.
-
Example:
-
The PTIDs ending in 5 will be paid in a lump sum. The PTIDs ending in 1 and 2 will be individual payments shown on bank statements.
-
How to Access the Settlement Detail Report
The Settlement Detail report provides an itemized view of individual transactions included in your daily settlement and sales list.
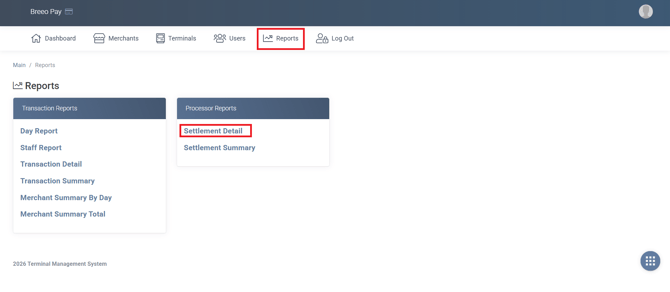
- Navigate to the Reports tab and select Settlement Detail.
-
Set your timeline using the Start Date and End Date field
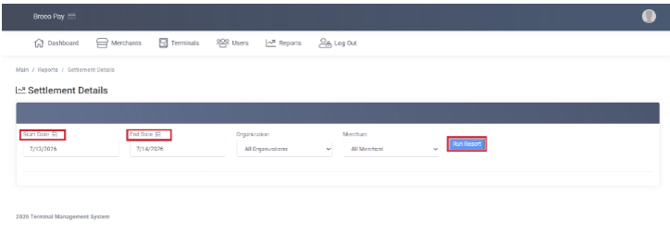
3. Click Run Report.
4. (Optional) To export the data, click the Excel option or the Page icon in the top-right corner of the summary.
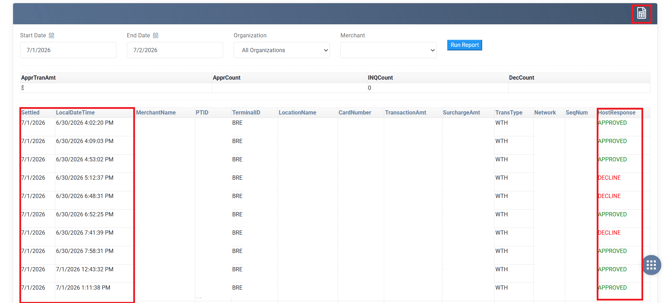
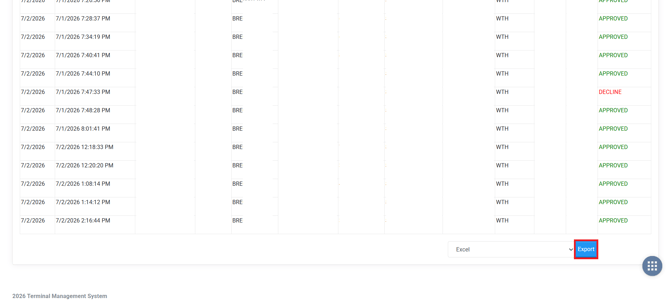
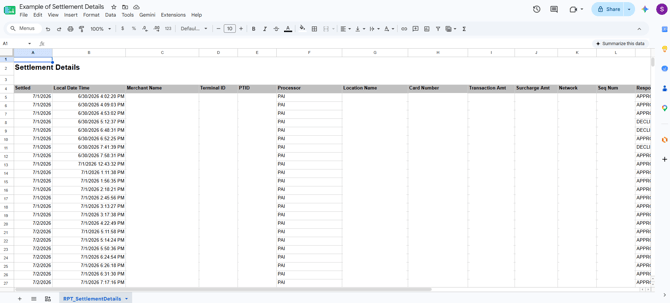
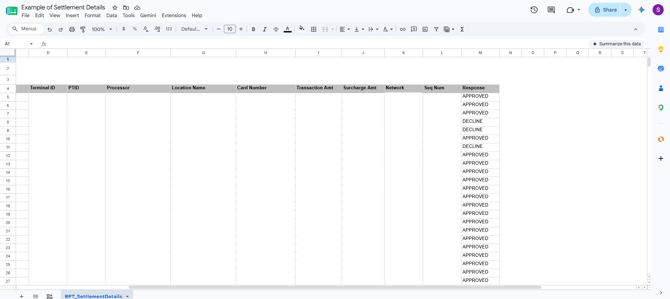
Report Breakdown:
- Time the transaction occurred
- Settlement date
- Terminal number
- Last 4 digits of the card used
- Transaction amount
- Payment status (Approved / Declined)
How to Print an End of Day (EOD) Terminal Report
WARNING: It is strongly advised to use BLAZE reports or the Dynamic Portal for EOD sales reporting. Switching frequently between SEMI-Integrated and Stand-Alone modes can cause connectivity issues, preventing terminals from reconnecting to the POS immediately.
If you must manually print the EOD report directly from the physical terminal, follow these steps:
Step 1: Switch to Stand-Alone Mode
- On the terminal screen, tap SEMI at the bottom-left corner.
- Select Stand-Alone Mode.
- Return to the home screen once the mode has changed.
Step 2: Print the Report
- Press 4 (Other Reports).
- Enter the case-sensitive admin password:
123456A. - Select Detail.
- Select Print.
CRITICAL: NEVER press 3 (Batch Reports) — this will clear your batch totals!
Step 3: Switch Back to Semi-Integrated Mode
- Press the # button.
- Enter the admin password (
123456A). - Scroll and select 9 - Misc Options.
- Select 1 - Semi-Integrated.
- Select Enable Semi-Integrated.
- Press the Red X button to return to the main screen.
Deposit Descriptors
-
DNS DAILY SETTLEMENT
-
MVMT
-
PAI
-
CANBRIDGE PMX
Commission Descriptors
-
DNS SURG
-
MVMT/PAI
-
PAYMENT ALLIANCE
-
1000 ONT LLC
Related Articles:
Retail | BLAZEPAY CATM Reporting
Retail | BLAZEPAY Cashless ATM In-store Workflow