What are Widgets?
Widgets are the key building blocks of a site, allowing you to add and manage content effectively. They serve as essential elements that enhance both the functionality and design of your website. By incorporating various types of widgets, you can create a dynamic and engaging user experience.
How to access Widgets

- To access widgets, log into cms.blaze.me
- Click on "Edit Site"
- On the left side navigation menu, select widgets

💡 Widgets can be searched for using the search bar at the top or by scrolling through the different sections in the library.
Add widgets from the widget library
- In the side panel, click Widgets to open the widget library.
- Click and drag the widget to the location you want in the site. A blue placement indicator appears.
- The widget appears in the location shown by the blue placement indicator.
When dragging-and-dropping a widget to your site, note the text in the blue placement indicator:

Insert here: The widget will be added to an existing row or column.
Insert in new row: A new row will be added and the widget will be placed inside of it.
Insert in new column: A new column will be added and the widget will be placed inside of it.
Insert to Column: Inserts widget within current column.
BLAZE Sites Widgets
BLAZE Sites widgets have limited design customization.
The following is a list of available BLAZE Sites widgets to be added to your site:

-
Age Gate
Works in tandem with the ECOM Menu Age Gate. Age Gate widget allows for the following content to be updated:- Enable Select a Store Dropdown - Toggle this option to allow visitors to select a store before entering the site.
- Logo* - Upload a logo to display on the age gate widget.
- Title* - Enter the main title text displayed on the age gate.
- Description* -
Add a short description or message that appears below the title.
- Yes Button Label Text* - Customize the text on the confirmation button (e.g., “Yes, I’m 21+”).
- No Button Label Text* -
Customize the text on the decline button (e.g., “No, I’m under 21”).
- Safe Link* -
Enter a URL where underage visitors will be redirected.
- Exclude Pages -
Specify any pages to exclude from showing the age gate, separated by commas.
* - required fields
-
Banners
Will display promotional banners as configured in Mission Control. Banners widget allows for the following content to be updated:
- Sync With Store Picker - widgets configured with the
Sync With Store Pickersetting will fetch data based on the current selected store.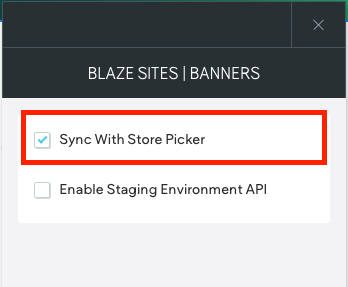
- Enable Staging Environment API - For connecting staging environments. Leave unchecked.
- Sync With Store Picker - widgets configured with the
-
Brands
Displays grid of brands per limited or as filtered based on IDs (min: 3 max: 15). Brands allows for the following content to be updated: 
- Sync With Store Picker - widgets configured with the
Sync With Store Pickersetting will fetch data based on the current selected store.
- Show BLAZE Site Enabled Brands - When checked, display brands that are enabled in BLAZE ECOM Mission Control.
- Brands Limit - Set a limit of how many brands will be displayed. (min: 3 max: 15)
- Title - Add a title for the brands section.
- Description - Add a description for the brands section.
- Enable Staging Environment API - For connecting staging environments. Leave unchecked.
- Sync With Store Picker - widgets configured with the
-
Deals
Displays grid of Discounts/Deals based on counts and position in Mission Control.
- Sync With Store Picker - widgets configured with the
Sync With Store Pickersetting will fetch data based on the current selected store. - Show BLAZE Site Enabled Deals - When checked, display deals that are enabled in BLAZE ECOM Mission Control.
- Sync With Store Picker - widgets configured with the
-
- Title - Title of deals section
- Description - Description of deals
- View All Deals Link -
- Promos Count - Set number of promos displayed (min: 0 max: 10)
-
- Enable Staging Environment API - For connecting staging environments. Leave unchecked.
- Sales Channel Filters: Filter deals by sales channel (eCommerce, Retail, Mobile App, Kiosk, Scan To Shop). More about sales channel filters here.
- Rewards Count - Set number of rewards displayed (min: 0 max: 10)
NOTE: Deals not explicitly assigned to a sales channel (i.e.: No Channels) will still display when filter is enabled
-
Location Map
Display your shop's location on an interactive map.
- Map Address - Enter shop's address.
- Map Height - Control height of the map.
-
Products
Displays product cards.

- Sync With Store Picker - widgets configured with the
Sync With Store Pickersetting will fetch data based on the current selected store.
- Sync With Store Picker - widgets configured with the
-
- Show BLAZE Site Enabled Products - When checked, display products that are enabled in BLAZE ECOM Mission Control.
- Product Counts - Set number of products displayed. (min: 1 max: 6)
- Enable Staging Environment API - For connecting staging environments. Leave unchecked.
-
- Product Filters - Filter products by the following (comma separated):
- Product Categories
- Product Tags
- Product Brands
- Product Flower Types
- Product Filters - Filter products by the following (comma separated):
🚨 Please ensure that input in the filter fields is entered in lowercase and exactly matches the filter criteria, as partial matches or variations will not be accepted.
-
- Delivery Type - Select whether to display products that are either :
- Pickup Only
- Scheduled Delivery
- Valid For Sale Only
- All
- Delivery Type - Select whether to display products that are either :
Pickup Only and Scheduled Delivery refers to the toggles in inventory tab in ECOM Mission Control 
-
- Sort By - Sort products by:
- Alphabetical: A-Z
- Alphabetical: Z-A
- Price: Low to High
- Price: High to Low
- Sort By - Sort products by:
-
Recommended Products
Recommended Products will only be displayed if enabled in ECOM Mission Control .
- Sync With Store Picker - widgets configured with the
Sync With Store Pickersetting will fetch data based on the current selected store. - Show BLAZE Site Enabled Products - When checked, display products that are enabled in BLAZE ECOM Mission Control.
- Product Counts - Set number of products displayed. (min: 1 max: 6)
- Delivery Type - Select whether to display products that are either:
- Pickup Only
- Scheduled Delivery
- Valid For Sale Only
- All
- Sync With Store Picker - widgets configured with the
-
- Product Filters - Filter products by the following (comma separated):
- Product Categories
- Product Tags
- Product Brands
- Product Flower Type (sativa, hybrid, indica)
- Product Filters - Filter products by the following (comma separated):
🚨 Please ensure that input in the filter fields is entered in lowercase and exactly matches the filter criteria, as partial matches or variations will not be accepted.
-
- Sort By - Sort products by:
- Alphabetical: A-Z
- Alphabetical: Z-A
- Price: Low to High
- Price: High to Low
- Enable Staging Environment API - For connecting staging environments. Leave unchecked.
- Sort By - Sort products by:
-
Stores
Displays all the stores from the BLAZE ECOM Mission Control store group along with store information.
- Sync With Store Picker - widgets configured with the
Sync With Store Pickersetting will fetch data based on the current selected store. - Enable Staging Environment API - For connecting staging environments. Leave unchecked.
- Sync With Store Picker - widgets configured with the
- STORE LOCATOR - This widget is REQUIRED to connect your ECOM menu to your content site. DO NOT DISABLE OR DELETE THIS WIDGET.

- No Default Store - If you have more than 1 store in a group, enabling this setting will trigger the store selector.
- Force Store Selection - Enabling this setting will force and require customers to choose a location on their first page visit. Until cookies/cache is cleared.
- Clear Local Storage - This setting clears local storage on users device. Leave this unchecked
- Enable Staging Environment API - For connecting staging environments. Leave unchecked.
🚨 Store Locator - This widget is REQUIRED to connect your ECOM menu to your content site. DO NOT DISABLE OR DELETE THIS WIDGET.
We recommend to leave Store Locator configurations as is.
Recommended Products will only be displayed if enabled in ECOM Mission Control .
Edit Widget: Content and Design
🚨 BLAZE Sites widgets have limited design customization.
Edit Design
Most widgets in the editor have design options that enable you to customize the widget's appearance for your site. Not all widgets have the same options. For example, some widgets do not allow you to edit inner spacing, others do not let you change outer spacing.
To access the design editor, right-click the element, and click Edit Design.

Deleting/Hiding Widgets
Widgets can be removed from the content area by hiding or deleting widgets.
- You can hide widgets by selecting Layers in the side navigation menu and select the widget you would like to hide.
- Click on the eye logo next to the layer/widget that you want to hide

Hiding will remove the widget and its content from the webpage, but still keep it within the layers tab.

To delete a widget:
- Select widget to be deleted
- Click on the trash can icon to delete.

🚨 This will delete and remove the widget from the layers tab.
If widget or content is accidentally deleted or removed, you may hit the UNDO button on the top navigation bar. 