BLAZE ECOM supports the use of KML files configured in POS Regions to define where delivery addresses are accepted for online orders. This kb article will explain the necessary configurations in ECOM Mission Control and BLAZE POS to set up delivery zones by KML Files.
The details below will explain these settings required for KML Delivery Zones.
MC BLAZE POS:

MC Deliveries tab:

POS Global Settings Online Store:


POS Global Settings Regions:

POS Global Settings Inventories:
First Step: Creating KML Files for Delivery Zones:
What is a KML File?
- A KML (Keyhole Markup Language) file uses XML to express geographic annotation and visualization.
- In simpler terms, you can draw a zone on Google Maps or Mapbox and express that geographic understanding to other systems via a .KML file.
- Google My Maps
- Once here, follow along with our video tutorial to create your zones
- Google My Maps
Setting up your Regions in BLAZE POS:
The KML files will be assigned by regions within BLAZE POS - 1 KML file can be applied per region. You will want to create regions in BLAZE POS Global settings first.
- Please click here to read our step-by-step guide to building regions in BLAZE POS
Once Regions are configured, you're ready to upload KML files to them.
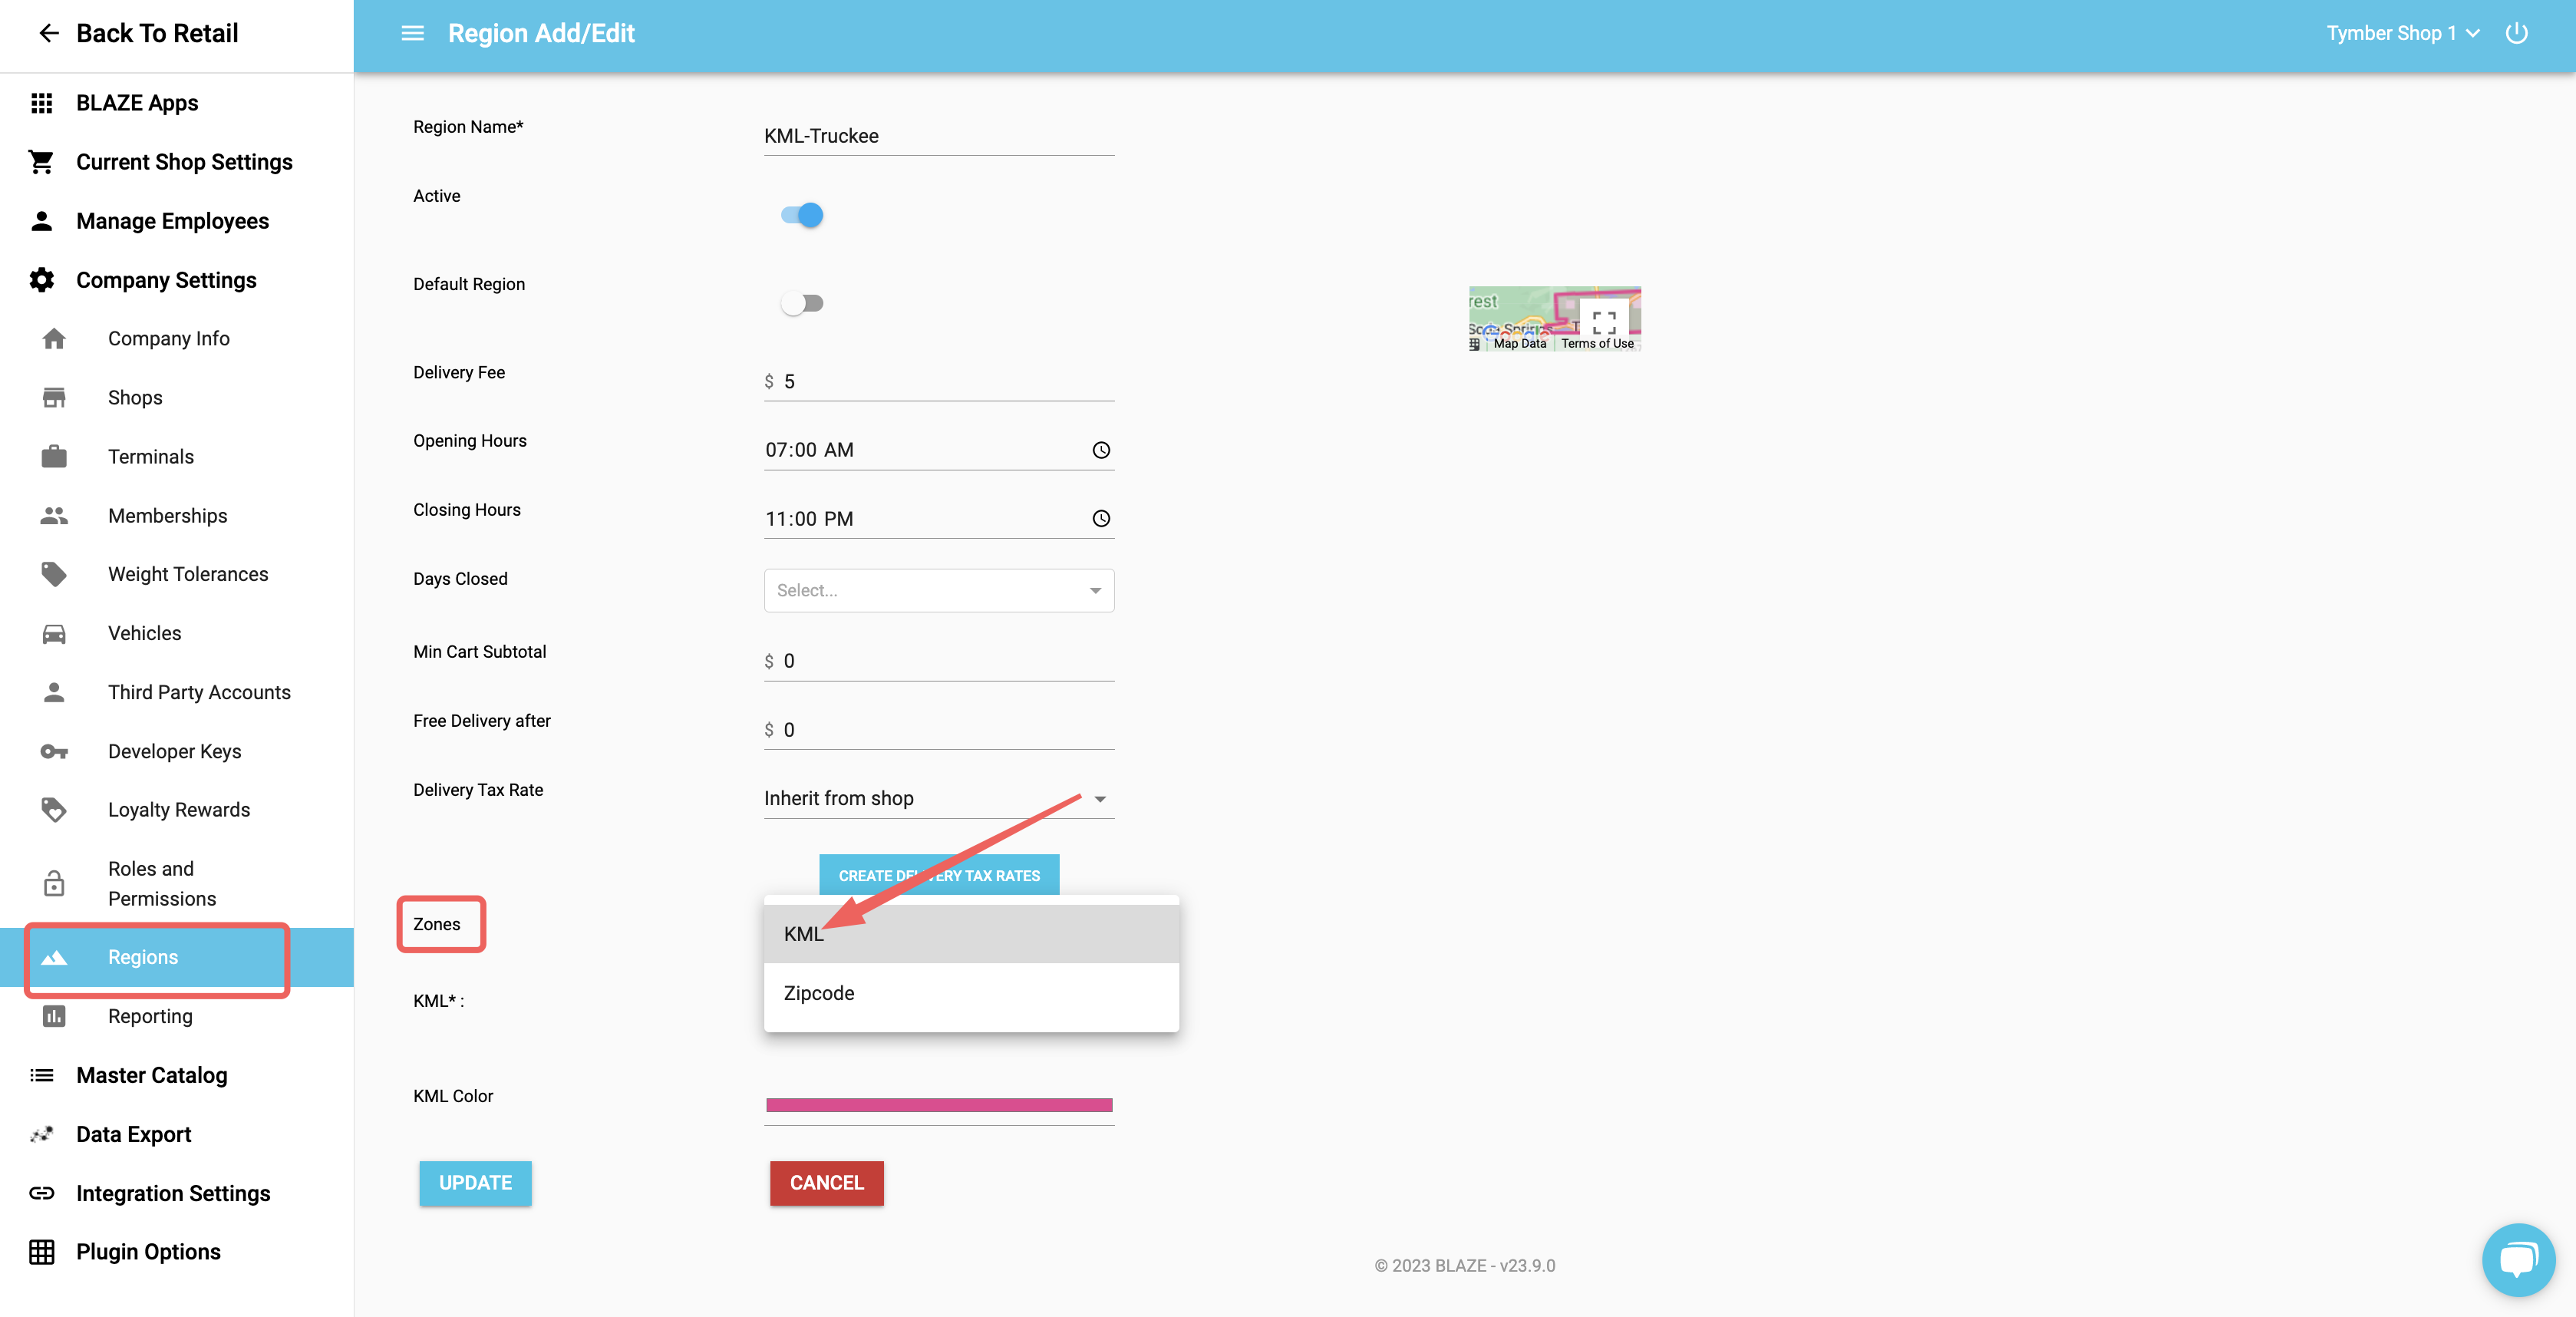
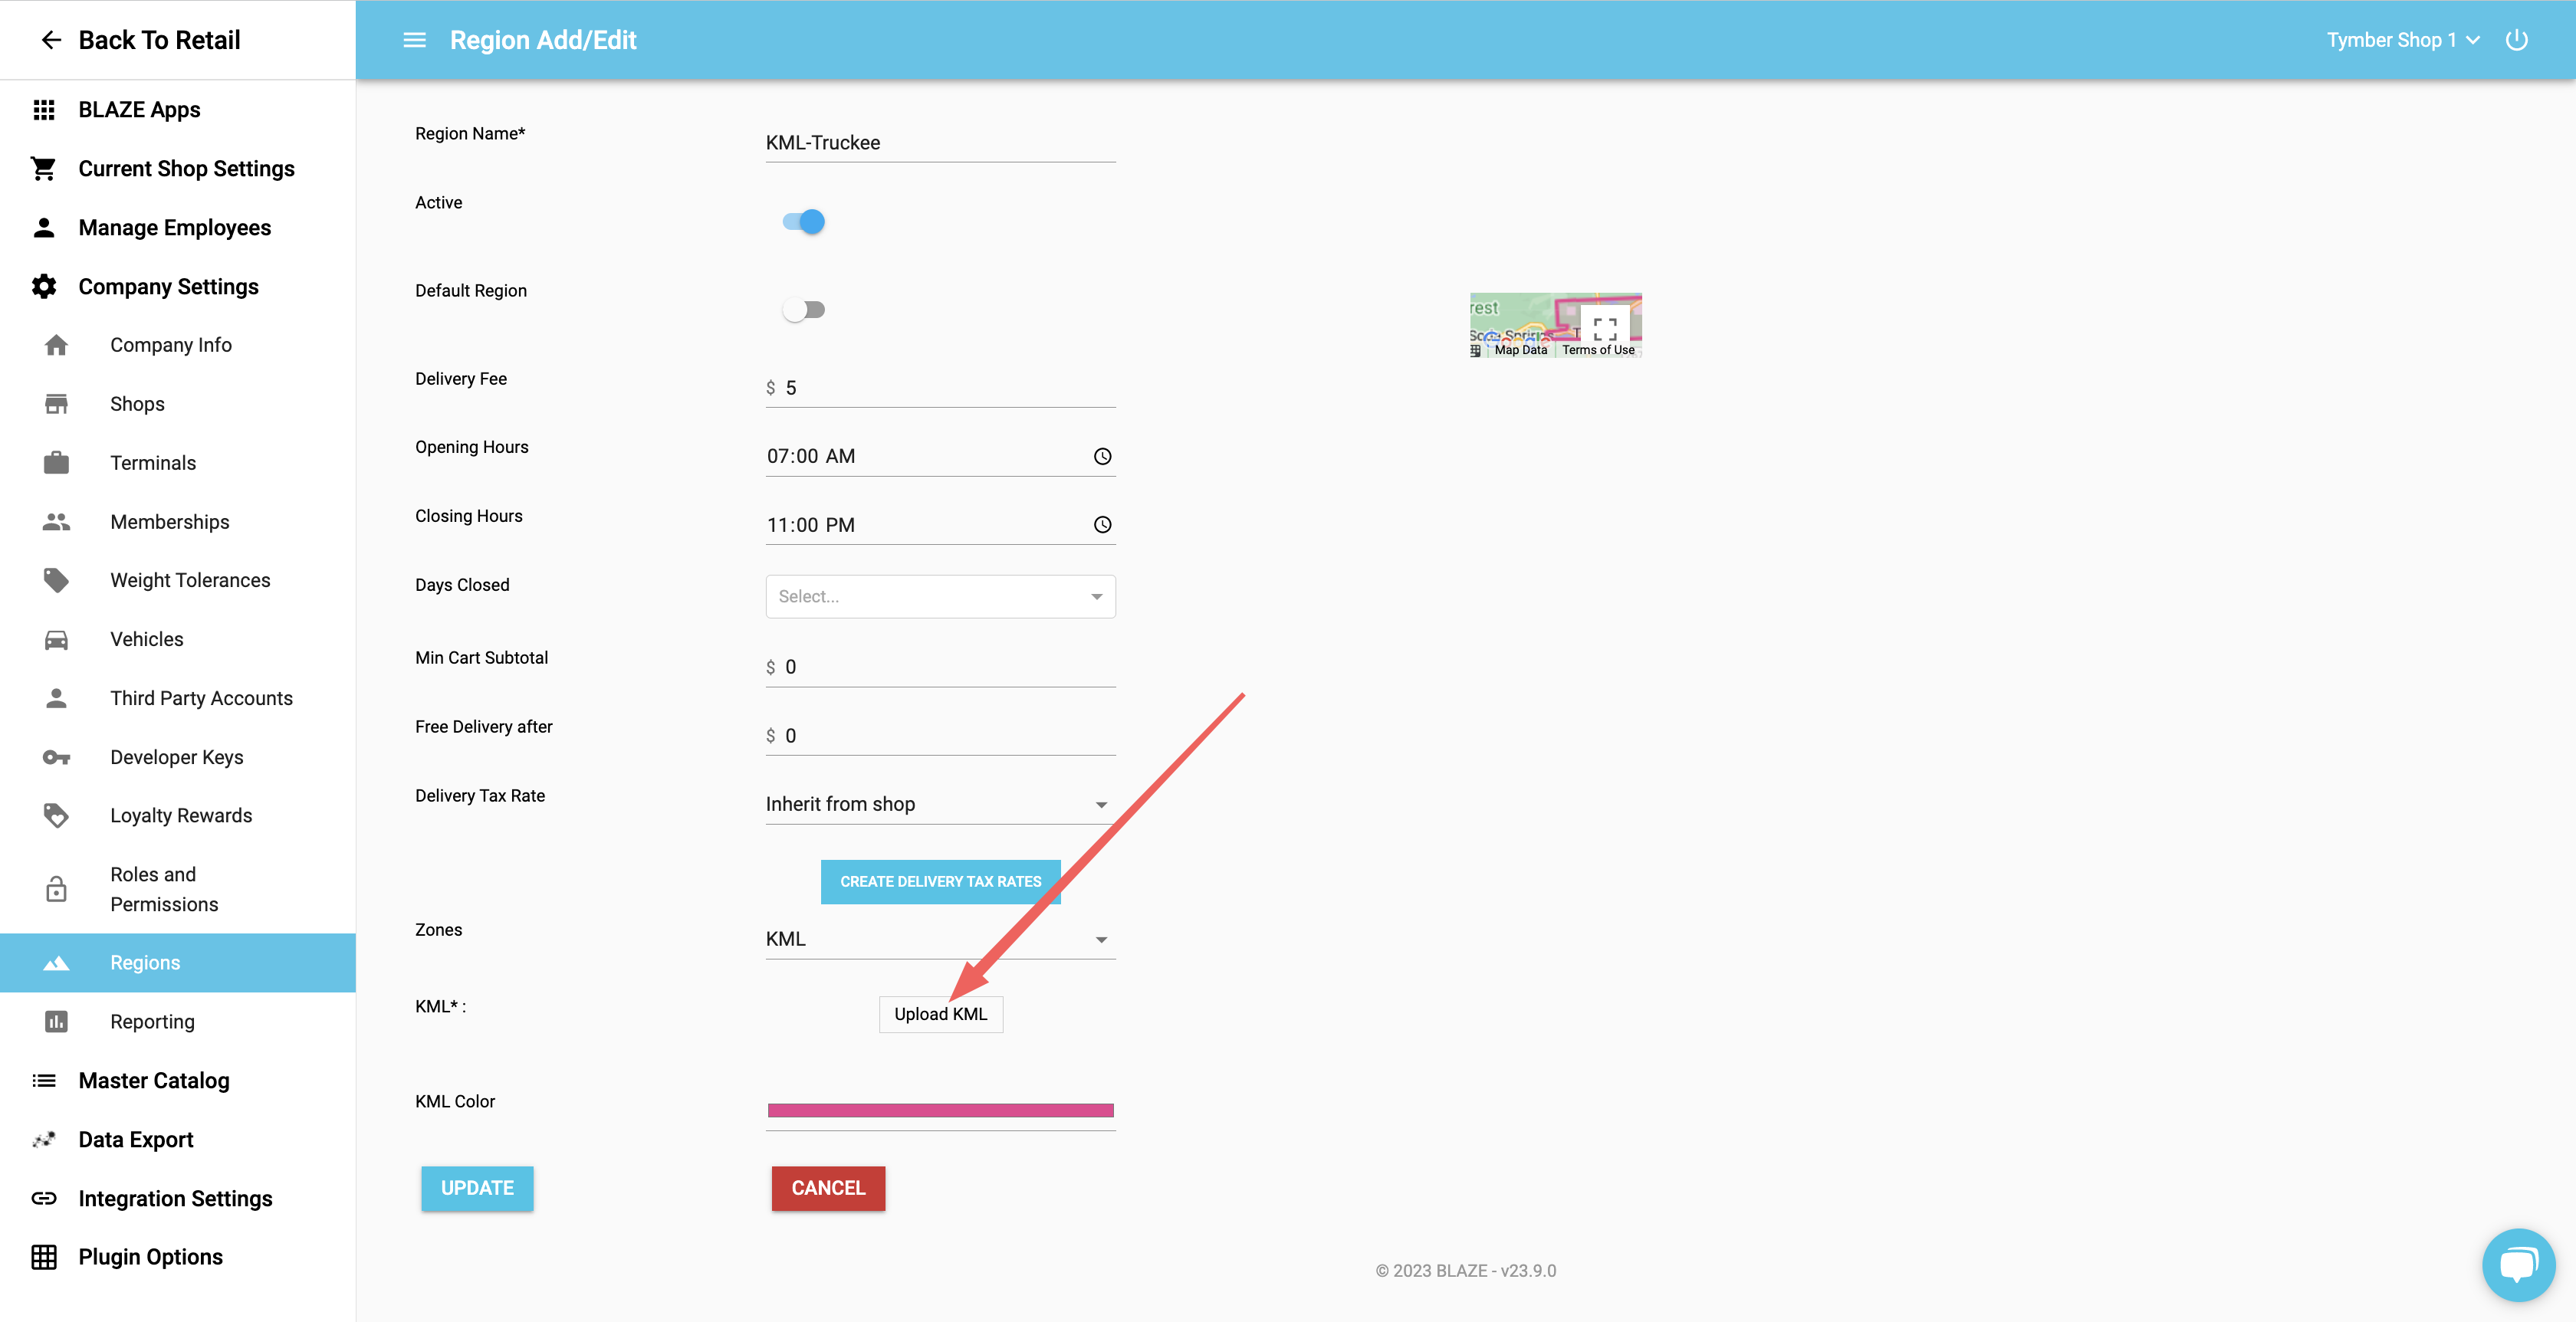
Upload Your KML Files to BLAZE POS Regions:
Within Your BLAZE Regions, you can set up a zone for each one.- These zones can be zip code based or .KML files (1 per region)
- Upload your .KML files in the desired regions
- Note: The screenshots are from a Blaze Dispatch Pro account.
If you would like the most of the ability to build unique regions that support unique Fees and Minimums by region, you could consider BLAZE Dispatch Pro. If you want to learn more about signing up for Dispatch Pro, reach out to your Account Care Manager or submit a contact form to BLAZE.
We recommend that you do not use overlapping KML zones for the smoothest order management experience:
- If you do use overlapping zones, and a customer orders from an address in that intersection, you have two options:
- Within BLAZE's region management, designate one of the regions as the "Default Region" so those orders populate to that region
- Plan for a flow where those orders will come in unassigned and your dispatcher will need to manually accept the order & assign to a driver
Associate Regions with Inventories in BLAZE POS:
Once Regions are configured with KML files, you'll want to associate the Regions with the Inventories they will be supporting.
- Please click here to read our step-by-step guide to associating Regions to Inventories in the BLAZE POS
Enable Specific Inventory in BLAZE POS:
- Enable Specific Inventory must be enabled in Global settings:
- Global Settings -> Online Store -> Enable Specific Inventory -> By Nearby Regions or By Nearby Regions + Default Regions

- Global Settings -> Online Store -> Enable Specific Inventory -> By Nearby Regions or By Nearby Regions + Default Regions
Request Manual Sync in ECOM Mission Control:
Once Regions and Inventories are configured, you'll want to run a manual POS Sync in Mission Control to Sync updates to ECOM before the automatic sync cycle.
Inventories in Mission Control:
Head to ECOM Mission Control -> Inventories to confirm the inventories and Regions/Zones you would like enabled for sellable products.
- ECOM | How to Manage Your Inventories Within ECOM Mission Control
- Recommended Safe Settings (Pizza delivery model):
- Scheduled Delivery - Available
- Express Delivery - Unavailable
- Pickup - Available (does not allow customers to order for pickup if delivery only retailer)
- Is Active - Active

- Recommended Express Kit Settings (If utilizing Express/Ice Cream Truck delivery model):
- Scheduled Delivery - Unavailable
- Express Delivery - Available
- Pickup - Unavailable
- Is Active - Active

- Recommended Safe Settings (Pizza delivery model):
To confirm your Region/Zone synced correctly, click Inventories -> Select Your Location -> Zones
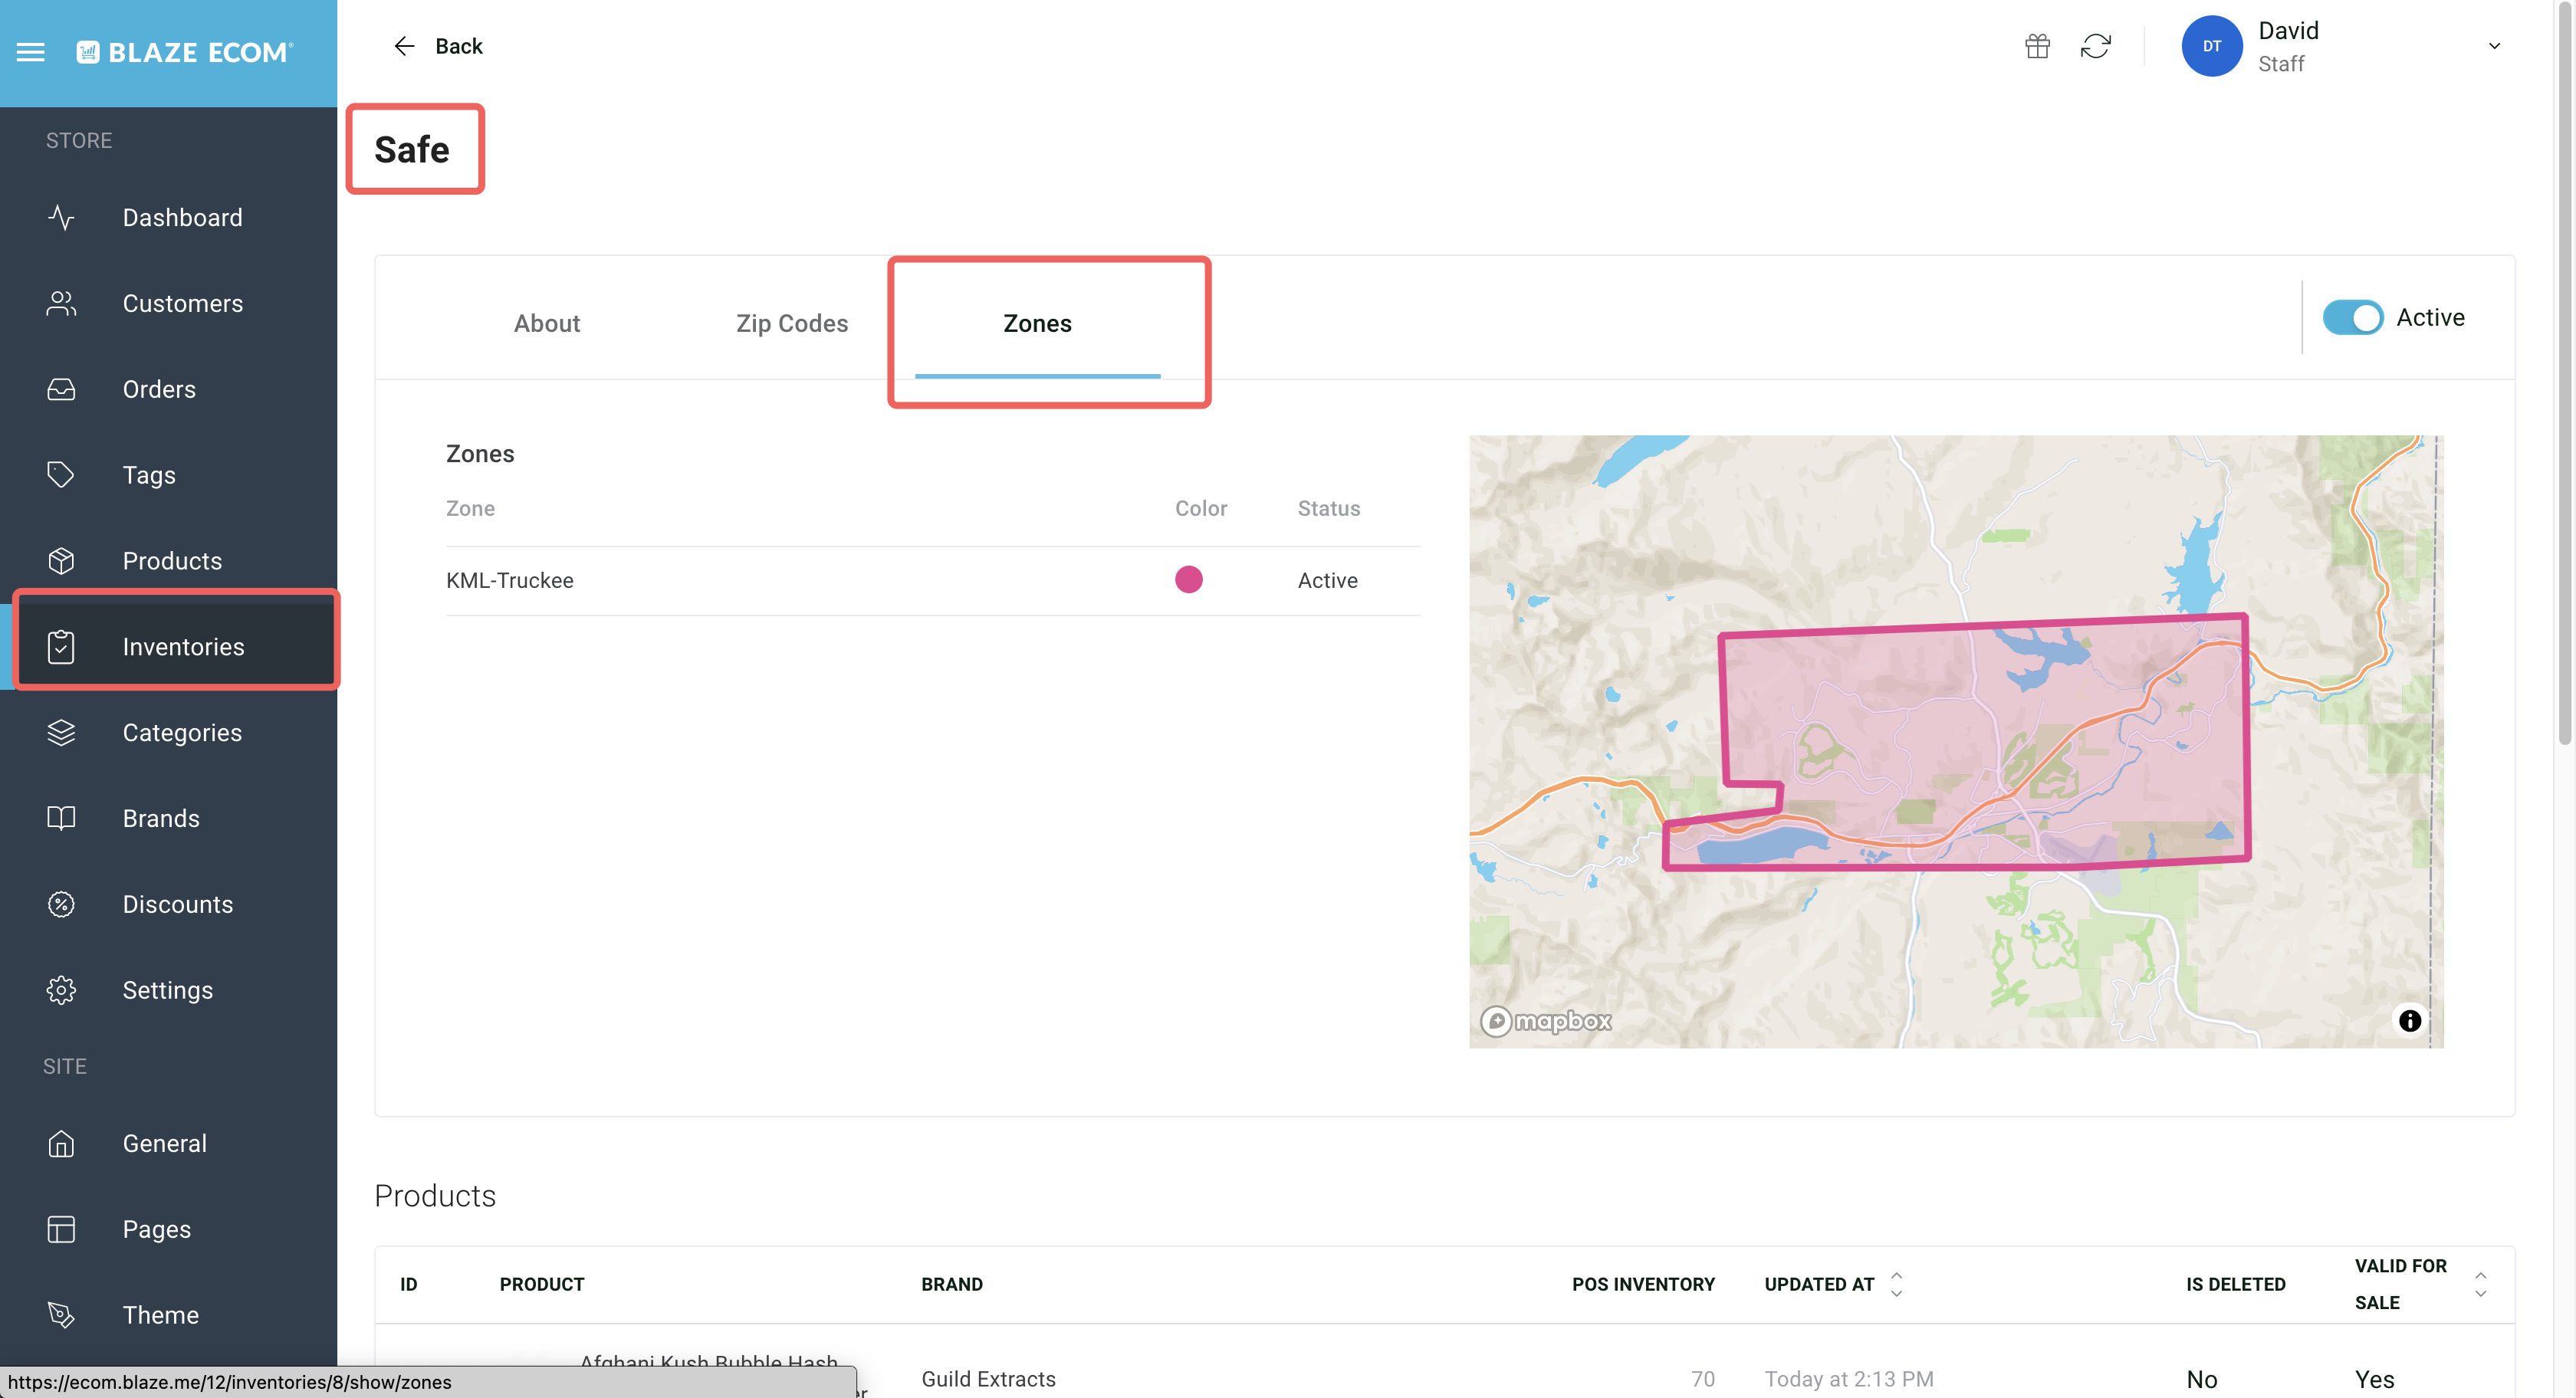
If multiple Regions are associated to an inventory, the map will show the different zones by color and shape. 
Area Restrictions and Deliveries in Mission Control
- Area Restrictions in POS Global Settings should be configured to Disabled for supporting KML Zones on ECOM

Important: Remove any zip codes configured in the Mission Control Area Restrictions - They will conflict with the KML zones if still configured.
Step 5: Enable Delivery Area Restrictions in Mission Control
Settings -> Deliveries -> Allow Scheduled Deliveries -> Allow Area Restrictions
- Remove Added Area Restriction Zip Codes From Delivery Settings
- Go to Settings > Delivery to access your area restrictions. If you have had added any, they will appear in the outline bar below. Clear them out and click "Save".
Allow Delivery Area Restrictions must be enabled in the Deliveries tab for total delivery area to be registered.

Step 6: Enable Geographical Delivery Zones In Mission Control
Go to Settings > Integrations > Blaze > Settings and toggle 'Geographical Delivery Zones' on as shown below
Once enabled, you must use KML files for each Region/Zone
- Zip-code defined zones will not be recognized again unless you toggle this off

If you want to make the most of the ability to build unique regions, you could consider BLAZE Dispatch Pro. If you want to learn more about signing up for Dispatch Pro, reach out to your Account Care Manager or submit a contact form to Blaze.