Prerequisites
- Have a Leafly account
- Read Leafly FAQs
Integration Guide Disclaimer
For further assistance or questions, please reach out to BLAZE Support (support@blaze.me) or use Leafly's Request Form to contact the Leafly Support Team.
Please also visit the BLAZE Help Center and Leafly Knowledge Base for helpful hints and tips.
Steps
BLAZE API Key
- Click on this link to generate your BLAZE API Key.
NOTE: You will need to copy and paste the API key in the next portion of the setup. You may want to keep this BLAZE tab open until you have completed the Leafly Setup.
NOTE: If you have multiple locations, you will need to generate a developer key for each one separately.
Set Up in Leafly
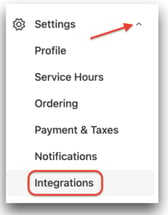
1. In Leafly's backend, navigate to the left side panel, click on the Settings arrow and select the Integrations option
2. On the Integrations settings page, select connect my POS to begin the Integration sync process
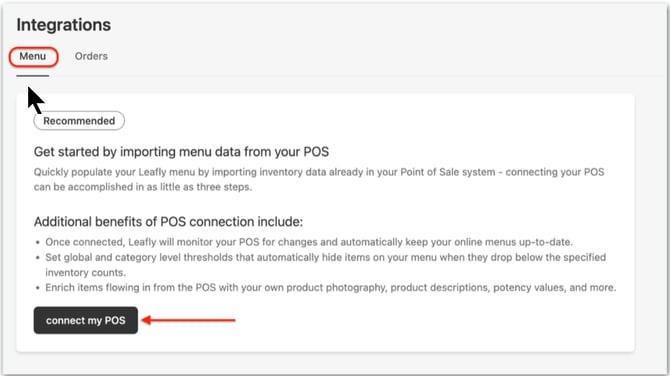
- Under POS System, select BLAZE Pull from the drop-down list
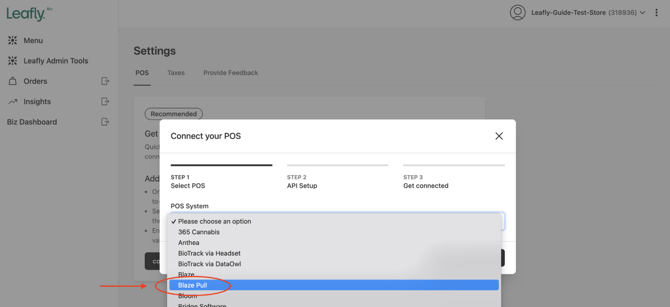
- Click continue to next step button
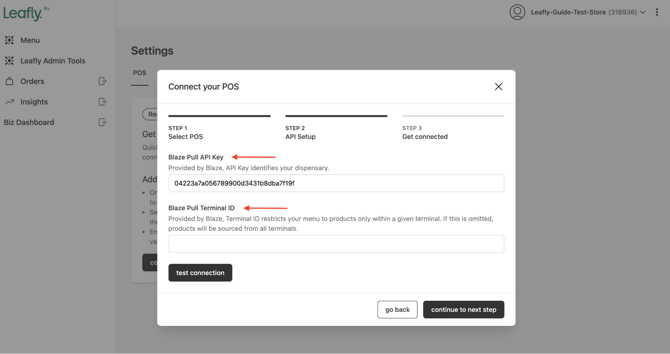
- Enter your BLAZE API Key in the appropriate fields. You’ll need to enter a valid Developer Key to successfully connect.
NOTE: The Terminal ID (Inventory ID) is optional and if entered, will restrict your menu to products only within a given terminal (Inventory).
- Once you’ve entered your credentials, click test credentials to confirm they are entered correctly.
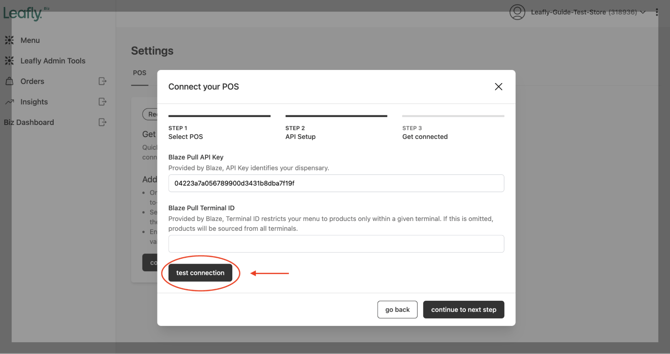
- Once you’ve successfully tested your credentials, click continue to next step
- Click acknowledge and accept to accept the Data Override Warning and complete the sync process on Leafly Biz.
-
You will be taken back to the POS Settings page, with a success message in the upper right corner.

Leafly Configuration (post POS-sync)
- Continue to the Leafly Configuration (post POS-sync) section of the linked document.
Set Up in BLAZE
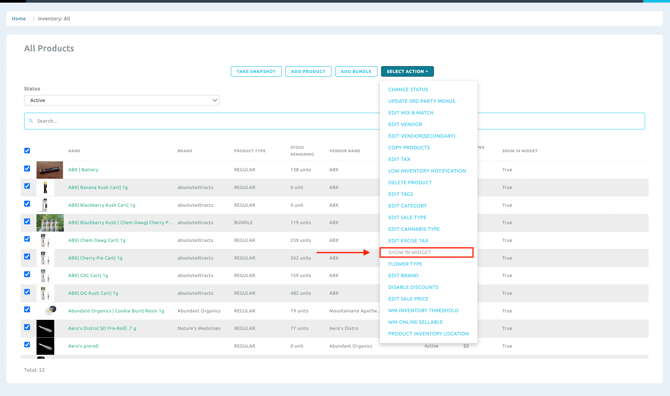
1. To specify what products display to Leafly and what do not, navigate to Retail > Inventory > All (this can also be done by category).
- Select the products to display to Leafly using the bulk checkmarks to the left of the product name
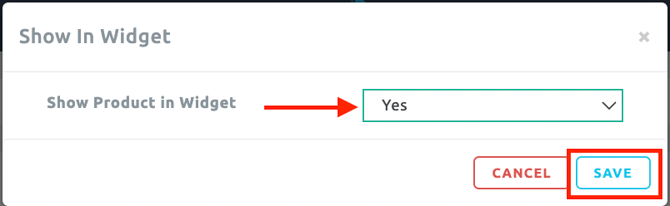
- Click Select Action > Show In Widget > Select Active > Save
- NOTE: To select items to NOT display onto Leafly, select Inactive