If you have already created your promotion, and want to skip ahead to using/testing it, jump to the Using a Promotion section of this article!
Creating or Editing a Promotion
The following steps will show a detailed walkthrough of creating a new promotion, or where to edit an existing one. You can also find a video showing the steps in real time below.
1. Select the Loyalty / Marketing tab on the BLAZE web app and click Promotions.
.png?width=460&height=913&name=promotions%20picture%20(2).png)
2. Click the Add Promotion button to begin creating a new promotion, or if you would like to edit one you have previously created, click on it in the list of promotions below.
.png?width=688&height=156&name=add%20promo%20arrow%20(2).png)
3. Define the rules specific to the promotion you want to run. For more information on promo rules, please refer to the Promotion Rules article found here.
BOGO Promotion Setup
The following setup steps will walk you through the required settings to make a BOGO promotion work.
Here is the settings page for editing a promotion. In this picture, you will see an example of a preroll BOGO promotion, and all of the settings already set up. Below the picture, we will cover each field, what it does, and why we are setting it the way we did.

- Version: At this time this should always be V2 to get the most up to date promo features.
- Name: This will be the name of the promotion that shows in your promotion list, as well as shows when you add it to your order.
- Status: This can be either Active or Inactive, this determines whether or not the promotion can currently be used or viewed from the cart as promotions available to add.
- Promotion Type: This can be either Product or Cart. Product for the promotion to discount specific lines of the order, Cart for the promotion to discount the overall total of the cart itself. For a BOGO we will use the Product Type
- Auto Apply: If enabled the promotion will automatically apply to a customers cart when the requirements are met, however if removed from the order by staff, the promotion will not re-apply itself to that cart.
- Stackable: This can be either Yes or No. Setting this as Yes will allow this promotion to be used alongside other promotions in the same order. If this is set as No it cannot be stacked, meaning if this is on an order, nothing else can be added even if the other promotion is stackable. In addition having this set as No means that if any other promotion is on the order, this promotion will not be addable.
- Discount Lowest Priced Product: This can be either Yes or No. Setting this to Yes will make your promotion target the lowest-priced eligible product first when applying.
- Promo Description: This will be the description of the promotion.
- Promo Codes: This will be the promo code that can be used in the promo code field on your online store. For example, for a BOGO 50% Preroll, it could be something like HALFOFFPREROLL.
- Required Code?: This can be either Yes or No. Setting this as Yes will require your budtenders to type in the code to use the promotion.
- Restrict to Sales Channel: Here you can leave it blank so that the promo applies to all possible sales channels. If you want a product to be app/in store(retail)/ecom only you can select the desired options here to allow the promotion to function in only the desired sales channels.
- Date Range: The date range selector can be used to limit this promotion to only be usable during certain dates. Leaving this blank will give the promotion no limited date range.
- Available On: This can be used to limit the promotion to only be usable on certain days of the week.
- Time: This can be used to limit the promotion to only be usable at certain times of the day.
- Max Available: This can be used to limit the number of times the promotion can be used globally. An example of this would be a promotion where the first 25 people to get a certain product will get it half off. When setting up a promotion in this way, you would enter 25 in this field.
- Max Per Customer: This can be used to limit the number of times the promotion can be used per member. For example, if this is a first time customer discount, you would enter 1 as after this has been used we do not want the member to be able to claim it again.
- Enable Scalable Cash Discount: This field will never be used for a BOGO promotion.
- Restrict to Member Groups: This checkbox can be checked if you want the promotion to only be usable on members in certain member groups. An example of when you might use this could be if you only want to give Veterans this promotion. In that case you would check this box and select that member group.
- Restrict to Consumer Type: This checkbox can be checked if you want the promotion to only be usable on members in certain member groups. IE you want the promo to be able to be used by adult use customers ONLY.
- Group Products By: Allows you to group up products by different criteria such as Category, Brand, or Vendor. If you were to setup a BOGO for a brand, but the customer couldn't mix and match BOGOs across product categories, then you would want to group by category so that the products are grouped by category and you must have two of the same category to redeem.
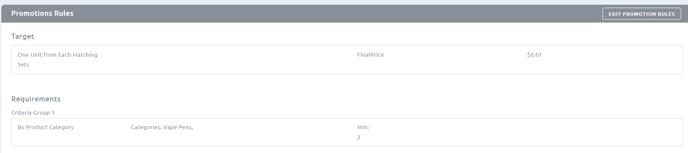
Now that we understand the different settings for a BOGO promotion and which ones we need to ensure the BOGO is working as intended. The final step is to create the rules of the promotion. Promotion rules are the guidelines that tell the system when an order or product qualifies for it. For our example, we are doing a buy any one Vape Pen, get any Vape Pen for a penny. Below is a picture showing the rule being set up, right before saving it.
Note: The promo setup in the screenshot will allow you to have this auto apply promo scale automatically. For example if I have 4 products in my cart, all BOGO eligible, then the following logic will apply the promotion automatically, twice. This also works the same way within Blaze ECOM.
***Here the Min under requirements is TOTAL number of products including those that will be discounted.***
Note: If you want this BOGO to apply automatically ONLY ONCE per cart you even if someone had 4 products like in the previous example, you will want the following setup.
Target: One From (x), x being product, brand, vendor etc depending on desired criteria.
Minimum: By desired criteria > Min = 1. In this case the minimum represents the number of full priced products that must be in cart.
If you have been following along, you can now save your promotion.
Target: One From (x), x being product, brand, vendor etc depending on desired criteria.
Minimum: By desired criteria > Min = 1. In this case the minimum represents the number of full priced products that must be in cart.
If you have been following along, you can now save your promotion.
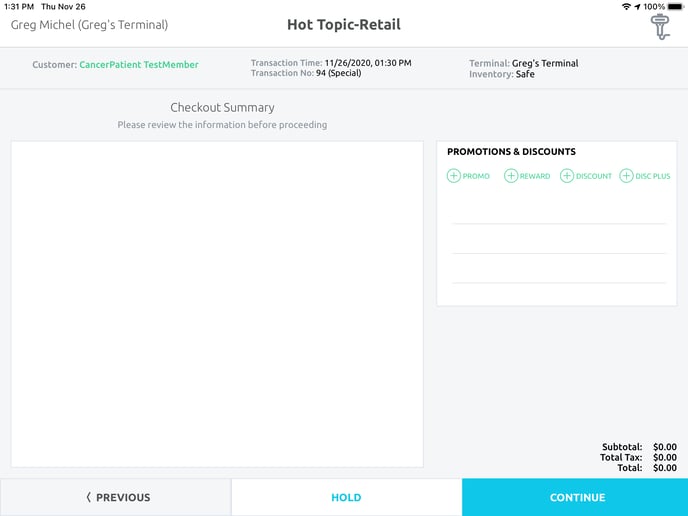
Using a BOGO Promotion on the Web and the POS app
A Promotion can be used in both the Dispatch and the iPad POS app. Below you will find a picture of where to find the promotions on each.
Webapp:
.png?width=688&height=376&name=mceclip1%20(2).png)
iPad POS app: