The BLAZE Delivery app is designed for Drivers and Delivery Services. It is optimized for a phone screen. This app can be found in either the App Store (Apple) or Google Play Store (Android) by searching "BLAZE Delivery" (with quotations).
Or, click these links for easy access:
Apple: https://apps.apple.com/us/app/blaze-delivery/id1482410193
Android: https://play.google.com/store/apps/details?id=com.blaze.retail.delivery&hl=en_US
After you have downloaded the App please take a look at Retail | BLAZE Delivery App to get an understanding of the App layout and its contents.
Overview
Packing an order in the Delivery App
Global Settings
These are settings that you will want to verify that are set for your delivery service.
- Global Settings > Current Shop Settings > Shop Information
- Click on the Edit button
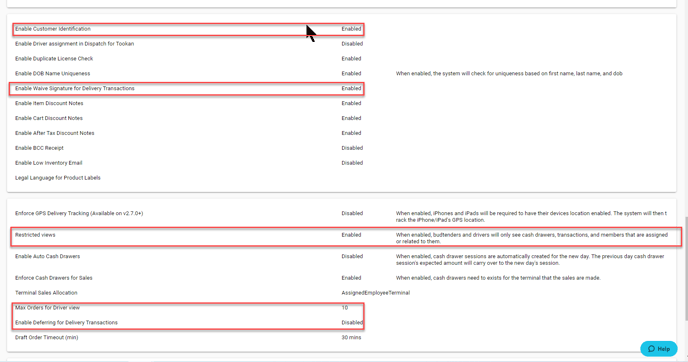
- Enable Customer Identification: Allows an asset to be attached to the transaction, not the profile. An asset can be an ID used for verification for delivery.
NOTE: To require the drivers to take a DL photo you must enable the following setting: Enable Customer Identification
- Enable Waive Signature for Delivery Transactions: If this option is enabled, you will see the option to Waive Signatures
- Restricted views: When enabled, budtenders and drivers will only see cash drawers, transactions, and members that are assigned or related to them
- Max Orders for Driver view: Maximum number of orders a driver may view at a time.
NOTE: Max Orders for Driver view defaults to 1. This option will need to be increased.
-
- Enable Deferring for Delivery Transactions: This option is used so that orders can be skipped or delivered later.
- Click the Save button at the top of the view to save your changes.
Assigning the Order
There are a couple of ways to Assign A Driver to an order. You can Assign A Driver when creating an order or Re-route an existing order.
Assigning the Order Video Walkthrough
New Order
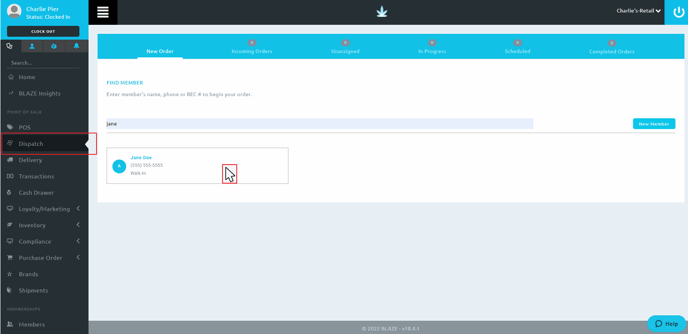
To create an order, navigate to Dispatch and either Find Member or create a New Member.
- Select the existing member by clicking into the Member box.
Note: Clicking on the Member's name will take you to the Member Profile.
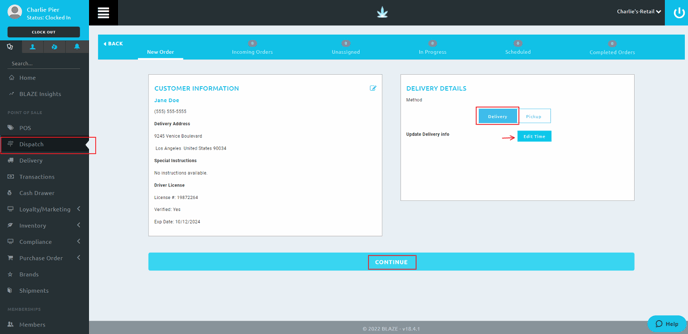
The Delivery Details Method defaults to Delivery.
- You are able to set up a delivery window by clicking on the Edit Time button.
- Click Continue.
After your order is completely entered, click Assign A Driver.
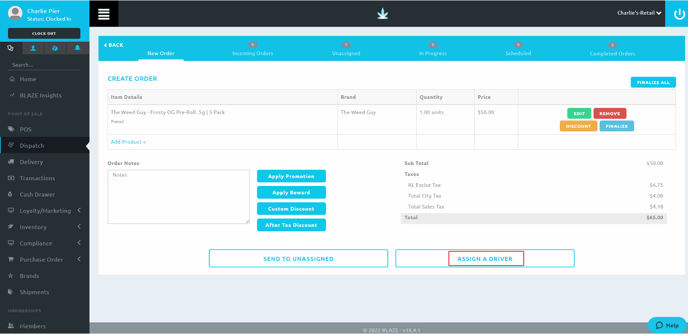
Note: Click here to skip to the Re-route Driver window.
Existing Order
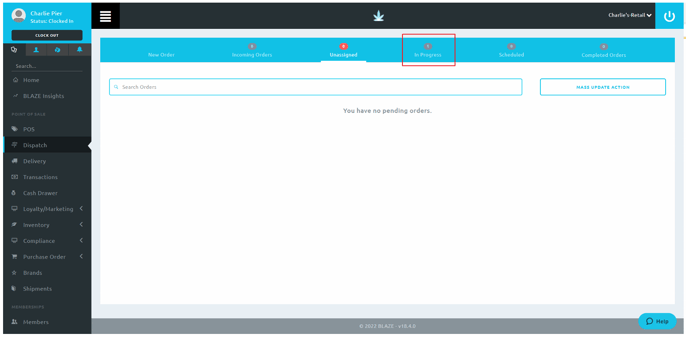
You are also able to Re-Route existing orders in Dispatch while in the Unassigned, In Progress and Scheduled queues.
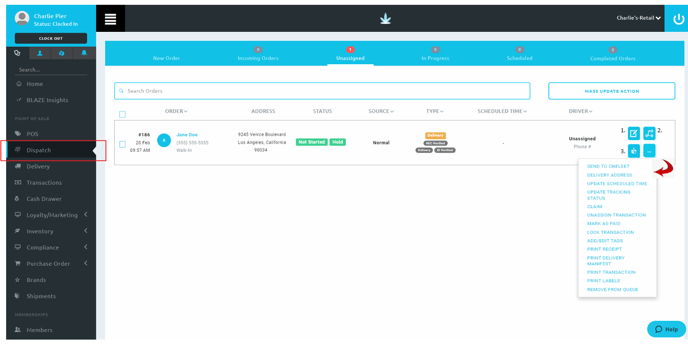
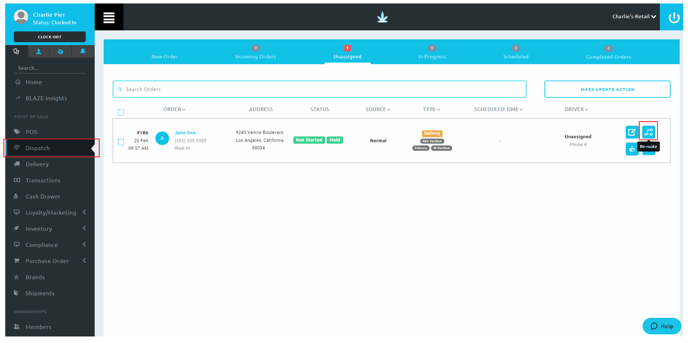
On the right side of the order, you have 4 square icon options.
1. Edit: Will take you to the Cart Order
2. Re-route: This will allow you to assign or re-assign the Order/Task
3. Packed By: Allows you to see or assign who packed the order.
4. The 3 Dot Icon
- Send to Onfleet: Allows you to assign to Onfleet if the options are enabled
- Delivery Address: Allows you to update the Delivery Address
- Update Scheduled Time: Allows you to set the Delivery Time parameters
- Update Tracking Status: Allows you to update the Status of the order
- Claim: Moves an order from an in-progress OR queued status to an on hold status
- Unassign Transaction: Allows you to unassign the transaction
- Mark as Paid: Allows you to mark the transaction as PAID
- Lock Transaction: Allows you to lock the transaction
- Add/Edit Tags: Allows you to Add and/or Edit tags
- Print Receipt: Allows you to print the receipt
- Print Delivery Manifest: Allows you to print the Delivery Manifest
- Print Transaction: Allows you to print the Transaction
- Print Labels: Print labels by going to Inventory in the Main Menu and to Print Labels
- Remove from Queue: Allows you to remove from the queue
Click Re-route
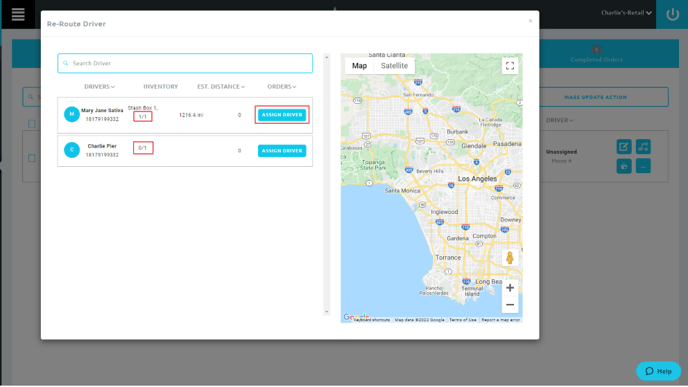
In the Re-Route Driver window, there is a Drivers column that lists all drivers that are signed in.
Under Inventory you see the 1/1 and 0/1.
- 1/1 indicates that there is 1 item in this order and 1 item that the driver has in their inventory.
- 0/1 indicates that the driver does not have that product in their inventory
There is also a column for Estimated Distance for the delivery and how many Orders each driver is assigned.
We are going to assign Mary Jane to this order by clicking Assign Driver.
Packing an Order in the shop
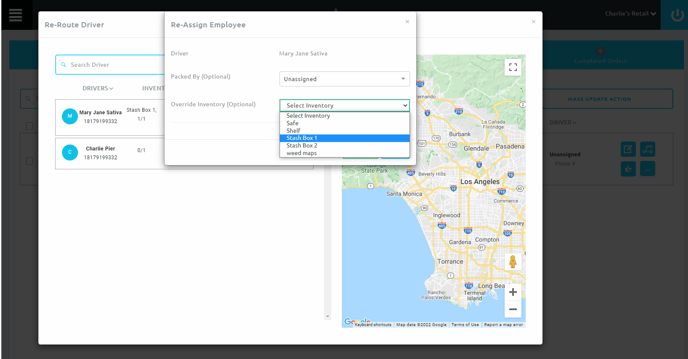
Another window will populate to Re-Assign Employee. You will see the driver's name defaulted.
Packed By (optional) - Packing an Order is the process of getting the ordered products ready to sell and packed into their packaging material in order to deliver to the customer.
- If this is Pizza Delivery Style then you more than likely have someone packing your orders before they leave the shop. If orders get packed in the shop before leaving, select the person who packed the order.
- If this is an Ice Cream Truck model then, you will be packing the orders in the field as the orders come in.
- We are leaving this Unassigned as it will be Packed by the driver in the field.
Override Inventory (optional), make sure to select the correct inventory this is being sold from.
Once the order is assigned, the order will proceed to In Progress.
Now the driver will be able to see this Order as a Task in the App as well.
The Delivery App
The screen shots and workflow in the Delivery App will be the same for Android and Apple users.
The Delivery App Video Walkthrough
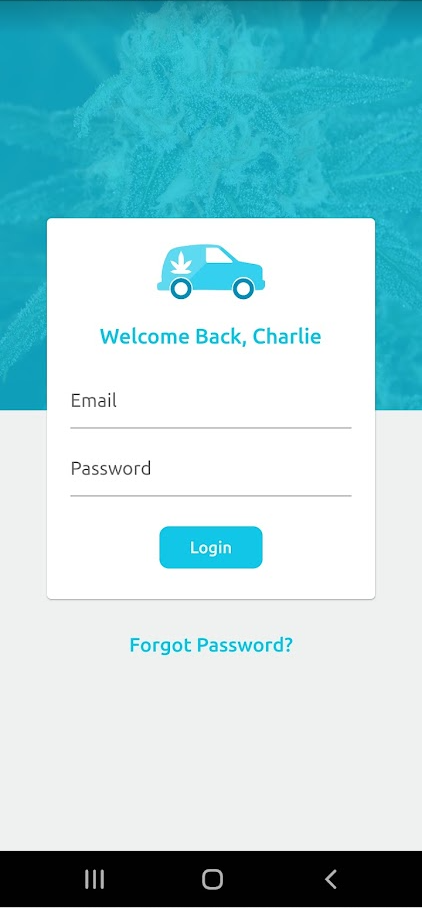
1. Sign in to the Delivery App with your Email and Password.
- Click Login
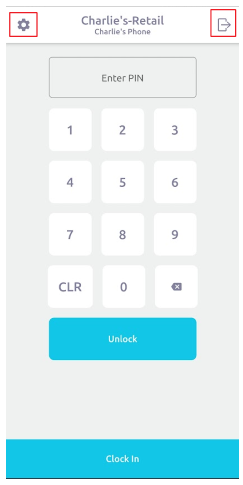
2. The Enter PIN screen has the options to:
- Clock In using the Clock In button
- The Gear Icon will allow you to change terminals
- The Exit Door icon is the log out option
- Enter PIN using the key pad
Enter your PIN
- Click Unlock
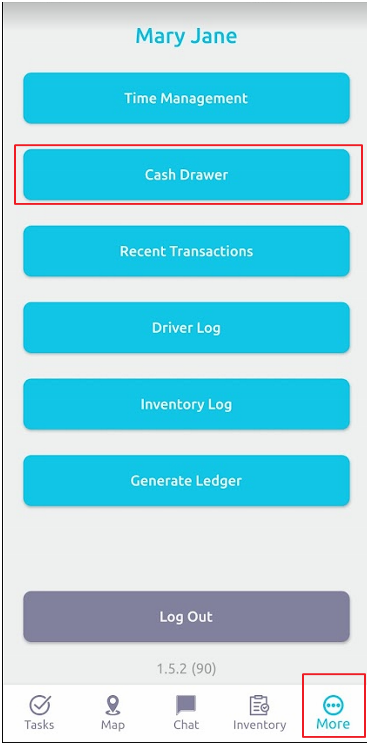
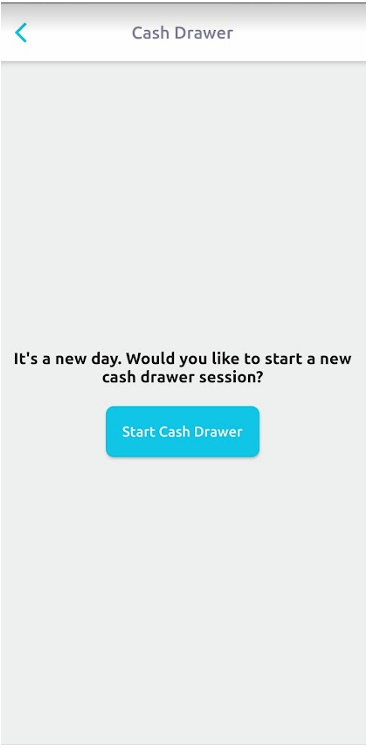
3. Go to the More option and make sure to open a Cash Drawer.
4. Click Start Cash Drawer
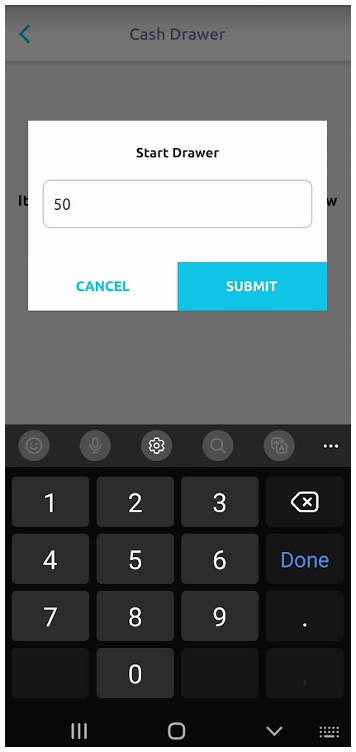
5. Enter the starting amount of your drawer.
- Click SUBMIT
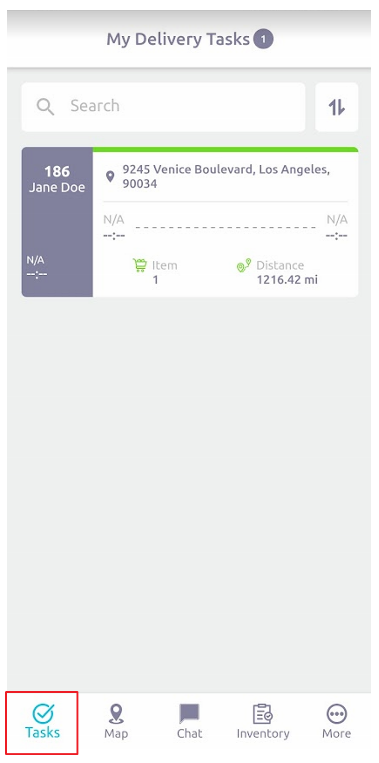
6. Go to Tasks on the Menu on the bottom to see your assigned orders.
- Click on the Task itself to open it
Packing an order in the Delivery App
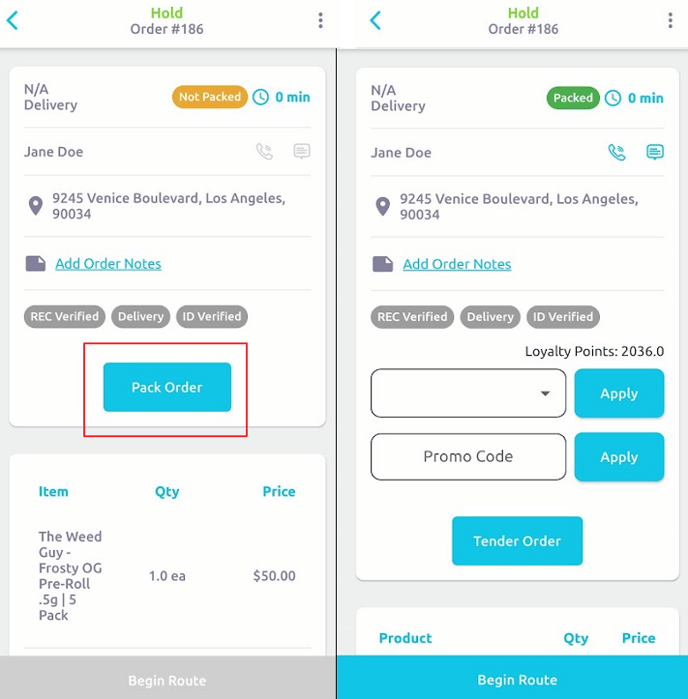
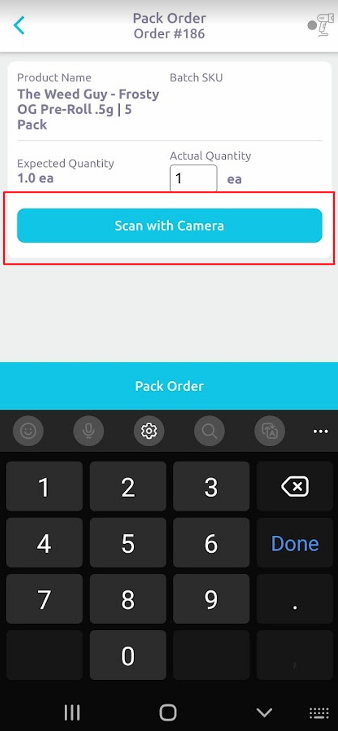
7. Pack the order by clicking the Pack Order button, shown on the left. This is the process of gathering the order, scanning the products and packing or bagging the products for the sale.
- If the order was packed before it left the shop you would see it listed as Packed as shown on the right.
- The Task will be on Hold until the order is tendered out.
Note: If your order is Packed, skip this process and you can Begin Route.
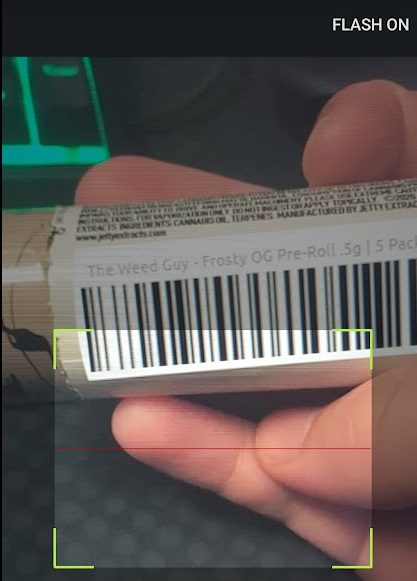
8. Click the Scan with Camera button.
9. Scan the products and pack them.
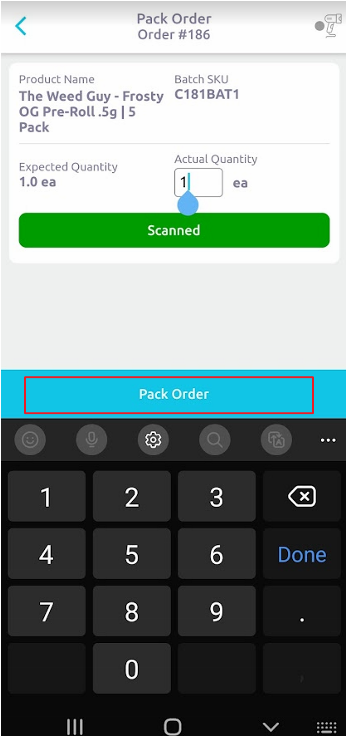
10. The screen will show you scanned the products.
- Click Pack Order to continue.
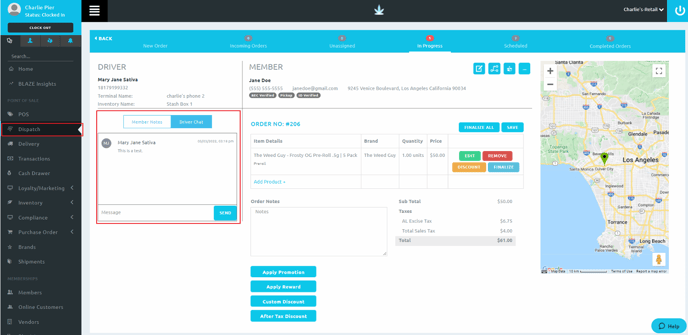
Once you have packed the order, you will be presented with more options in the Delivery App.
- Phone Icon - will allow you call out, the Member's phone number is the default number.
- Text Icon - Allows you to chat with Dispatch through the open order In Progress in the Web.
- Add Order Notes - Allow you to add notes to the order.
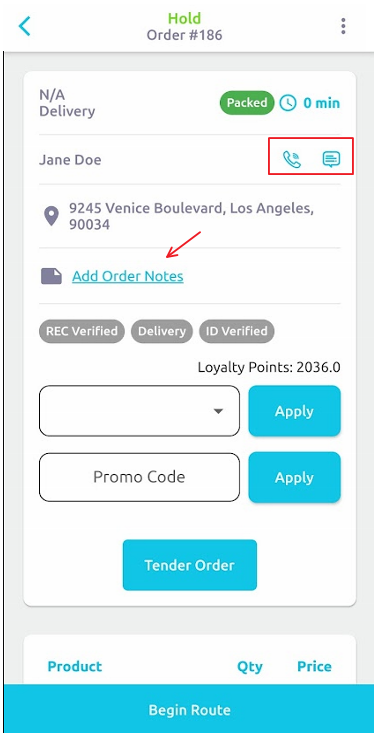
- Here is the view of an open order where you can Chat with a driver and view added notes.
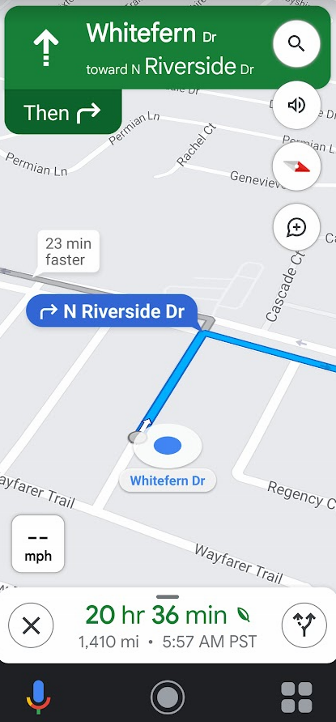
11. Now you can begin your route by clicking Begin Route.
12. You will be routed to your destination. Set Google Maps as your default map app in your device.
 .
.
Tender the Order
13. Once you arrive, you will now be able to Tender the order.
- If they have any Promo Codes, enter them here by selecting from the drop down menu or typing in the Promo Code in the second field and selecting Apply.

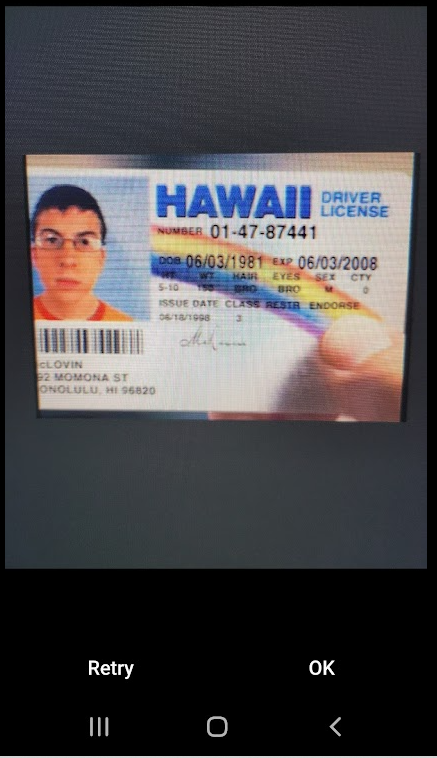
14. You will first have the option to Capture Image or to Skip the option.
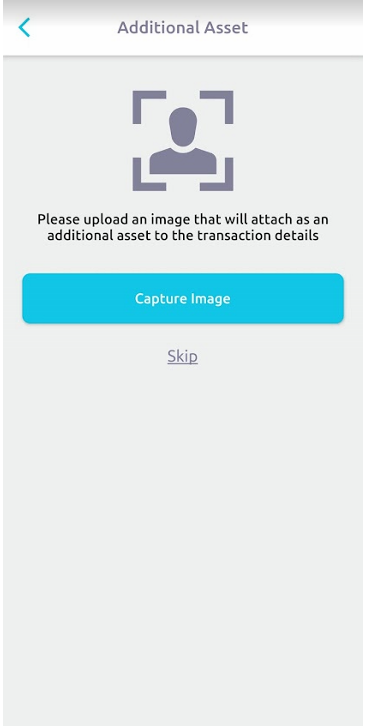
- Once you take the photo, you will be shown the photo and asked if the photo is OK or Retry.
15. Once the photo is taken you will be taken to a signature screen.
- Have your Member sign for the order.
- Select Agree.
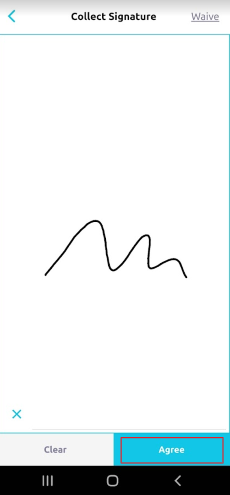
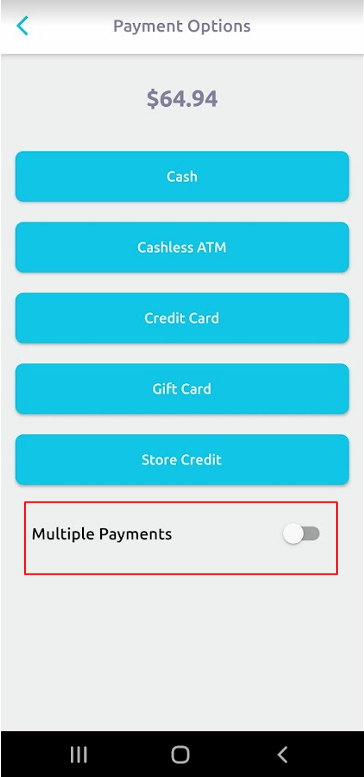
16. Next is Payments Options.
- Select the Payment Option needed.
- Note: If the customer is going to pay with multiple payment options, be sure to select Multiple Payments before entering the first method of payment.
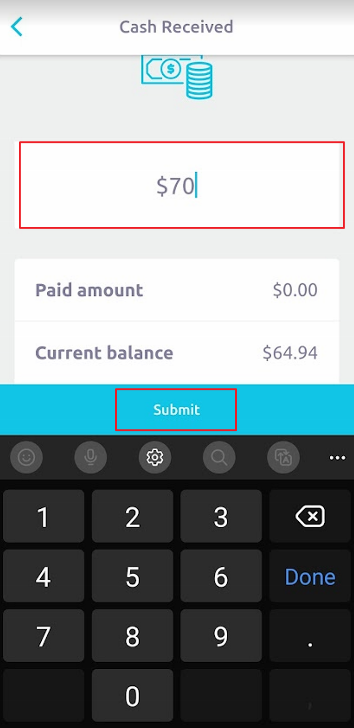
17. After selecting the Payment Option, you will have a payment received field.
- Enter the amount of the payment and click Submit.
18. You will then be taken to a screen for the Completed Transaction.
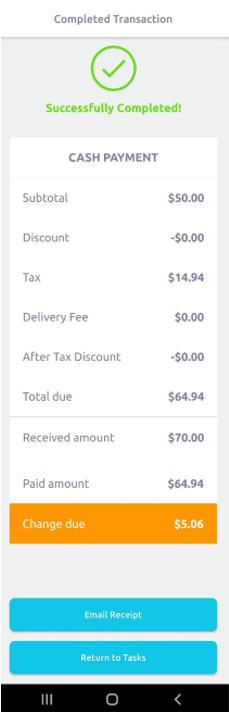
You will have the choice to Email Receipt or Return to Tasks.
At this point, you would move on to the next delivery in Tasks.
If you have further questions, please reach out to us at support@blaze.me !