Retail POS App | How to Process an Assigned Order
How to Process an Assigned Order in the POS App.
Ensure your Cash Drawer is open before processing an order.
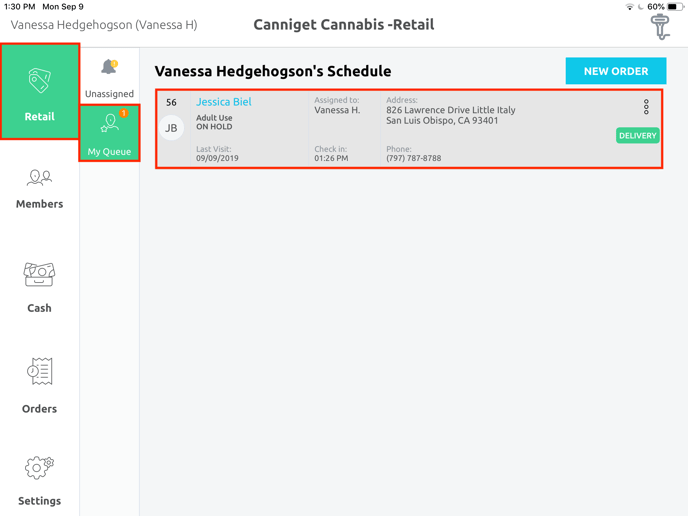
1. Navigate to Retail > My Queue
- Your assigned orders will appear here
- The orange notification signifies how many members are in your queue
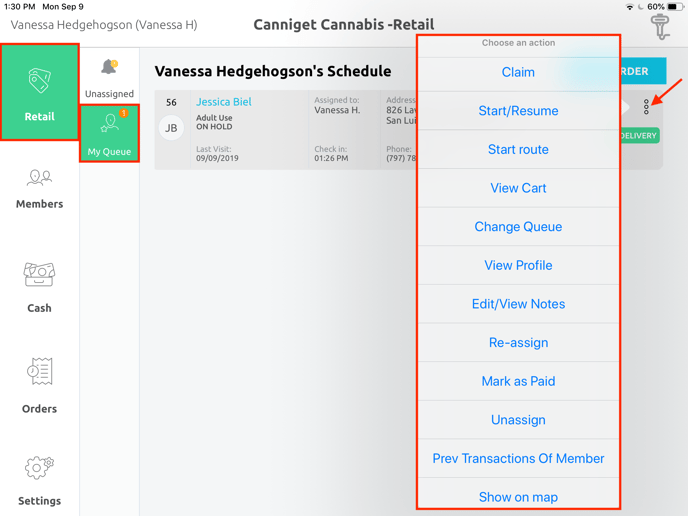
2. Tap on the 3 dots of the order you wish to address. A variety of options will appear.
- Claim: Moves an order from an in-progress OR queued status to an on hold status
- Start/Resume: This action either starts or resumes their order
- Start Route: This action syncs their delivery address with Apple Maps and provides you with potential routes from your current location
- View Cart: This action displays a quick view of the items in their cart
- Change Queue: This action allows you to change the Queue they are in (Unassigned, Walkin, or Delivery)
- View Profile: This action allows you to view the Member's profile
- Edit/View Notes: This action allows you to edit and/or view previous Notes
- Re-Assign: This action allows you to re-assign this Member to another employee
- Mark as Paid: This action removes the payment process from the checking out experience
- Unassign: This action allows you to unassign the Member from your Queue
- Prev Transactions of Member: This action allows you to view this Member's previous transactions
- Show on Map: This action allows you to see their delivery address on Apple Maps
3. To continue checking the member out:
- Tap the Start/Resume button
- If this order was assigned to you, the member's order details will come from the dispatch employee
NOTE: If the member wants to add products at this point, and you have both the inventory and capability to modify their order, make the adjustments at this time - When done, tap the Checkout button
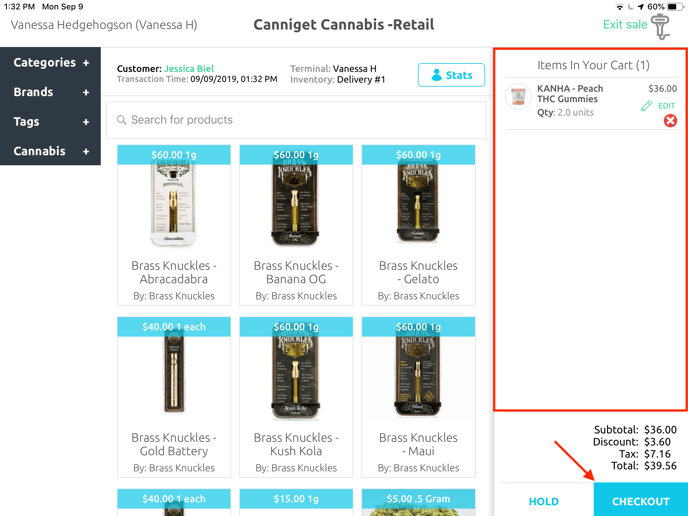
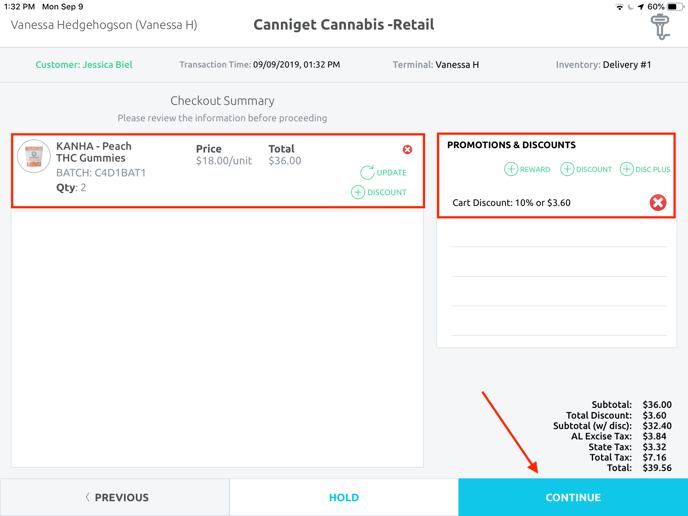
4. Ensure that the rung up order matches what they have asked for.
- If applicable, add any additional Rewards and/or Discounts
- Any preexisting Discounts or Rewards have been added by your dispatcher
- Tap the Continue button
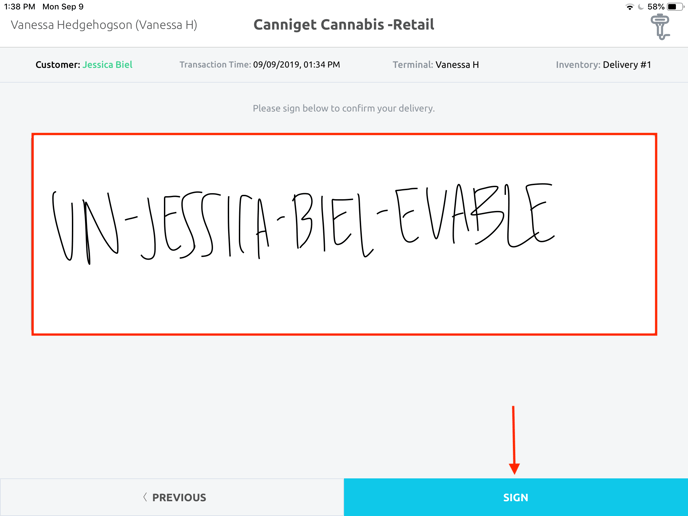
5. If enabled, have the member sign for their delivery.
- Tap the Sign button
NOTE: This step will NOT appear if this feature is disabled in Global Settings.
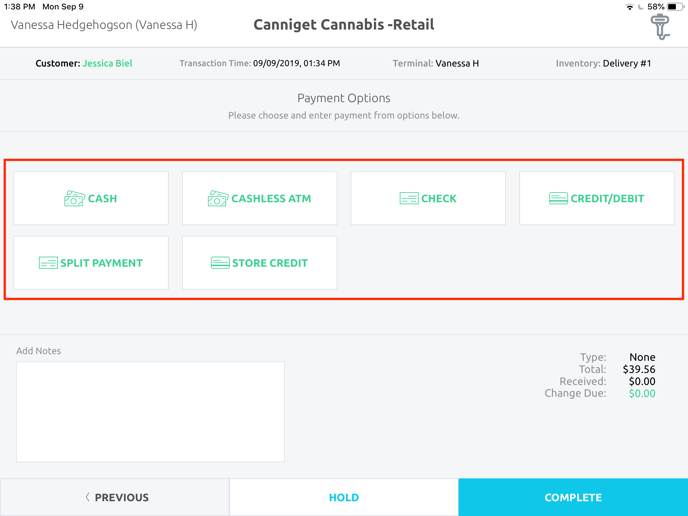
6. Select the payment method used from your options listed (These may be different than the ones you see, depending upon your Payment Methods selected in Global Settings).
- Tap the Complete button
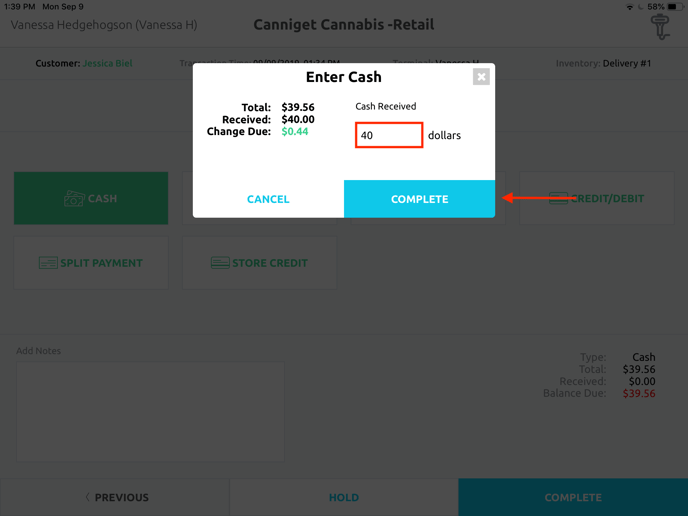
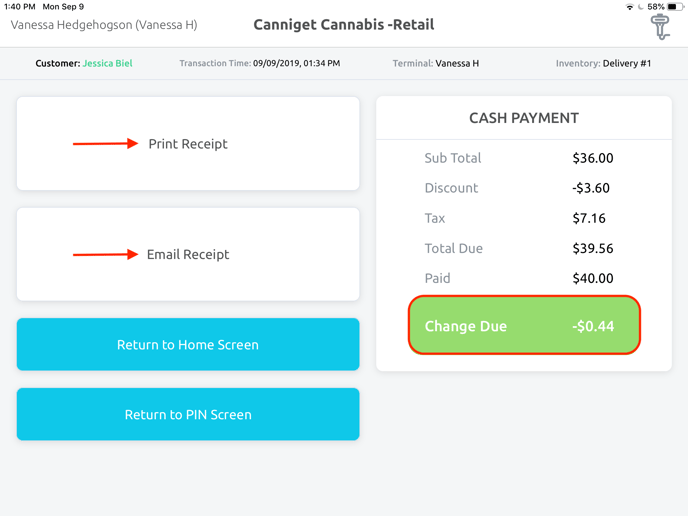
7. If applicable, give any change due at this time.
- Print or Email the receipt to the desired email
