Retail POS App | Two-Step Fulfillment
Two-Step Fulfillment in the POS App.
Our Two-Step Fulfillment System involves 2 main steps: Preparing and Fulfilling the order.
This Checkout Type is designed for orders that have two employees processing an order. One employee prepares the order, and the other employee fulfills and checks out the order. Navigate to the sections below to learn more.
Global Settings
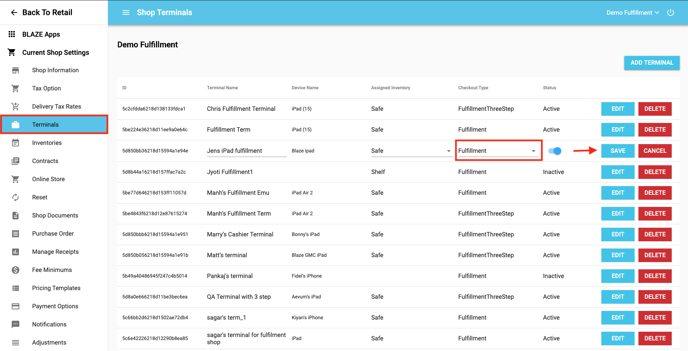
Before using the Two-Step Fulfillment System, it must be enabled for the terminal(s) using it. This can be done on the Web in Global Settings.
- Navigate to BLAZE > Global Settings > Current Shop Settings > Terminals
- Click the Edit button for the desired Terminal to be enabled for Two-Step Fulfillment
- Checkout Type: Select the Fulfillment option
- Click the Save button
- Repeat as necessary
- The modified Terminal(s) are now ready to process orders using BLAZE's Two-Step Fulfillment
Prepare the Order
New orders can be processed by looking up an Existing Member or creating a New Member.
Existing Member
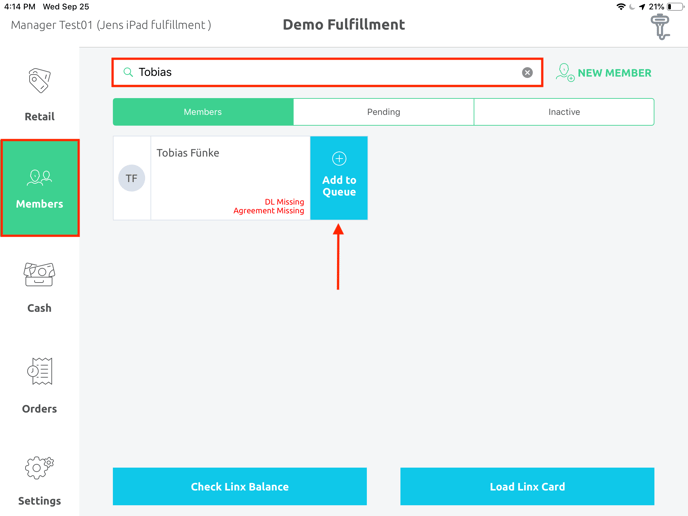
1. If a Member already exists, navigate to Members
- Search the member's name in the search bar
- Tap the Add to Queue button
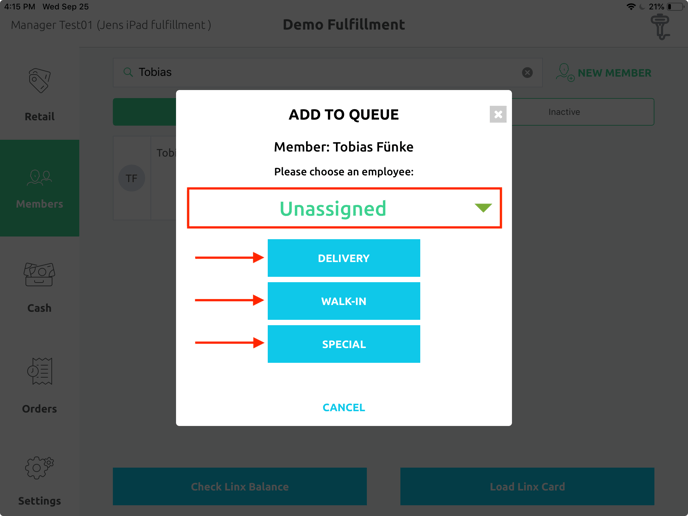
2. A popup will appear
- Assign the Member to an available Employee or leave Unassigned
- Select which Queue (Delivery, Walk-In, or Special) to add them to (These may be different than the ones you see, depending upon your Queues selected in Global Settings).
3. Navigate to Retail > Unassigned or My Queue > Prepare
- Tap on the Member recently added to the selected Queue
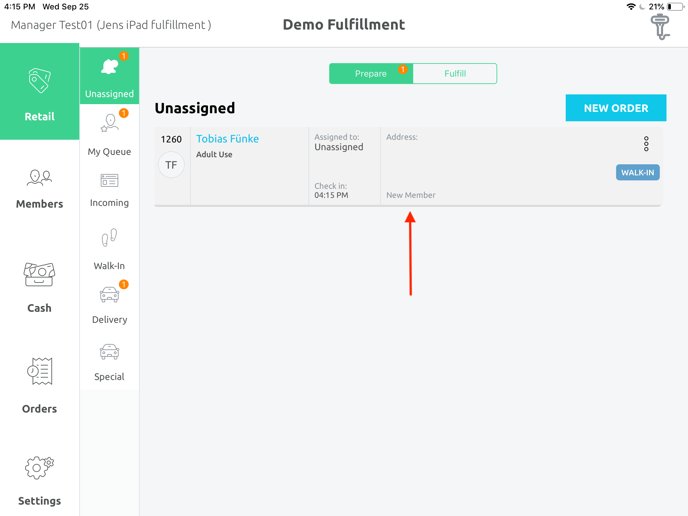
NOTE: To continue preparing the order, skip to step 5 in the following New Member section.
New Member
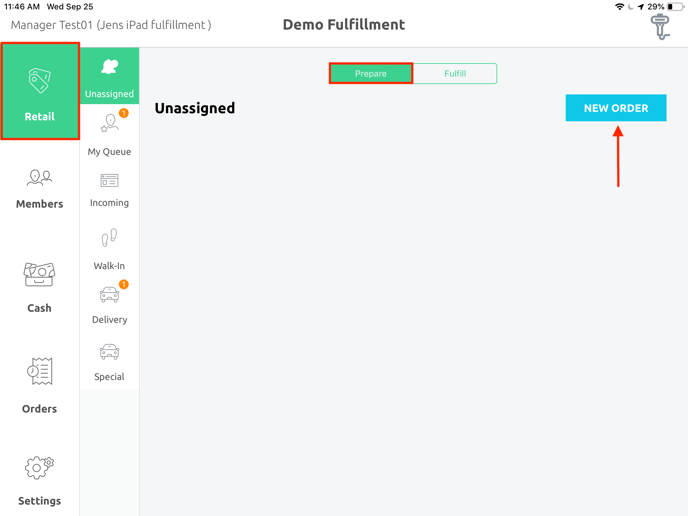
1. To sign up a New Member, navigate to Retail > Unassigned > Prepare
- Tap on the New Order button
NOTE: This can be done in any of the Queues available.
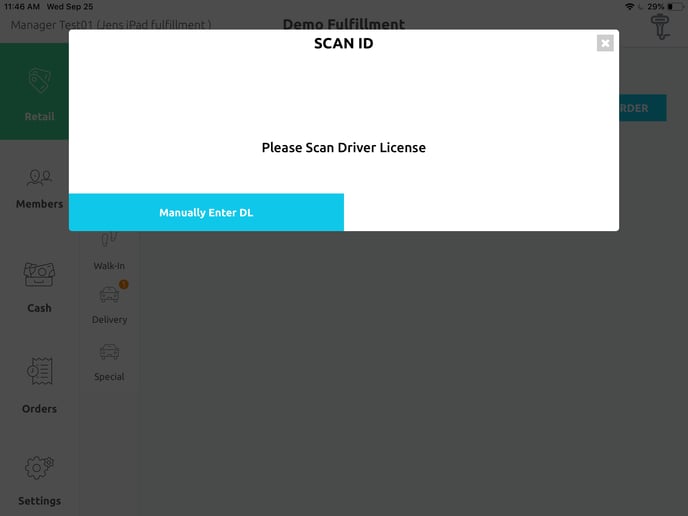
2. Either scan the Member's ID with a compatible scanner or manually enter the Member's ID by tapping the Manually Enter DL button.
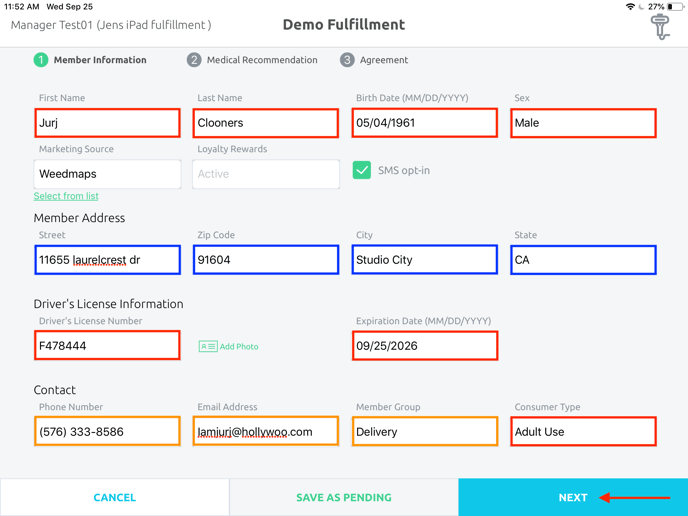
3. Enter the Member's First and Last name, Birth Date, Sex, Driver's License Number, Expiration Date, and Consumer Type; these are mandatory.
- For deliveries, the Member's Address (Street, Zip Code, City, and State) is also mandatory
- The Contact information (Phone Number and Email Address) help lookup the Member when they return; Phone Number is mandatory for deliveries
- When done, tap the blue Next button
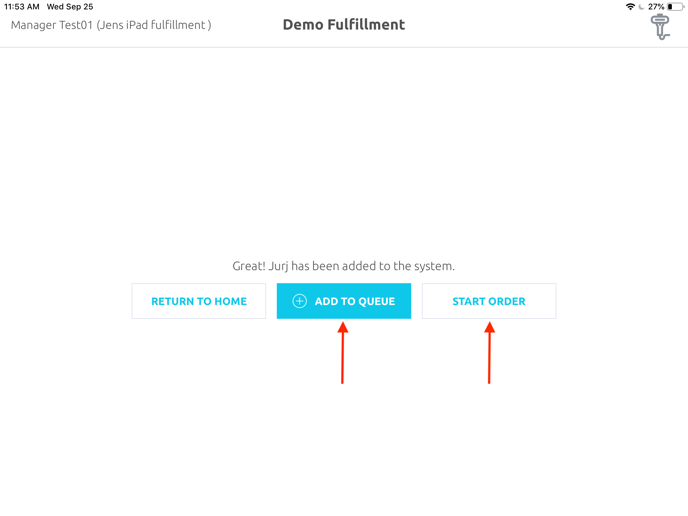
4. Either tap the Add to Queue or Start Order buttons.
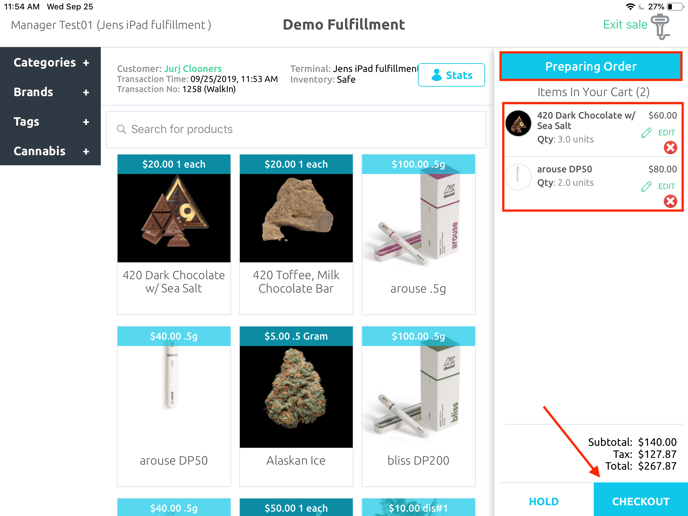
5. Select the desired products.
- Then tap the Checkout button
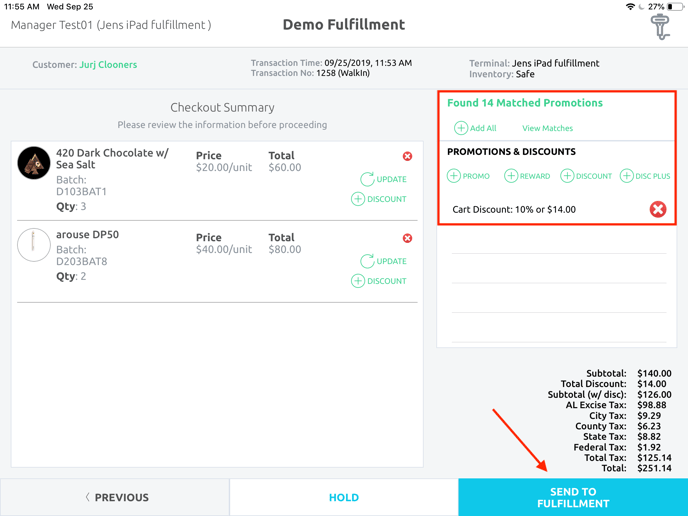
6. Once redirected to the Checkout Summary.
- Apply applicable Promos, Rewards, and/or Discounts
- Ensure that the rung up order matches what they have asked for
- Then tap the Send to Fulfillment button
- The order is now ready to Fulfill
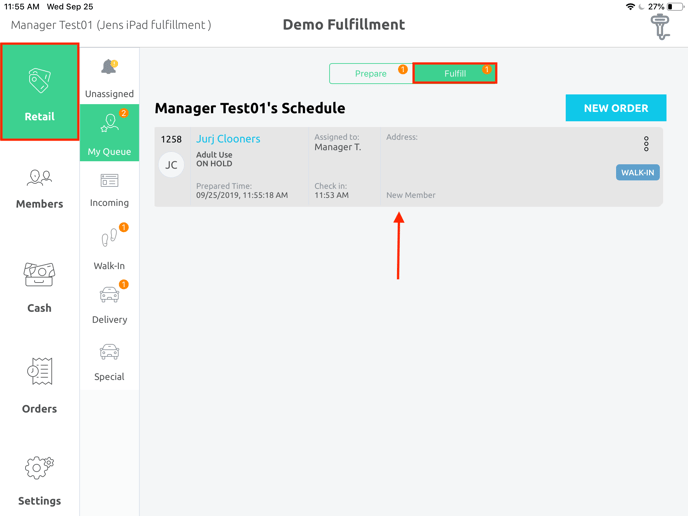
Fulfill
1. Navigate to Retail > My Queue > Fulfill
- Tap on the new order
2. The status of each product will, by default, be "Not Packed" until either the Fulfill button is tapped or scanned.
- The Select button allows different batches to be chosen from, if applicable; if tapped, a popup will appear to choose the desired batch.
- When ready to fulfill the product, tap the Fulfill button or use a compatible scanner of the item being fulfilled
- Repeat as necessary for each product of the order
NOTE: The Scan feature will only work if connected to a compatible scanner.
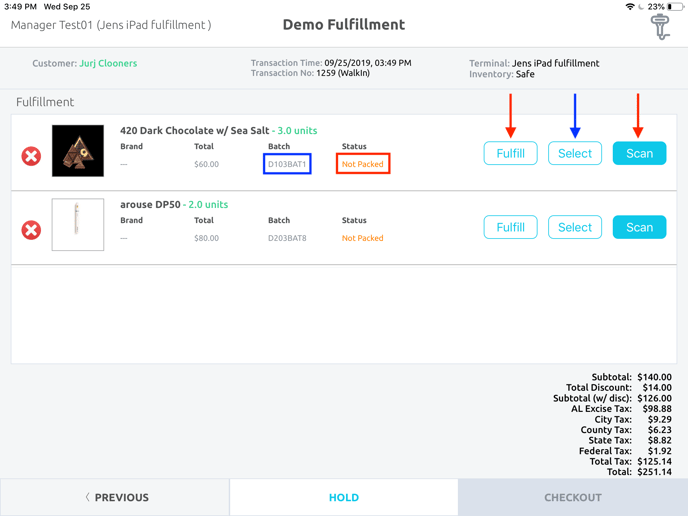
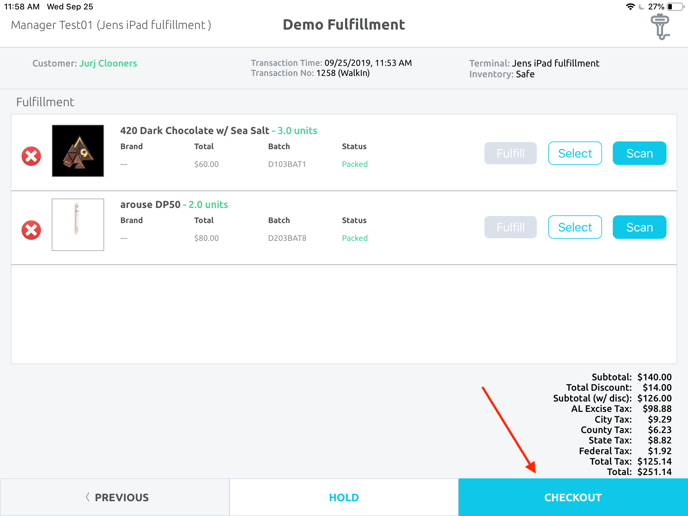
3. The status will change to "Packed" when fulfilled.
- When all products have been fulfilled, tap the Checkout button at the bottom of the page
4. Select the payment method used from your options listed (These may be different than the ones you see, depending upon your Payment Methods selected in Global Settings).
- Add any notes to the order, if desired
- Tap the Complete button
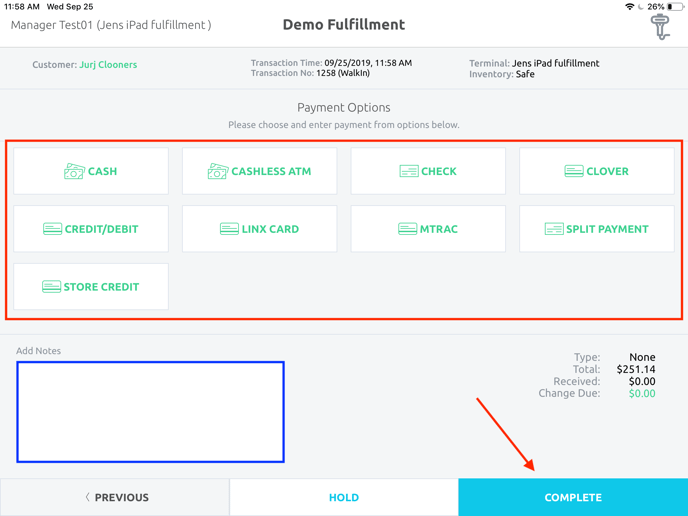
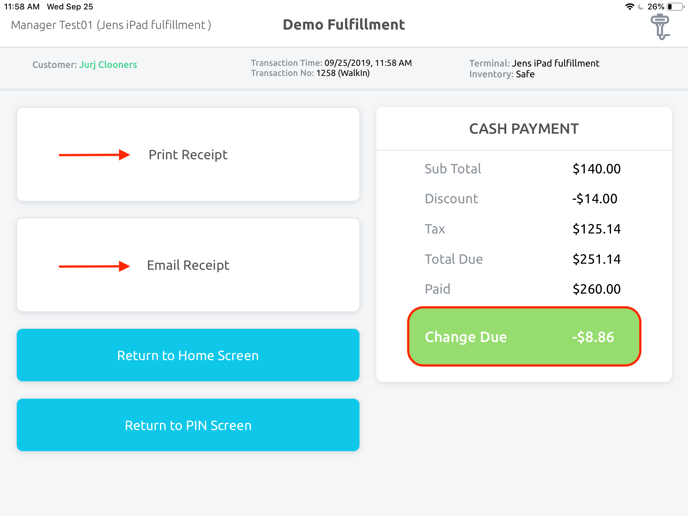
5. If applicable, give any change due at this time.
- Print or Email the receipt to the desired email
