This can also be applied for promo, display, or fee items.
IMPORTANT: Please ask your vendors to send sample products with their OWN Metrc tag.
1. Create a Sample Category
2. Create a Sample Product
3. Editing the Sample Product *IMPORTANT*
4. Receiving Inventory
5. Ready for use
Useful Tips
How to Create Sample Products
This can also be applied for promo, display, or fee items.
1. Create a Sample Category
NOTE: This only needs to be done for the initial set up, skip to step 2 if this category already exists
- Go to Inventory > Manage Categories
- Category Name: Samples
- Category Type: Cannabis (If it is cannabis)
- Metrc Category: Not assigned (you will define the Metrc category within the sample product created)
- Cannabis Type: Default
- Category Unit: Unit (set as grams if all items will be sold as grams)
- Click the + to save
.png?width=688&height=115&name=2020-08-20%20(15).png)
2. Create a Sample Product
- If you already have the original non-sample product in your current inventory, you can go to that product and select "Create Copy."
- If you do not have an original product to create a copy, you can add a new sample product to the Sample category tab you created in Step 1.
Create Copy: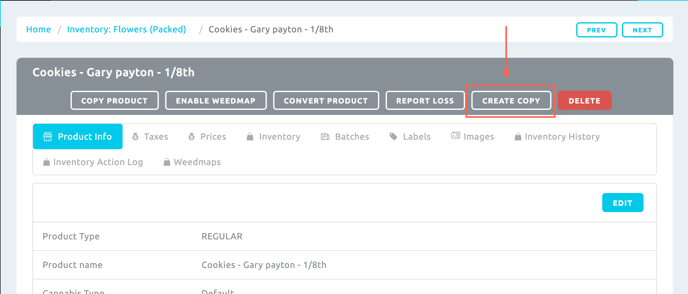
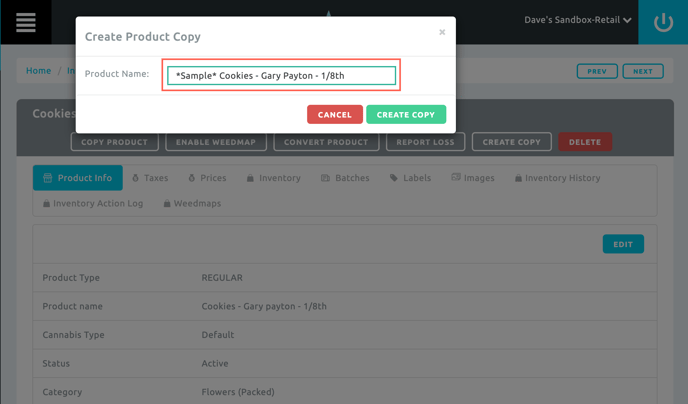
NOTE: When creating the Sample product, BLAZE recommends entering "Sample" in the product name, along with the original name or any way you prefer to distinguish a SAMPLE product.
3. Editing the Sample Product *IMPORTANT*
Once a sample product is created, you will need to locate the product and edit it to complete important details.
Edit / Update:
- Metrc Category: Shown on your Metrc manifest
- Weight Per Unit: Shown on your Metrc manifest
- Retail Value: Value is based upon the shop
- Sync to Third Party Menus / Available Online: Be sure to disable to not show product on third party menus
- Show In Online Widget: Be sure to disable to not show product on your online menu
4. Receiving Inventory
After your sample product set up is complete, you can receive/add inventory batches through either one of the following methods (select only ONE option or you will have duplicates):
- Receive Metrc transfers: Best used when the vendor sends samples as a separate package, not associated with a sellable inventory package tag. This way you can record a Purchase Order.
- Metrc Packages Intake: Best used when intaking individual packages. This will not record a Purchase Order.
- Purchase Order: Best used when the transfer is not appearing in Receive Metrc Transfers and the vendor sends samples as a separate package, not associated with a sellable inventory package tag. This way you can record a Purchase Order.
- Manually add a batch: This way you can manually add a batch to the product profile. This will not record a Purchase Order.
5. Ready for use
After creating the sample product and adding inventory, this sample is ready for use / sell / display. As long as this product is set to active, it will be available to be tendered in BLAZE
NOTE: If the online widget & Available Online (3rd party sync) are DISABLED, they will NOT display to your customers.
Useful Tips
*If you do not want the sample category to be shown on your menu, go to > Inventory > Manage Categories > uncheck the "Active" box to make the category inactive.
NOTE: This will prevent you from adding or editing items in this category until it is set to active again.
*If you don't want a specific individual sample product visible on your menu, you can make the product inactive.
*If you want to create a separate inventory to hold samples, go to Global Settings > Inventories > Add Inventory > create an inventory for Samples / Displays > transfer sample products to new inventory.